

![]()
Moving data is one of the common tasks done by data engineers. In this blog, we will be connecting Azure Data Factory to external storage (Azure Blob Storage) and moving the Movies Data dataset to Azure Data Lake Gen’2 that we set up in this blog.
Create an Azure Data Lake | Step-by-Step
1) You need to have access to Microsoft Azure. An Azure free account is sufficient for all steps in this blog. To create an account use the following link: https://azure.microsoft.com/en-us/free/
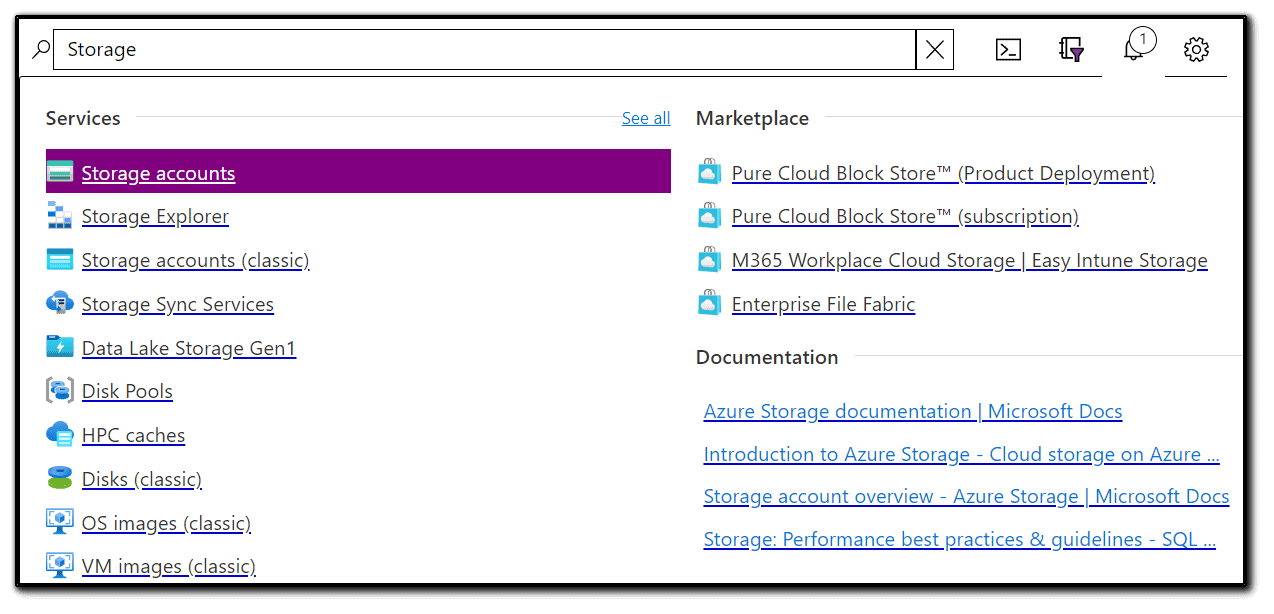
2) Search for Storage accounts in the Azure search bar and click on it.
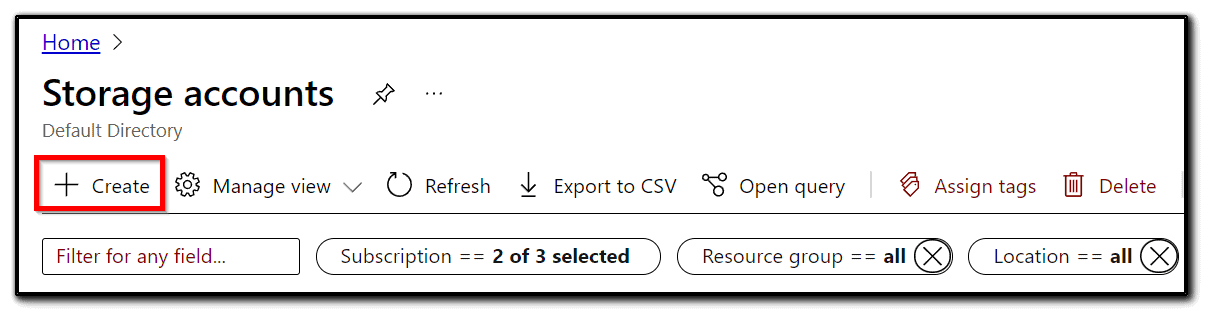
3) To add a new storage account, click + Add.
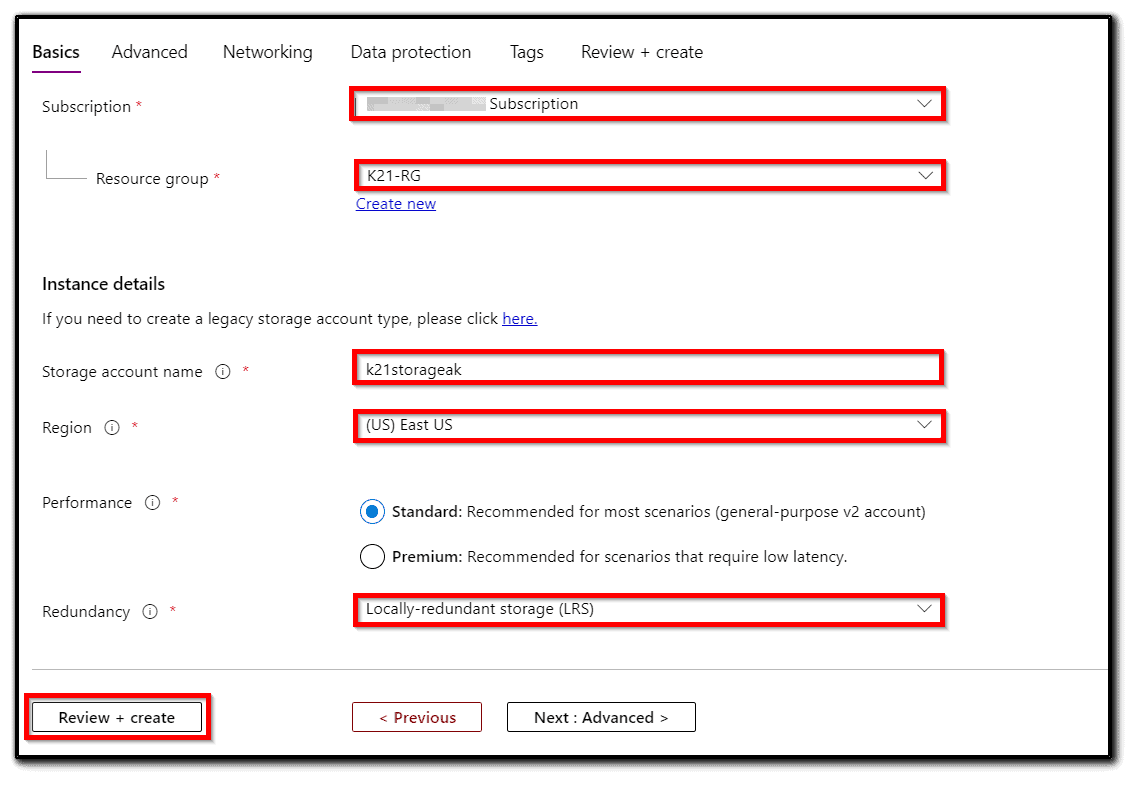
4) Select Azure Subscription and Resource Group.

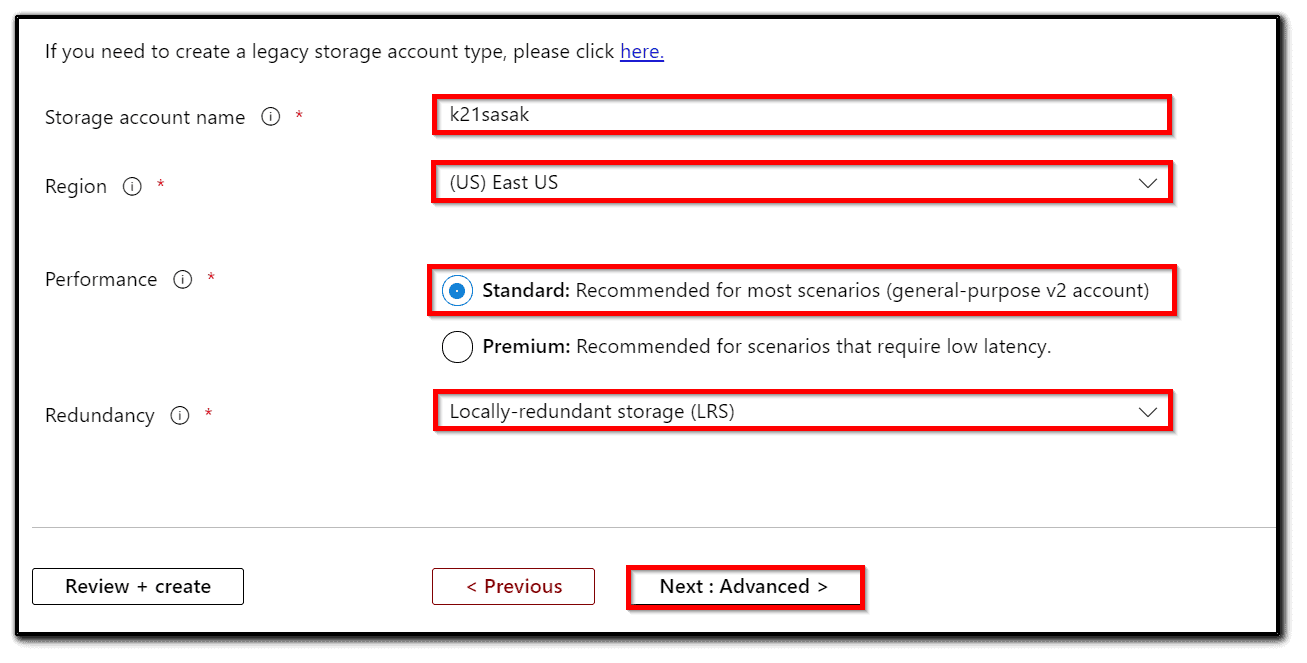
5) Add a Storage account name. This needs to be globally unique and set a data center location as shown in the following screenshot. In order to minimize latency, pick a region close to the location of your servers.
6) Pick Standard or Premium performance. Use the Standard option for the cheaper and slower hard drive-based storage.
7) Select StorageV2 (general purpose v2) for Account kind.
8) Select Replication of Locally-redundant storage (LRS).
9) On the advanced tab set Hierarchical namespace to Enabled. Please note that the Hierarchical namespace is a feature of Data Lake Storage Gen2 and has to be enabled.

10) Click Next: Networking. You can connect to your storage account either publicly or privately. Select Public endpoint (all networks) and Microsoft network routing (default) as shown in the following screenshot:
11) Click Next: Data protection. On this tab, we have to create policies for blob versioning and soft delete, which can help us restore files after overwrites and file share data. We are not going to track changes, so we will the default settings.
12) Proceed to the Tags tab. Fill tags and add appropriate tags as per your requirements.
13) After checking all inputs on the Review + create tab, click Create.
Also Read: Our blog post on ADF Interview Questions.
Create an Azure Blob Storage | Step-by-Step
1) Let’s create the Azure storage account. Go to All Services => Storage => Storage Accounts.
2) Click + Add.
3) Use our Free Trial subscription. For the resource group, we will use K21-RG. Give a name for the storage account, such as k21storage<YOUR NAME>, then click Review and Create.
4) Click Go to Resource and select Containers.
5) Click + Container and enter the name k21container.

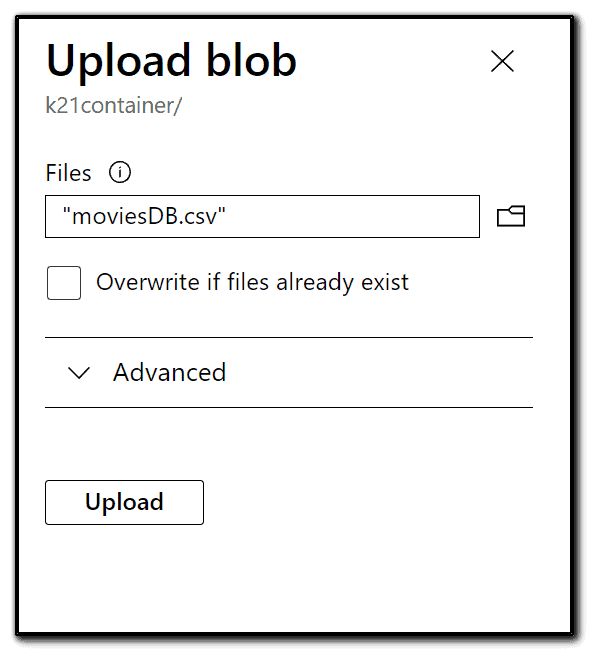
6) Now, we want to upload a data file into the Movies. CSV file. You can get this file from the below URL. Click Upload. We just uploaded the file to the cloud! https://raw.githubusercontent.com/djpmsft/adf-ready-demo/master/moviesDB.csv
Also Check: Our blog post on Azure Data Engineer Interview Questions.
Create an Azure Data Factory | Step-by-Step
1) Search for Data factories and click Enter.
2) Click Create data factory, or Add if you are on the Data factories screen, and it will open the project details, where we will choose a subscription (in our case, Free Trial).
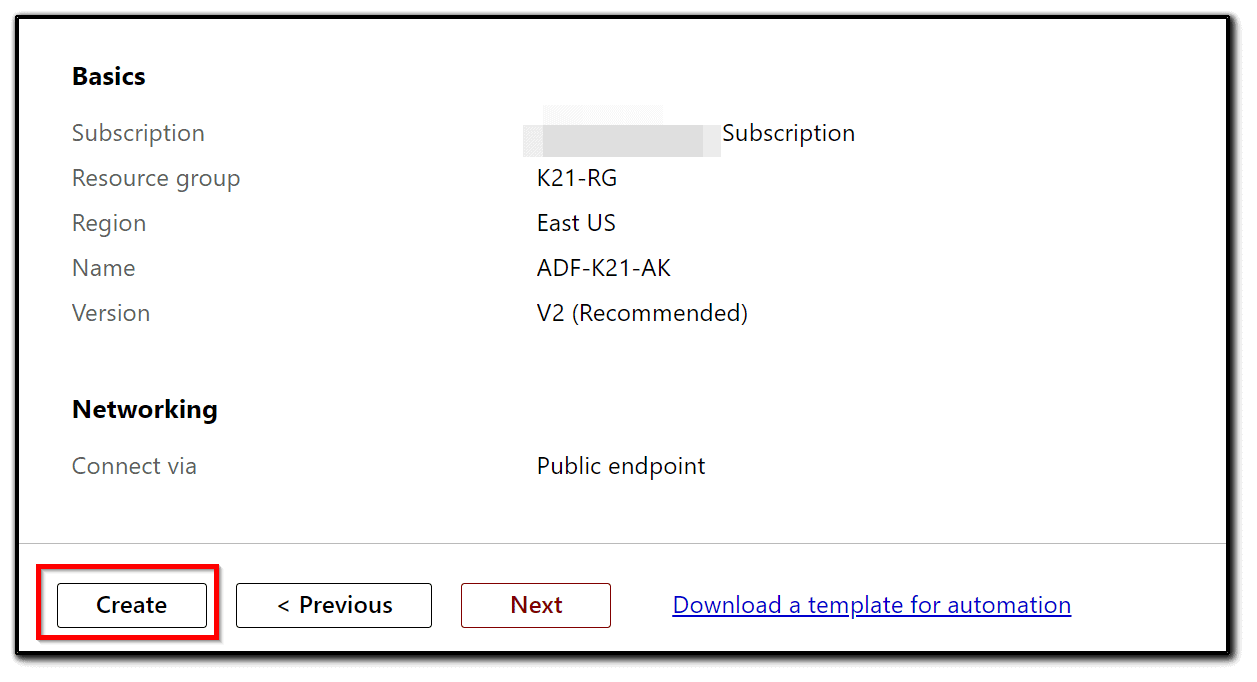
3) We will use K21-RG. Choose East US for Region, give the name as ADF-K21-<YOUR NAME>, and leave the version as V2. Then, click Next: Git Configuration.

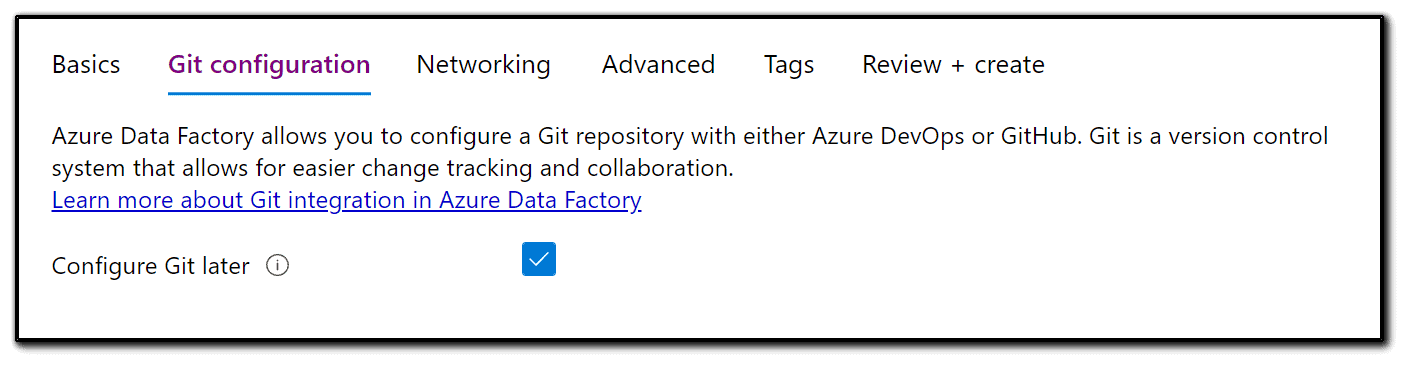
4) We can use GitHub or Azure DevOps. We won’t configure anything yet and so we will select Configure Git later. Then, click Next: Networking.
5) We have an option to enhance the security of our pipelines using Private endpoint and Managed Virtual Network. For this blog, we will use the default settings. Click Next.
6) Optionally, you can specify tags. Then, click Next: Review + Create.
7) ADF will validate your settings and will allow you to click Create.
Connect Azure Data Lake to Azure Data Factory and Loading data
To load the dataset from Azure Blob storage to Azure Data Lake Gen2 with ADF, first, let’s go to the ADF UI:
1) Click + and select the Copy Data tool as shown in the following screenshot:

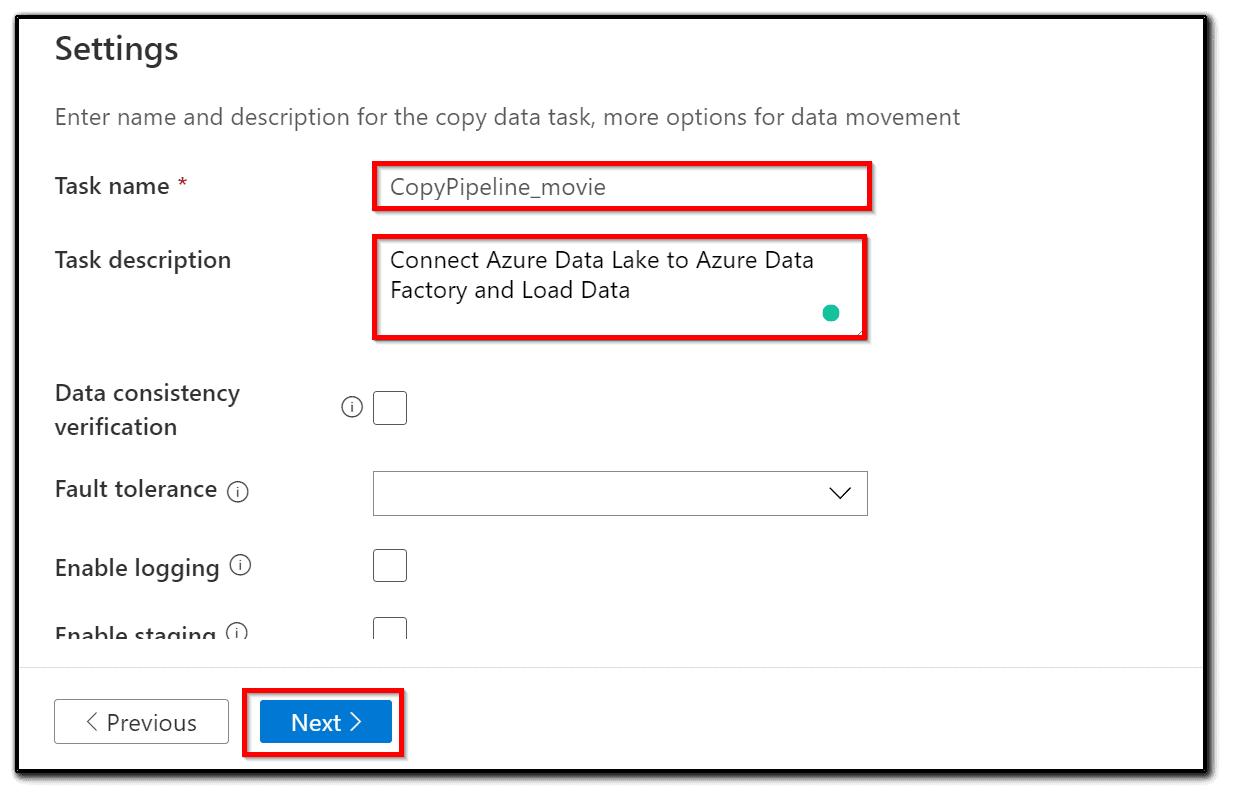
3) Data Factory will open a wizard window. Fill in the Task name and Task description and select the appropriate task schedule.
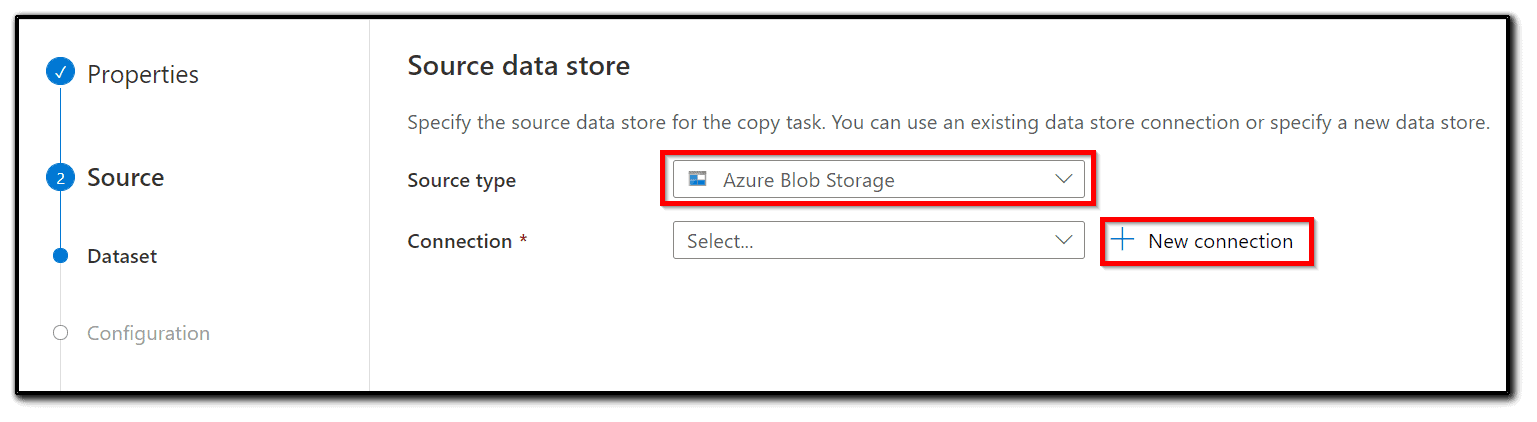
4) To connect to the Azure Blob storage where our dataset is stored, select the Azure Blob storage in the source type tab, click + new connection, to create a linked service.
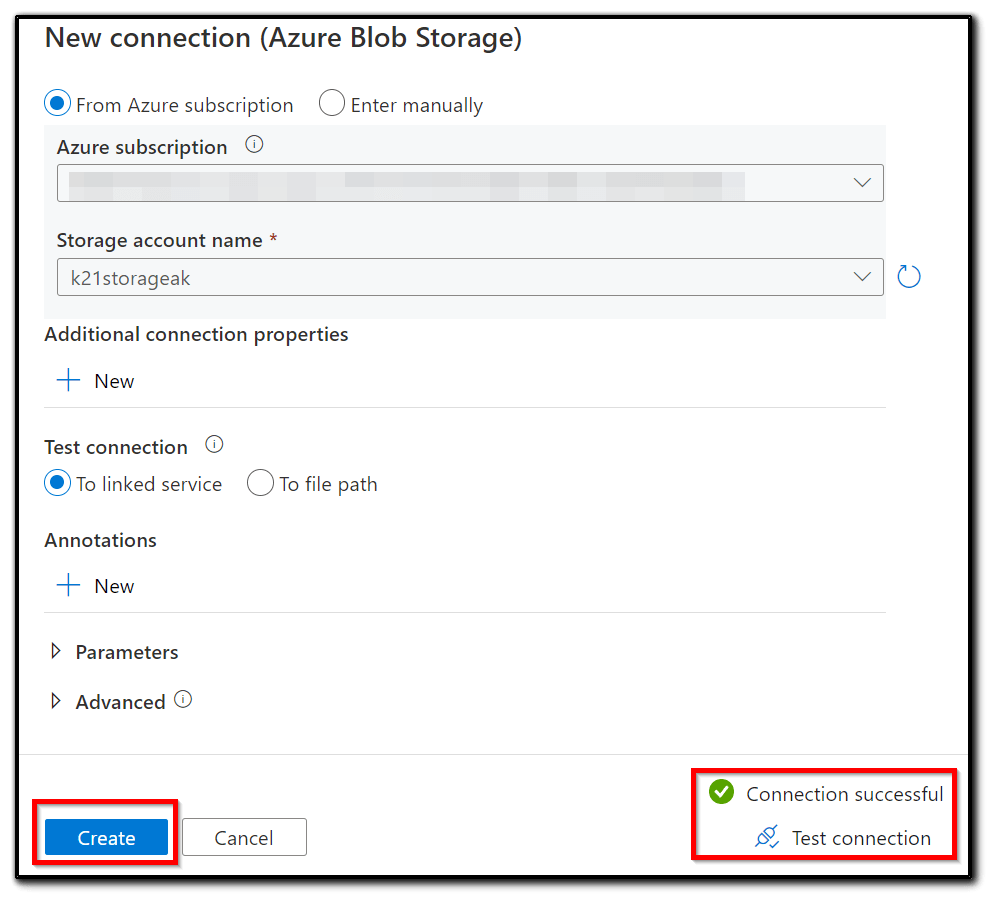
5) Create or select a linked service. Name the new linked service and add an appropriate description. Select an integration runtime. In this case, the default AutoResolveIntegrationRuntime will be the right option.
6) Select the Authentication method to the Account key and select an Account selection method.
7) Test the connection by clicking Test connection. If Connection successful is displayed, click the Create button as shown in the following screenshot:
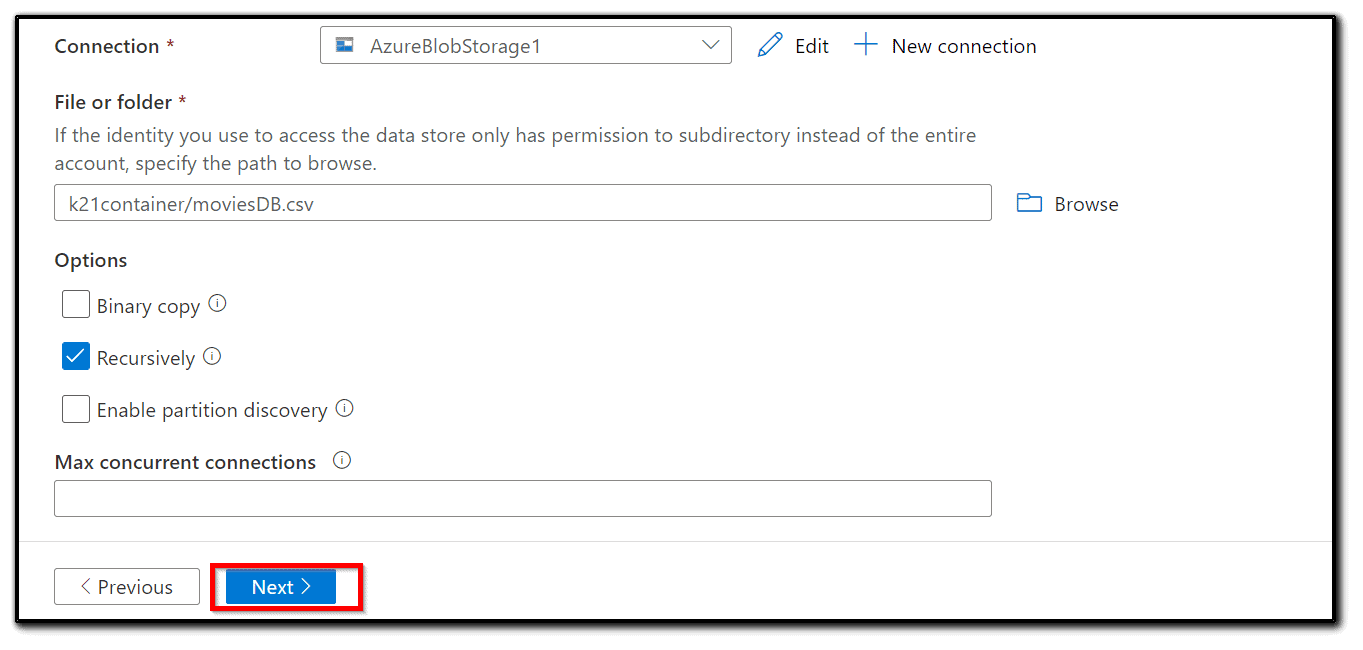
8) Go back to the Source data store page, select our newly created linked service, and click Next.
9) Choose an input folder. In our case, it is —- as shown in Figure.
10) Fill in the appropriate fields according to whether you need a binary or recursive copy. We don’t know the structure of the input folder, so a Recursive copy is more appropriate.
11) Filter by the last modified field. In our case, we will copy the whole dataset. Click Next:
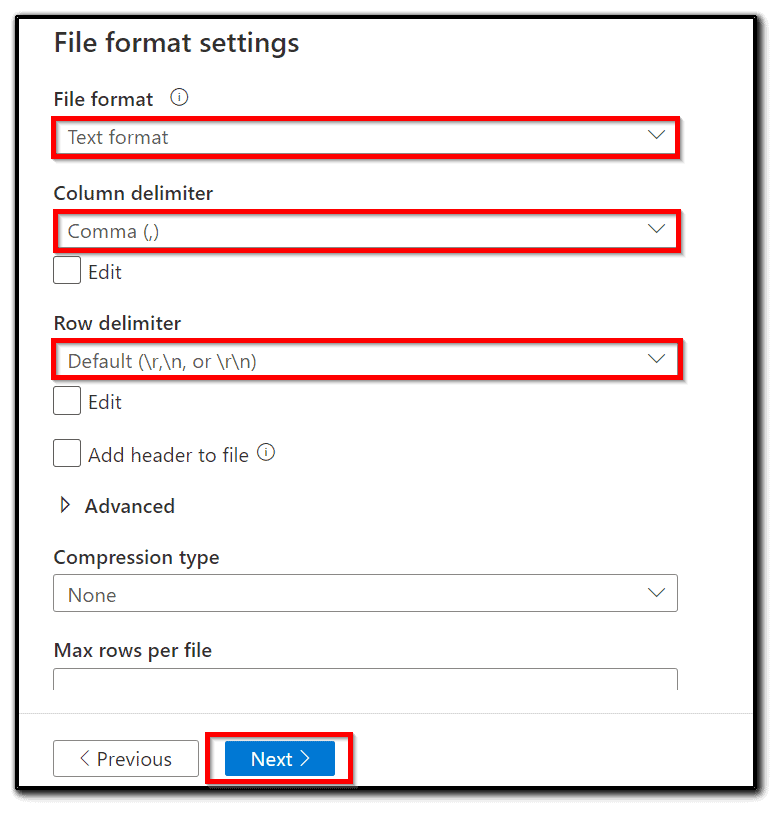
12) Select an appropriate file format. In this case, it is CSV format and the snappy compression None. You will see a preview of the data and Schema. If the preview is unreadable or absent, pick an appropriate file format and compression type, as shown in fig:

Now that we have set up the properties of the Copy data activity and Source, we have to set an output destination:
13) Create or select a linked service for Azure Data Lake Storage Gen2.

14) Add a Name and Description. Select an integration runtime. Since we are working on a fully managed cloud solution, AutoResolveIntegrationRuntime is a good choice. Set the Authentication method to the Account key and select an Account selection method. The From Azure subscription selection should be your choice, but you can use the manual method too. Click Test connection and if the test is successful, click Create:
15) Choose the output folder as shown in the following figure:
Note: You can’t create a new folder from Azure Data Factory. If you want to create a new folder, you can create it from the Azure Data Lake UI.
16) In this step, we can leave Block size (MB) and Max concurrent connections as the default. Click Next.

17) Set File format and Compression type. We are copying this dataset, so let’s leave the same format as the original dataset, as shown in the following screenshot:
18) Let’s check the final settings. Set Fault tolerance to Skip incompatible rows. Add a Folder path for logging and enable or disable staging. For this recipe, staging should be disabled, as shown in the following screenshot:
19) As a final step, check all the settings in Summary and click Next if everything seems right:

20) The pipeline will be deployed immediately. After a short delay, you will see a Deployment complete message as shown in the following screenshot:
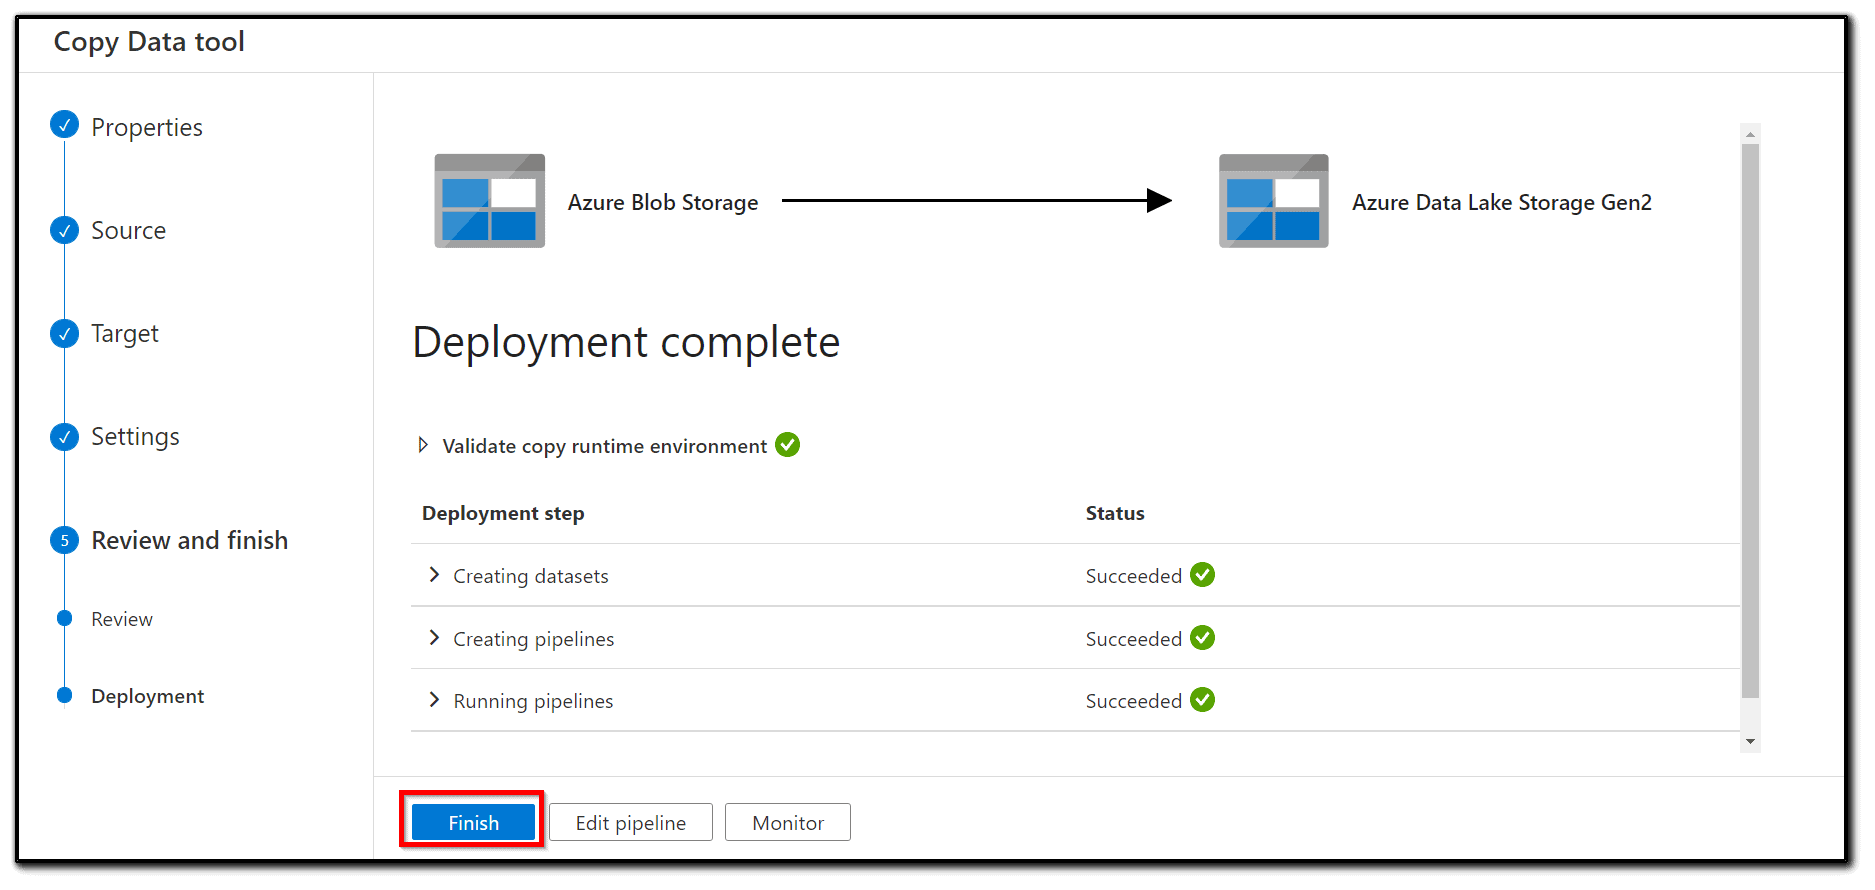
Congratulations, we have copied our dataset to Azure Data Lake.
Additional Tips And Resources
I hope this Connect Azure Data Lake to Azure Data Factory and Load blog helps you! I also highly recommend that you open a free Azure account if you don’t have one yet. You can create your free Azure account here. Also, check out my blog posts about Microsoft Azure Data Engineer Certification:
- Microsoft Certified Azure Data Engineer Associate | DP 203 | Step By Step Activity Guides (Hands-On Labs)
- Exam DP-203: Data Engineering on Microsoft Azure
- How To Copy Data From Blob Storage To A SQL Database Using ADF
- Azure Data Lake For Beginners: All you Need To Know
- Azure Data Factory For Beginners
Next Task For You
In our Azure Data Engineer training program, we will cover 28 Hands-On Labs. If you want to begin your journey towards becoming a Microsoft Certified: Azure Data Engineer Associate by checking out our FREE CLASS.


![AWS DevOps [DOP-C02] Professional Step By Step Activity Guides (Hands-On Labs)](https://k21academy.com/wp-content/uploads/2023/02/DOP-C02-1.png)