

![]()
This blog will cover the overview of Multi-Factor Authentication, Azure AD MFA setup hands-on, etc., that acts as an additional authentication system for successful authentication of Azure Account.
So the term Authentication means the process of identifying a user’s identity to know whether the user is genuine or not. So without any further delay, let’s get into this post.
Let’s have a look at the topics of discussion:
- What is Azure Multi-Factor Authentication (MFA)?
- Relevant Authentication Factors
- How can Azure MFA verify a user’s identity?
- What is Conditional Access?
- Hands-on: Enable Azure AD MFA (Multi-Factor Authentication)
- FAQs
- Conclusion
What is Azure Multi-Factor Authentication (MFA)?
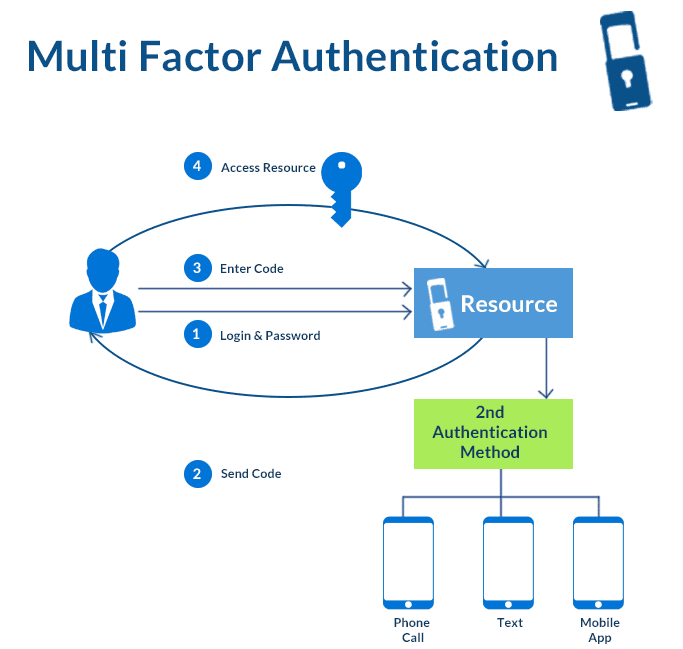
Azure Multi-Factor Authentication is an addition to a two-step verification process. This becomes quite a challenge for attackers to hack into someone’s ID. Even if the hacker or attacker knows the user ID and password, it is useless without an additional authentication method. This is a trusted security feature that can guarantee the solid security of your accounts. Various methods such as facial recognition, fingerprint access, registered mobile number, etc., are helpful in Multi-Factor Authentication.
Relevant Authentication Factors
There are a couple of authentication factors available. Let’s see them one by one.
- Single Factor OTP: OTP stands for One-time-Password. It is a software or hardware token generator that generates one-time passcode to authenticate the user. There is not any need for a second channel to receive the passcode because the password is generated with the device clock and seed value. This passcode is valid for a limited time and gets changed when you request a new OTP. When you enter this OTP into the system, this OTP also gets verified at the server-side to confirm whether the genuine user is requesting to log in.
- Memorized secret: It is a static pin code assigned to the user for authentication when the users use the Azure MFA server on-premises.
- Out of Band Device: It is another method of authentication. Out of Band Device is a physical device that can communicate securely over a distinct communication channel. If we talk about Azure MFA, this device is your mobile phone, and the secondary network is your internet when you use Microsoft authenticator APP.
Also Read: Our blog post on Azure Security Center.
How can Azure MFA verify a user’s identity?
There are multiple ways Azure MFA can verify a user’s identity.
- Phone call:
- The user responds to the call by pressing #
- Azure MFA can choose caller ID
- Optional Pin code
- Text Message
- there can be a one-way message
- There can also be a two-way message
- Optional Pin Code via Azure MFA Server
- Microsoft Azure Authenticator App
- It authenticates through Push Verification
- Optional Pin Code
Check out: Azure Networking
What is Conditional Access?
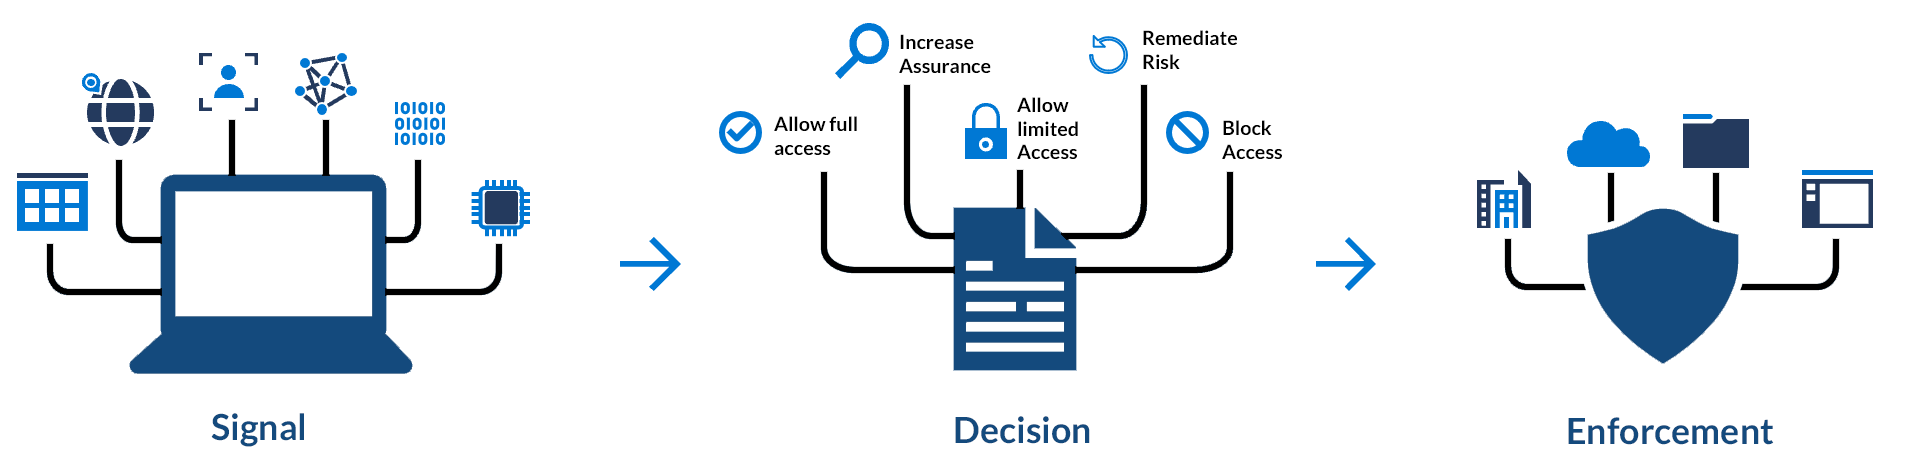
Conditional access is a great feature available for administrators to track users and protect an organization’s data. Admins can block or grant access to users using conditional access. Conditional access can be implemented with IP locations, types of devices, certain users or groups, etc. There are various Azure Active Directory plans available. Plan 1 is relied on the group, location, device status, etc., whereas plan 2 has risk-based access policies. The basic conditional access helps to reduce MFA prompts and uses a second factor such as connection in an organizations’ office or a domain-joined PC.
Check out: Azure Firewall
Hands-on: Enable Azure AD MFA (Multi-Factor Authentication)
There are straightforward steps to do Azure AD MFA setup. In this demo, we are using the Azure Authenticator app to sign in. So, follow the steps given below to enable Multi-Factor Authentication.
Step1: Login to your Azure Portal and go to Active Directory.
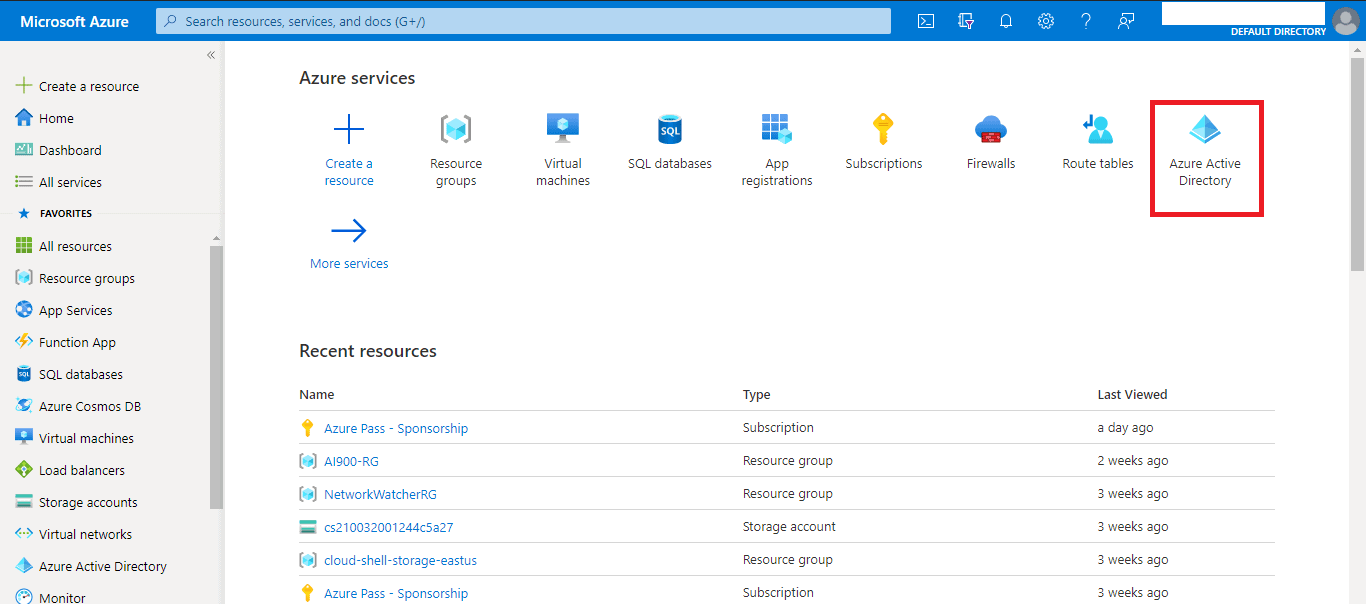
Step 2: Now go to All Users, and you will see the list of all users associated with your account. Now click on Azure Multi-Factor Authentication as shown in the image.

Also Check: Our blog post on AZ 500 Learning Path.
Step 3: When you click on Multi-Factor Authentication, it will show you the option to select the user and enable MFA.
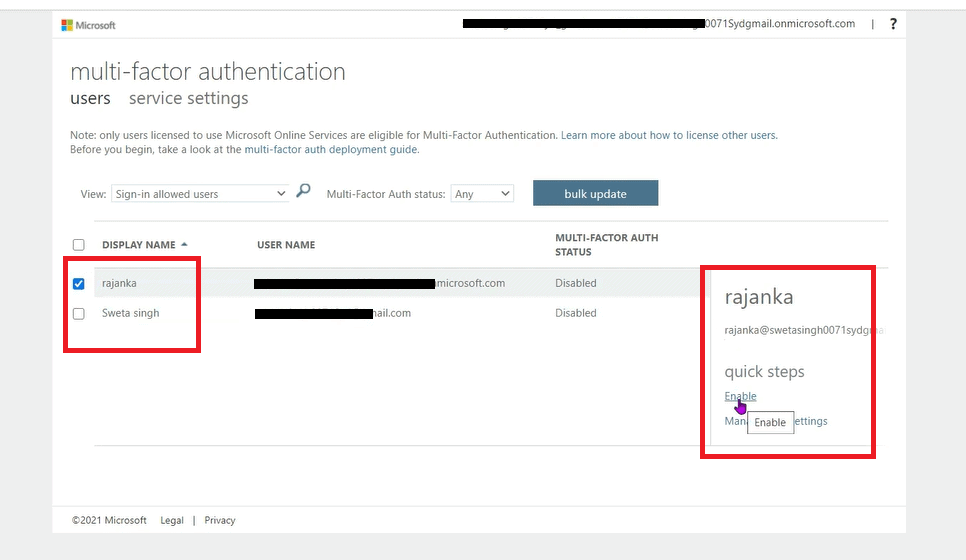
Step 4: Click on Enable option as shown in the above image. Now it will prompt you to enable Multifactor Authentication. Just click on Enable Multi-Factor Auth.

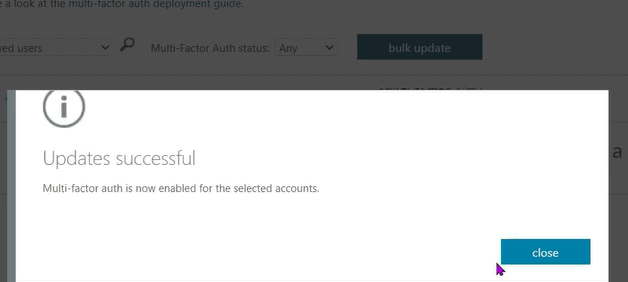
Now it will prompt you that the Multi-Factor Auth has been Successfully enabled.
Check out: Top 10 Best Practices for Azure Security in 2021
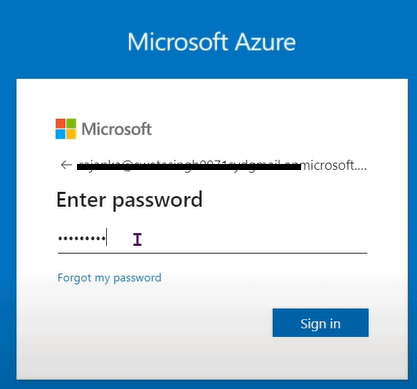
Step 5: Now, enter your credentials to log in to your Azure Account and click on Sign in.
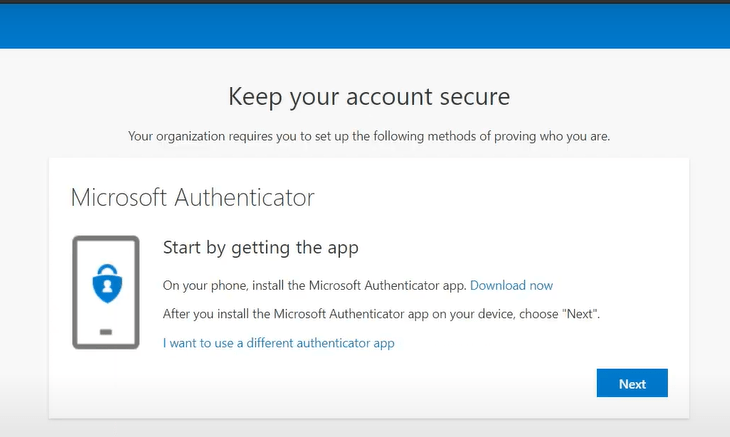
Step 6: It will prompt with the message as shown below in the image. Click on Next.

Step 7: We need to install Microsoft Authenticator Application from the Play Store on mobile phones. And click on next-next on the message shown below, and a QR code will appear.
Also Read: Our blog post on AZ 500.
Step 8: Once you install the Authenticator App on your mobile phone, scan the QR as shown in the image down below.
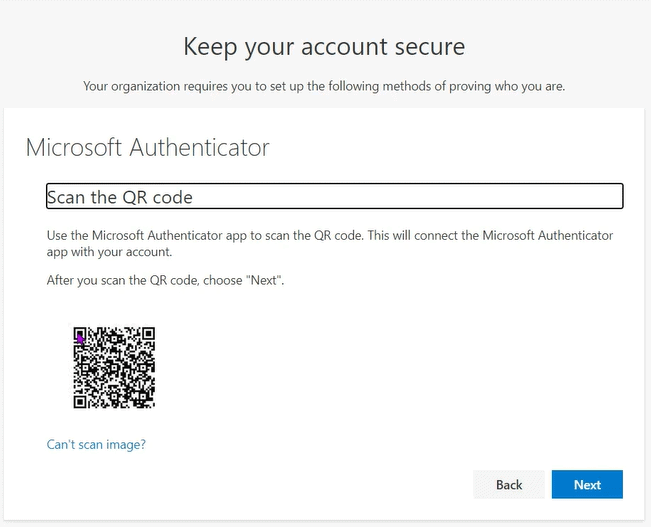
Step 9: Once you scan the code, click on Next. It will send a notification to your Mobile Phone as Deny or Approve the Sign in.
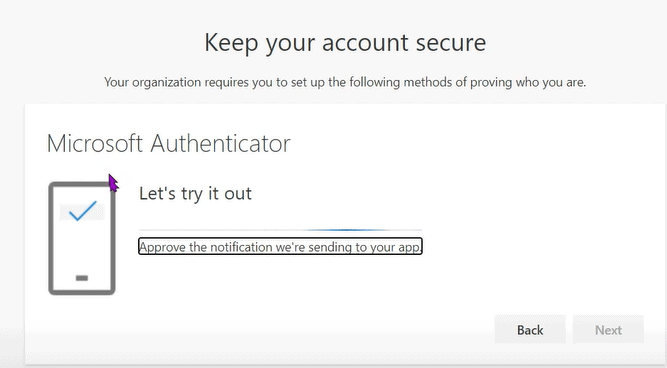
Step 10: Once you click on Approve, it will ask for the device pin, enter the pin, and display a message as shown below.
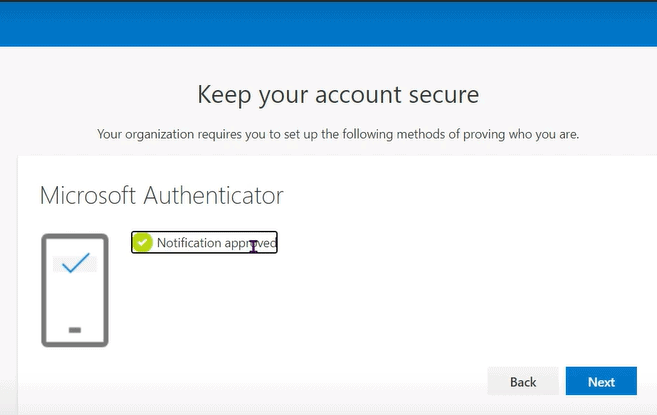
Step 11: Click on Next and click on Done.
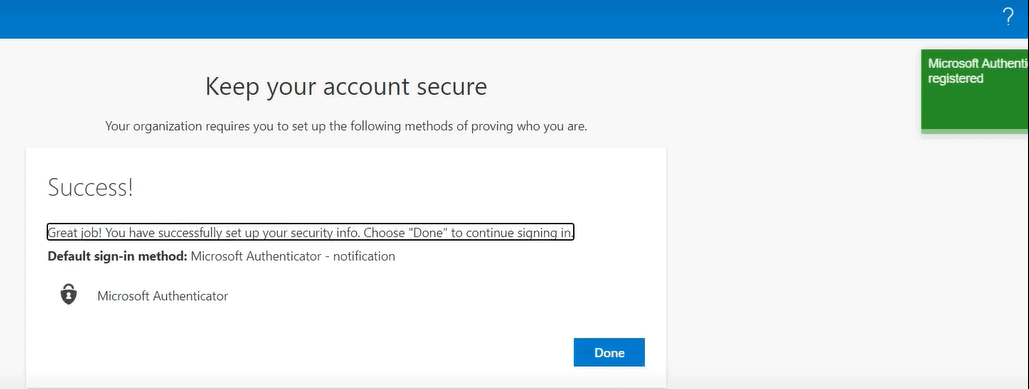
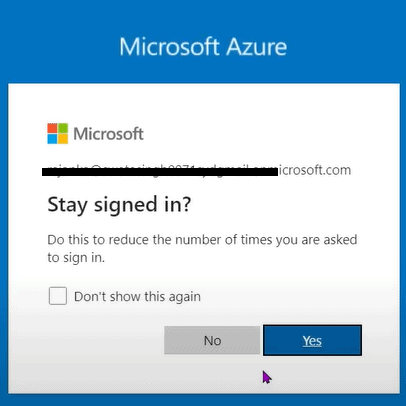
Step 12: You can log in to your account.
Note: This whole process shown above needs to be followed for the first time registering Azure AD MFA.
Next time you need to log in, it will send a notification to your Mobile phone in Authenticator App. You need to click on Approve if you want to sign in and click on Deny if you want to Deny Sign in. With just these simple steps, you will be able to log in using Azure Multi-Factor Authentication.
FAQs
Q1. What is Azure AD multi-factor authentication?
Ans: Azure AD MFA helps to secure access to data and applications. It provides an additional strong layer of security by providing a second method of authentication that is easy to use.
Q2. Does Azure AD provide MFA?
Ans: Yes, Azure Active Directory does provide Multi-factor Authentication to provide an additional layer of security while accessing the data and applications
Q3. How do I enable MFA on my Azure AD?
Ans: You can enable MFA in Azure with straightforward steps. Go to Azure portal, click on Azure Active Directory, and choose users. Go to multi-factor authentication and select service settings. Now, on the Service Settings page, under verification options, you can select or unselect the methods you want to provide to your users.
Q4. What is the lowest Azure subscription level?
Ans: If you want to get conditional access to SaaS apps, you need an Azure Active Directory Premium subscription, where Premium P1 is the lowest subscription level available.
Q5. What triggers Azure MFA?
Ans: Various use cases trigger Azure MFA, such as those users whose credentials are leaked, sign in from unknown, anonymous IP addresses, and impossible travel to atypical locations.
Conclusion
Azure AD MFA is a great security feature to secure your account. You can directly use Azure AD MFA without any extra configurations and deployments. It is easy to set up, manage, use, and helping companies, organizations meet their security and compliance goals. Even you can integrate Azure MFA with your applications using its API.
References/Links
- Azure Firewall vs Network Security Group
- Introduction to ARM Templates: Learn, Create and Deploy in Azure
- AZ-500 Exam – Microsoft Azure Security Technologies Certification
- Azure AD Multi-Factor Authentication Official Docs
- Azure Synapse SQL Vs Dedicated SQL Pool Vs Serverless SQL Pool Vs Apache Spark Pool
Next Task For You
Begin your journey toward Mastering Azure Cloud and landing high-paying jobs. Just click on the register now button on the below image to register for a Free Class on Mastering Azure Cloud: How to Build In-Demand Skills and Land High-Paying Jobs. This class will help you understand better, so you can choose the right career path and get a higher paying job.


![AWS DevOps [DOP-C02] Professional Step By Step Activity Guides (Hands-On Labs)](https://k21academy.com/wp-content/uploads/2023/02/DOP-C02-1.png)