


![]()
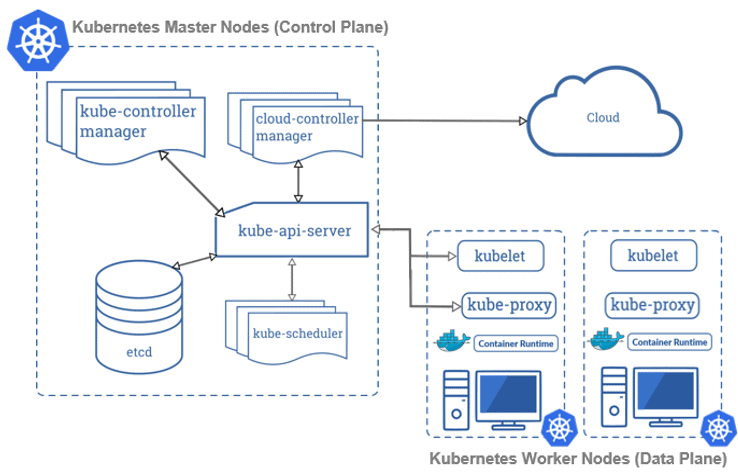
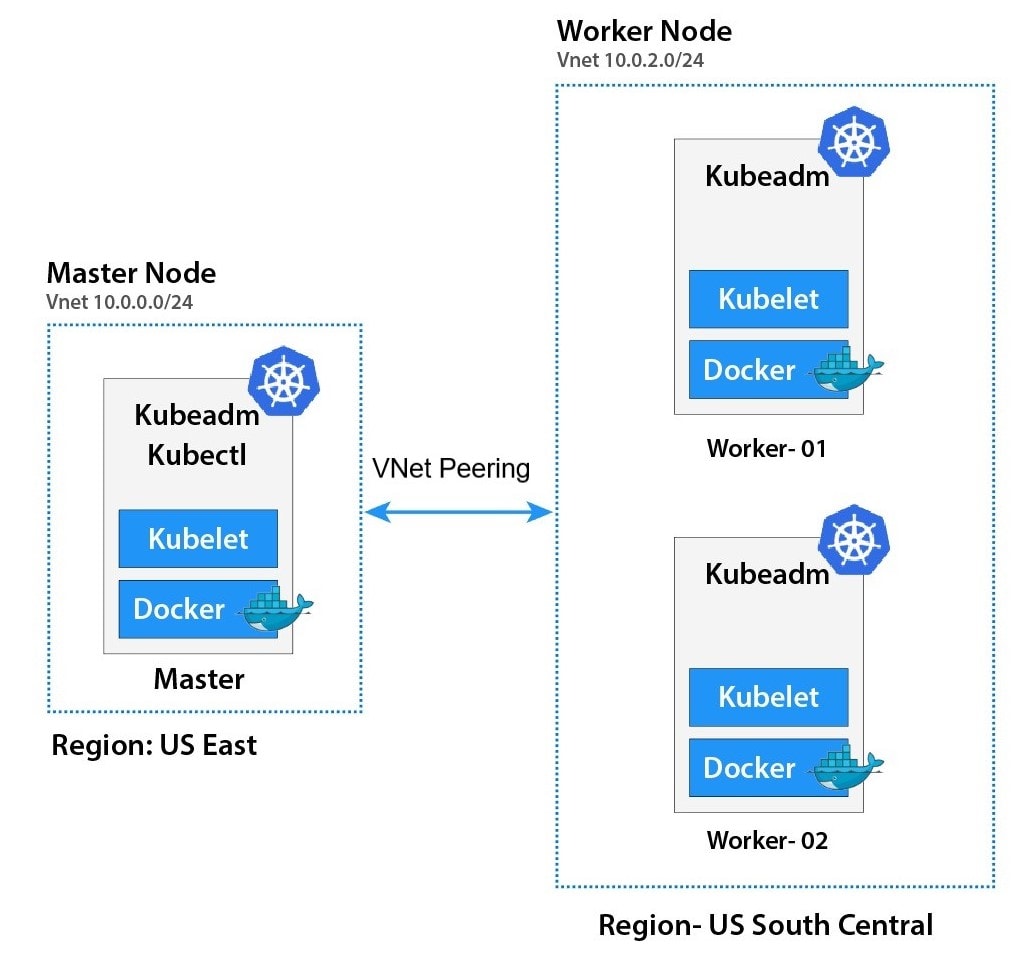
A Kubernetes Cluster is a group of node or machines running together. At the highest level of Kubernetes, there exist two kinds of servers, a Master and a Worker node. These servers can be Virtual Machine(VM) or physical servers(Bare metal). Together, these servers form a Kubernetes cluster and are controlled by the services that make up the Control Plane.
If you are new to Docker & Kubernetes world, then check out our blog on Kubernetes for Beginners to get an idea about the components and concepts of Kubernetes.
In this blog, we will cover How to install and configure a three-node cluster in Kubernetes which is the first topic in Kubernetes. We have a set of Hands-on Labs that you must perform in order to learn Docker & Kubernetes and clear the CKA certification exam. Cluster Architecture, Installation & Configuration have a total weightage of 25% in the Exam.
There are 3 ways to deploy a Kubernetes cluster:
1. By deploying all the components separately.
2. Using Kubeadm.
3. Using Managed Kubernetes Services
In this blog, we will be covering the following topics:
- Prerequisites
- Installing Containerd, Kubectl and Kubeadm Packages
- Create a Kubernetes Cluster
- Join Worker Nodes to the Kubernetes Cluster
- Testing the Cluster
Prerequisites for Cluster Setup
Deploying three nodes on-premises can be hard and painful, so an alternate way of doing this can be using a Cloud Platform for deploying them. You can use any Cloud Platform, here we are using Azure Cloud. Before getting on with creating a cluster make sure you have the following setup ready:
I) Create an Azure Free Account, as we will use Azure Cloud for setting up a Kubernetes Cluster.
To create an Azure Free Account, check our blog on Azure Free Trial Account.
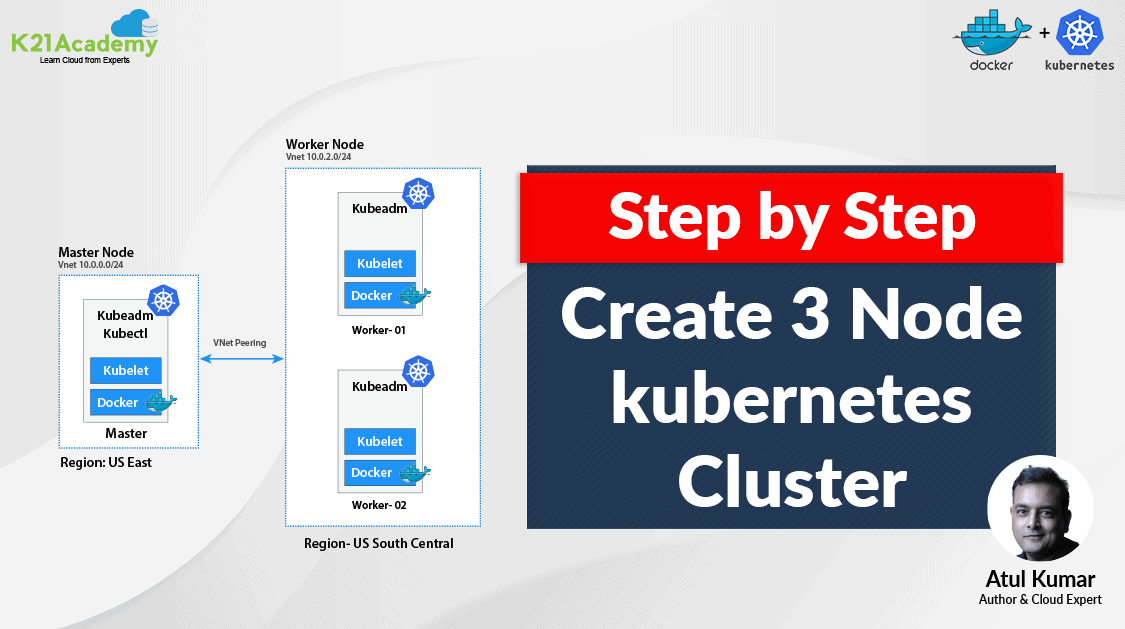
II) Launch 3 Virtual Machines – one Master Node and 2 Worker Nodes. We are launching these VMs in different regions because in the Azure Free tier account we can’t create 3 virtual machines in a single region due to the service limit. So we are creating One Master node in US East Region and Two Worker node (worker-1, worker-2 in US Southcentral Region)
To create an Ubuntu Virtual Machine, check our blog on Create An Ubuntu VM In Azure.
III) For connecting the worker node with the master node as they are in different regions and in different Vnet, we have to do VNet Peering.
To know more about Virtual Networks, refer to our blog on azure vnet peering
Also Check: Our Kubernetes training & understand Kubernetes basics in a better way.
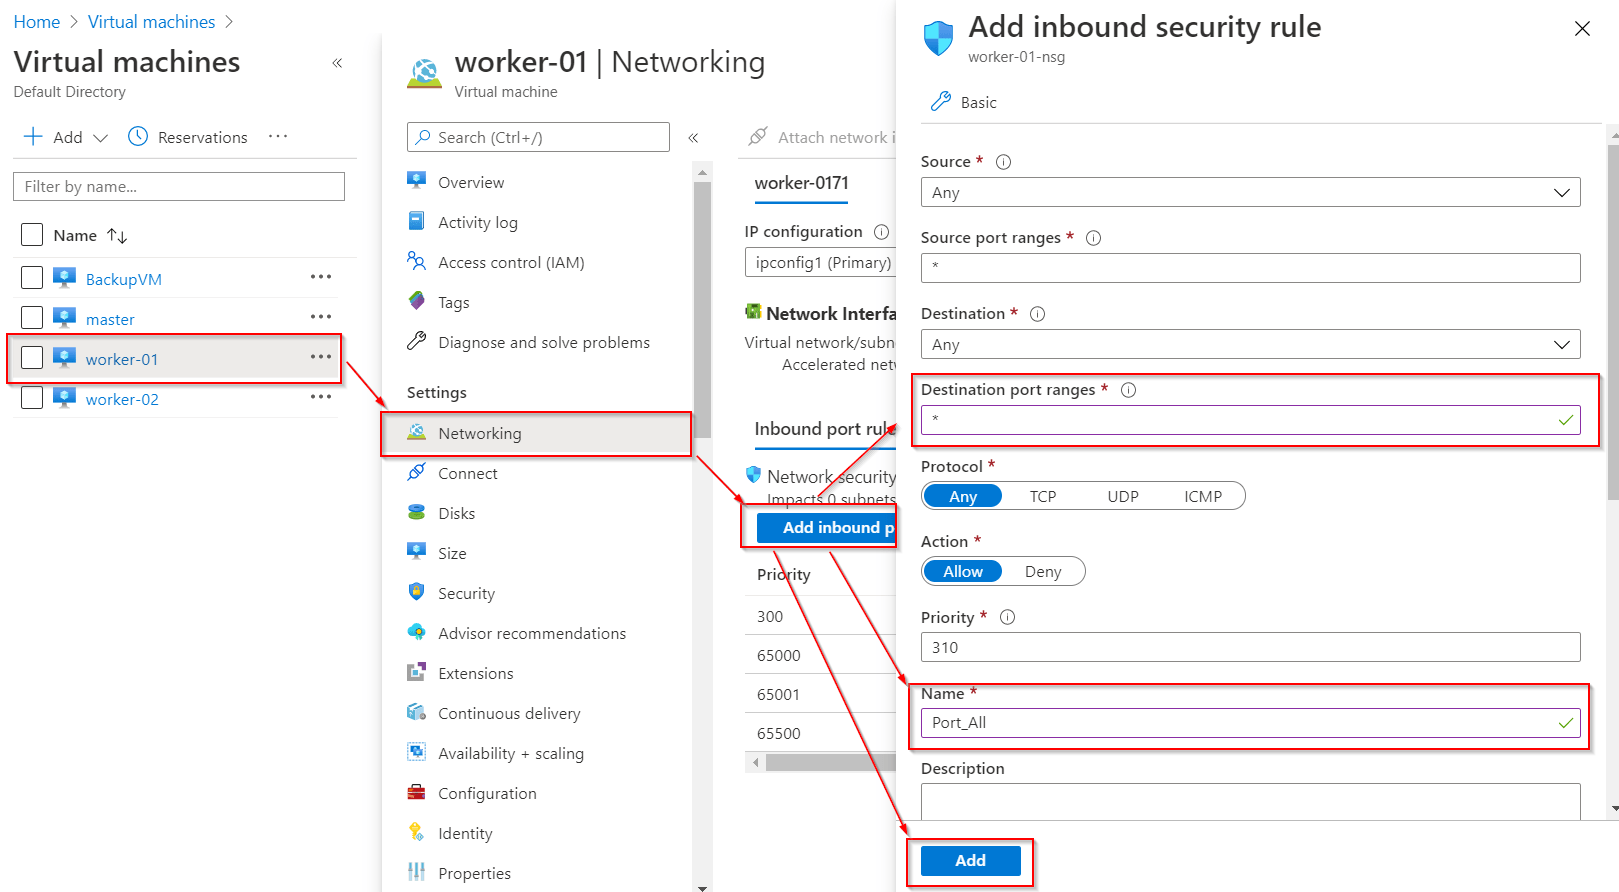
IV) The Ports specified below are the default Port range for NodePort Services for Master and Worker Nodes.
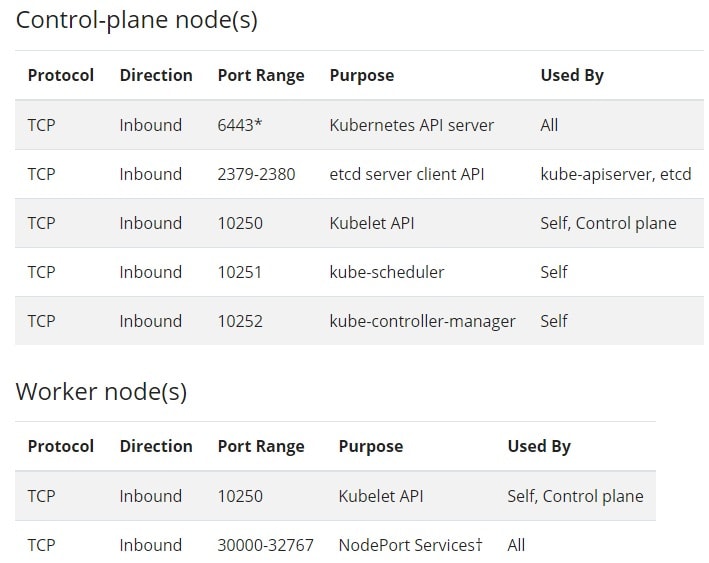
Port numbers marked with * are overridable, so we have to make sure that any custom ports we provide are open.
Note: As we are creating a cluster only for testing purpose, so we can open all the Ports rather than opening only specified Port.
 The specifications required for a Node:
- One or more machines running a deb/rpm-compatible Linux OS; for example Ubuntu or CentOS.
(Note: We are going to use Ubuntu in this setup.) - 8 GiB or more of RAM per machine.
- At least 4 CPUs on the machine that you use as a control-plane node.
Also Read: Kubernetes vs docker, to know the major difference between them.
Note: If you want to use AWS then, please you have to do the below setup:
I) Create an AWS Free Account, as we will use AWS Cloud for setting up a Kubernetes Cluster.
To create an Azure Free Account, check our blog on AWS Free Trial Account.
II) Launch 3 EC2 instances – one Master Node and 2 Worker Nodes. We are launching these VMs in any region.
To create an Ubuntu EC2 Instance, check our blog on Create An Ubuntu EC2 Instance.

Installing Containerd, Kubectl, And Kubeadm Packages
After doing the above-mentioned process, we have to install some packages on our machines. These packages are:
- kubeadm – a CLI tool that will install and configure the various components of a cluster in a standard way.
- kubelet – a system service/program that runs on all nodes and handles node-level operations.
- kubectl – a CLI tool used for issuing commands to the cluster through its API Server.
In order to install these packages, follow the steps mentioned below on Master as well as Worker nodes:
Step 1) We have to do SSH to our virtual machines with the username and password. If you are a Linux or Mac user then use ssh command and if you are a Windows user then you can use Putty.
$ sudo -i

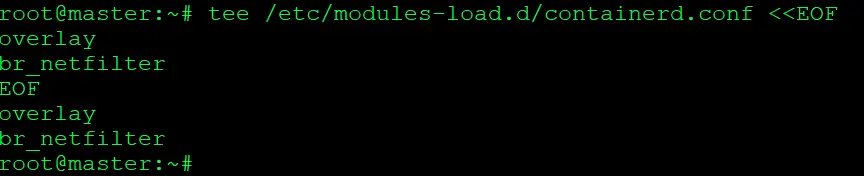
Step 2) Configure persistent loading of modules.
$ tee /etc/modules-load.d/containerd.conf <<EOF
overlay
br_netfilter
EOF
To Install Docker on the local system, you can check out the following blog Install Docker
Step 3) Load at runtime.
$ modprobe overlay
$ modprobe br_netfilter

Step 4) Update Iptables Settings.
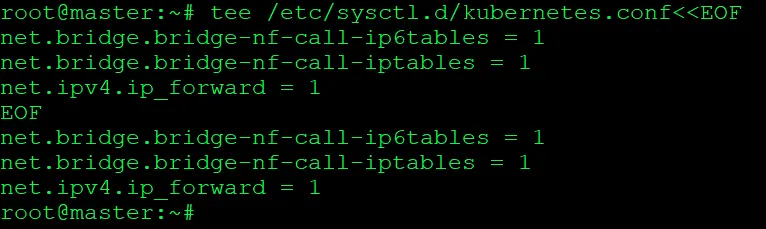
Note: To ensure packets are properly processed by IP tables during filtering and port forwarding. Set the net.bridge.bridge-nf-call-iptables to ‘1’ in your sysctl config file.
$ tee /etc/sysctl.d/kubernetes.conf<<EOF
net.bridge.bridge-nf-call-ip6tables = 1
net.bridge.bridge-nf-call-iptables = 1
net.ipv4.ip_forward = 1
EOF
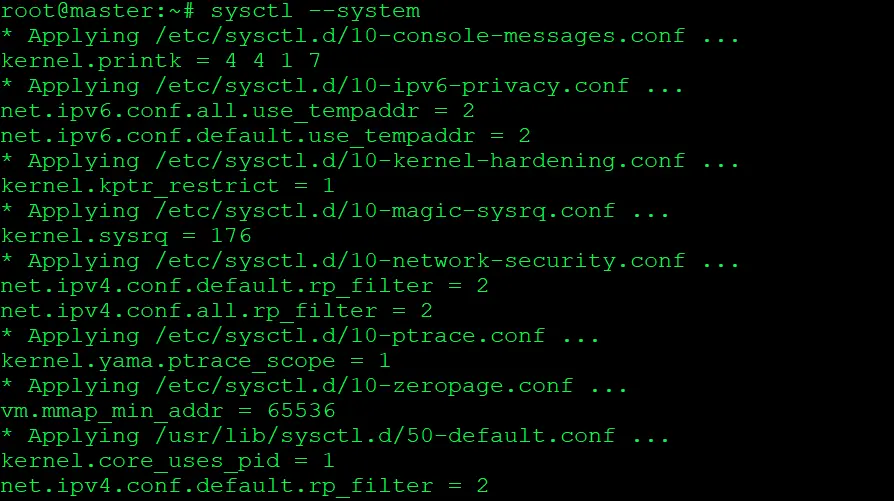
Step 5) Applying Kernel Settings Without Reboot.
$ sysctl --system
 Step 6) Adding Docker Repository GPG Key to Trusted Keys, so it allows the system to verify the integrity of the downloaded Docker packages.
$ mkdir -m 0755 -p /etc/apt/keyrings
$ curl -fsSL https://download.docker.com/linux/ubuntu/gpg | sudo gpg --dearmor -o /etc/apt/keyrings/docker.gpg

Step 7) Adding Docker Repository to Ubuntu Package Sources to enable the system to download and install Docker packages from the specified repository.
(Note: The below is a single command. Please copy and paste the command into a notepad first, then execute it.)
echo \
"deb [arch=$(dpkg --print-architecture) signed-by=/etc/apt/keyrings/docker.gpg] https://download.docker.com/linux/ubuntu \
$(lsb_release -cs) stable" | sudo tee /etc/apt/sources.list.d/docker.list > /dev/null

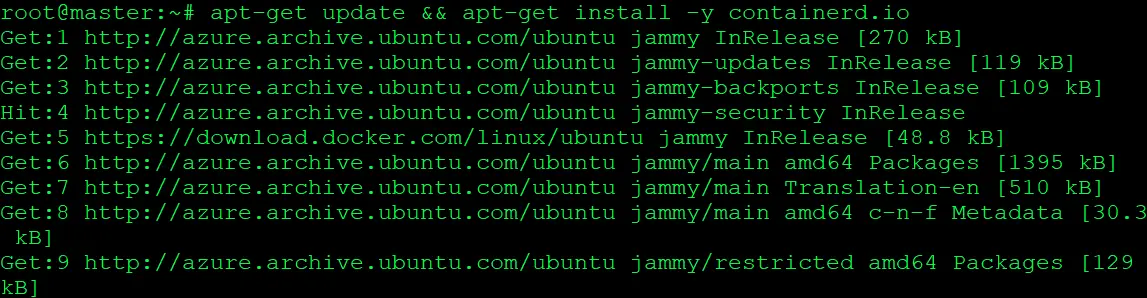
Step 8) Install containerd.
$ apt-get update && apt-get install -y containerd.io
 Step 9) Configure containerd for Systemd Cgroup Management to enable the use of systemd for managing cgroups in containerd.
$ mkdir -p /etc/containerd
$ containerd config default>/etc/containerd/config.toml
$ sed -e 's/SystemdCgroup = false/SystemdCgroup = true/g' -i /etc/containerd/config.toml

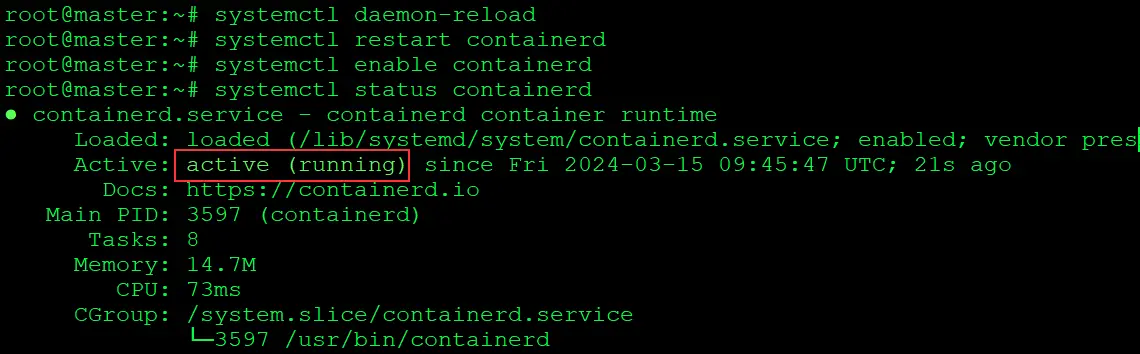
Step 10) Reloading Daemon, Restarting, Enabling, and Checking containerd Service Status.
$ systemctl daemon-reload
$ systemctl restart containerd
$ systemctl enable containerd
$ systemctl status containerd
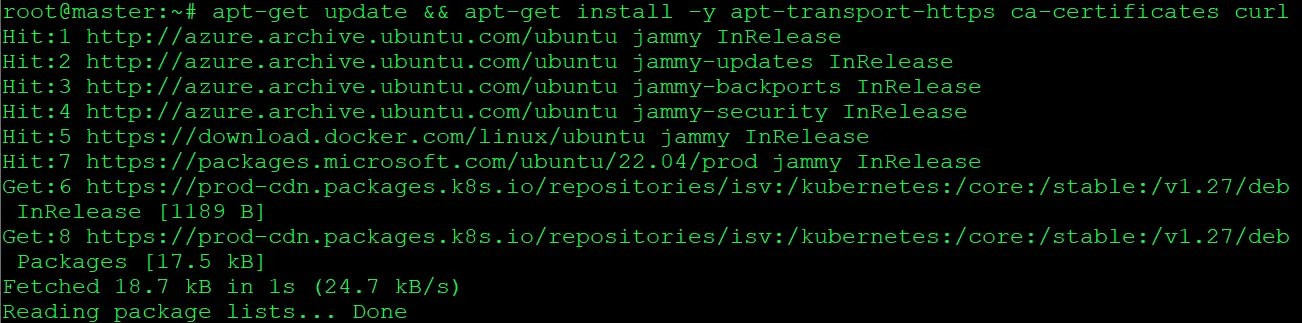
Step 11) Update the apt package index and install packages needed to use the Kubernetes https certificate configuration.
$ apt-get update && apt-get install -y apt-transport-https ca-certificates curl
Step 12)Download the GPG key, as it is used to verify Kubernetes packages from the Kubernetes package repository, and store it in the kubernetes-apt-keyring.gpg file in the /etc/apt/keyrings/ directory.
$ curl -fsSL https://pkgs.k8s.io/core:/stable:/v1.27/deb/Release.key | sudo gpg --dearmor -o /etc/apt/keyrings/kubernetes-apt-keyring.gpg

Step 13) Add the Kubernetes Repository to System’s Package Sources.
This command adds the Kubernetes repository to the system’s list of package sources by appending the repository information to the file.
$ echo 'deb [signed-by=/etc/apt/keyrings/kubernetes-apt-keyring.gpg] https://pkgs.k8s.io/core:/stable:/v1.27/deb/ /' | sudo tee /etc/apt/sources.list.d/kubernetes.list

Step 14)Install kubelet, kubeadm, kubectl packages.
$ apt-get update && apt-get install -y kubelet kubeadm kubectl

Step 15)To hold the installed packages at their installed versions, use the following command.
$ apt-mark hold kubelet kubeadm kubectl

Step 16)Start the kubelet service is required on all the nodes.
$ systemctl enable kubelet
Create A Kubernetes Cluster
As we have successfully installed Kubeadm, next we will create a Kubernetes cluster using the following mentioned steps:
Step 1) We have to initialize kubeadm on the master node. This command will check against the node that we have all the required dependencies. If it is passed, then it will install control plane components.
(Note: Run this command in Master Node only.)
$ kubeadm init

You will see a similar output:
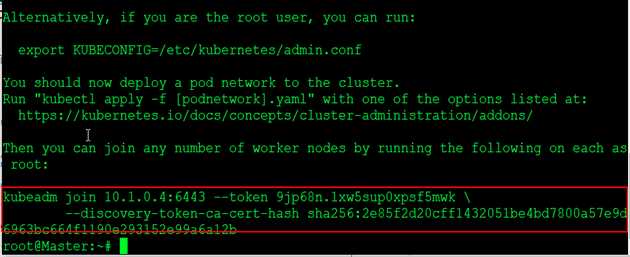
If cluster initialization has succeeded, then we will see a cluster join command. This command will be used by the worker nodes to join the Kubernetes cluster, so copy this command and save it for the future use.
Step 2) To start using the cluster, we have to set the environment variable on the master node.
$ export KUBECONFIG=/etc/kubernetes/admin.conf
$ echo 'export KUBECONFIG=/etc/kubernetes/admin.conf' >> .bashrc

Also Check: Our previous blog post on Kubernetes deployment.
Join Worker Nodes to the Kubernetes Cluster
Now our Kubernetes master node is set up, we should join Worker nodes to our cluster. Perform the following same steps on all of the worker nodes:
Step 1) SSH into the Worker node with the username and password.
$ ssh <external ip of worker node>
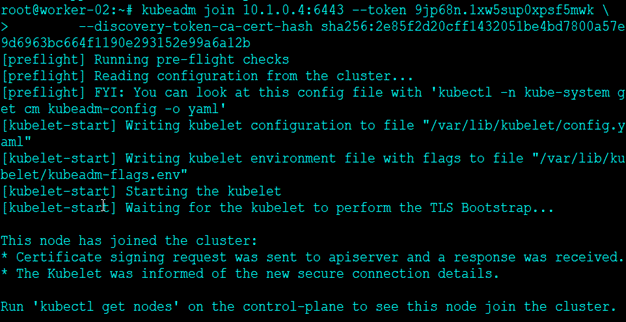
Step 2) Run the kubeadm join command that we have received and saved.
Note: This is above cluster command, you will get your command in your cluster so use that command not this command
$ kubeadm join 10.1.0.4:6443 --token 9jp68n.1xw5sup0xpsf5mwk \

        --discovery-token-ca-cert-hash sha256:2e85f2d20cff1432051be4bd7800a57e9d6963bc664f1190e293152e99a6a12b
(Note: Don’t use this same command, use the command that you have received and saved while doing kubeadm init command.)
If you have forgotten to save the above received kubeadm join command, then you can create a new token and use it for joining worker nodes to the cluster.
$ kubeadm token create --print-join-command
 Check Out: What is Kubernetes and Docker. Click here
Testing the Kubernetes Cluster
After creating the cluster and joining worker nodes, we have to make sure that everything is working properly. To see and verify the cluster status, we can use kubectl command on the master node:
Using Kubectl get nodes command, we can see the status of our Nodes (master and worker) whether they are ready or not.
$ kubectl get nodes

We have to install CNI so that pods can communicate across nodes and also Cluster DNS to start functioning. Apply Weave CNI (Container Network Interface) on the master node.
Note: If you want to know more about Network Policy, then check our blog on Kubernetes Network Policy
$ kubectl apply -f https://github.com/weaveworks/weave/releases/download/v2.8.1/weave-daemonset-k8s.yaml

Wait for a few minutes and verify the cluster status by executing kubectl command on the master node and see that nodes come to the ready state.
$ kubectl get nodes

To verify the status of the system pods like coreDNS, weave-net, Kube-proxy, and all other master node system processes, use the following command:
$ kubectl get pods -n kube-system
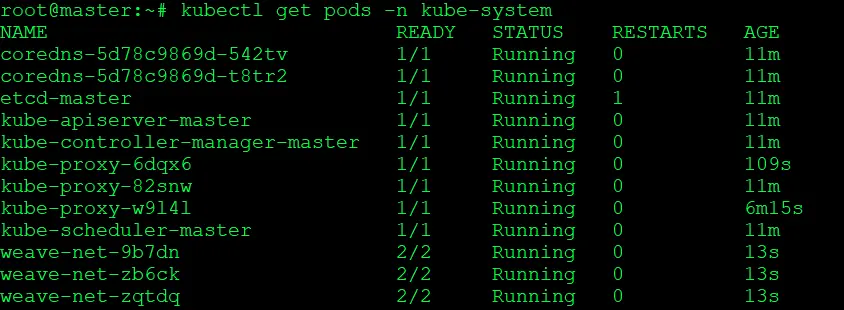
Your output should match with the shown output above. If not, you will have to check whether you have performed all the steps correctly and on the mentioned node only.
Frequently Asked Questions
What is a Kubernetes cluster?
A Kubernetes cluster is a group of machines, referred to as nodes, that collectively run containerized applications managed by Kubernetes. It consists of a control plane and one or more worker nodes.
What is the control plane in a Kubernetes cluster?
The control plane is responsible for managing the cluster and coordinating all activities. It includes components like the Kubernetes API server, etcd (a distributed key-value store), the scheduler, and the controller manager.
What is kubeadm?
Kubeadm is a command-line tool provided by Kubernetes to bootstrap a cluster. It simplifies the process of setting up a Kubernetes cluster by automating various steps, such as initializing the control plane, joining worker nodes, and configuring networking.
How can I add more worker nodes to the cluster?
To add more worker nodes to the cluster, you need to obtain the join command from the control plane node. You can use the kubeadm token create --print-join-command command on the control plane node to generate a new join command with a token. Run that command on the new worker nodes, and they will join the cluster.
Related Post
- Subscribe to our YouTube channel on “Docker & Kubernetes”
- Kubernetes for Beginners
- Kubernetes Architecture | An Introduction to Kubernetes Components
- Certified Kubernetes Administrator (CKA) Certification Exam: Everything You Must Know
- Certified Kubernetes Administrator (CKA): Step By Step Activity Guides/Hands-On Lab Exercise
- Kubernetes Ingress Controller Examples with Best Option
Join FREE Masterclass of Kubernetes
Discover the Power of Kubernetes, Docker & DevOps – Join Our Free Masterclass. Unlock the secrets of Kubernetes, Docker, and DevOps in our exclusive, no-cost masterclass. Take the first step towards building highly sought-after skills and securing lucrative job opportunities. Click on the below image to Register Our FREE Masterclass Now!


![AWS DevOps [DOP-C02] Professional Step By Step Activity Guides (Hands-On Labs)](https://k21academy.com/wp-content/uploads/2023/02/DOP-C02-1.png)