

![]()
AWS Linux is a Linux distribution designed specifically for usage in Amazon EC2 instances. It is a free and open-source operating system meant to function in combination with other AWS services.
In this blog, we will cover everything about the Linux EC2 Instance Service from AWS (Amazon Web Services).
- AWS Linux EC2 Instance
- AWS Linux 2023
- Use Cases
- Steps to Create Linux EC2 Instance
- Access Linux EC2 Instance using EC2 Instance Connect
AWS Linux EC2 Instance
- EC2 stands for Elastic Compute Cloud.
- Virtual Machines (Servers) in AWS are called instances.
- An EC2 Instance is a virtual server in Amazon’s Elastic Compute Cloud for running applications on the Amazon Web Service infrastructure.
- It is a web service provided by AWS for secure and realizable compute capacity which has made deployment faster and easier.
- AWS provides a variety of instances with different configurations of CPU, memory, and storage depending on the needs of the user.
- Users can take advantage of AWS’s scalability, dependability, and security capabilities while also having access to a familiar and powerful Linux operating system by using AWS Linux EC2 instances.
AWS Linux 2023
AWS Linux 2023 (AL2023) is the successor to Amazon Linux 2. It is a general-purpose rpm-based Linux distribution. AL2023 makes it easier to plan for operating system changes. Beginning with AL2023, a new major version of Amazon Linux is published every two years, with smaller quarterly updates in between.
It also offers five years of long-term support. Amazon Linux 2023 interacts with AWS services and is intended for large-scale cloud deployment. AL2023 AMIs and container images are locked to a certain version of the package repository by default, ensuring deterministic behavior and making OS updates easier to integrate into continuous integration and deployment processes.

Use Cases
- Simplify upgrade processes: Ensure deterministic behavior and simplify OS update integration in frequent integration and deployment environments.
- Improve consistency with version locking: Apply updates consistently across all of your instances by locking them to a specific repository version.
- Enhance your security posture: Set the system crypto policy to FUTURE or LEGACY, then lock down SELinux and configure it to enforce or permit.
Steps To Create A Linux EC2 Instance
1. Open the AWS console and Search for EC2 in the search bar and open it.

2. Once you are at the EC2 Dashboard, click on Launch to launch an instance.

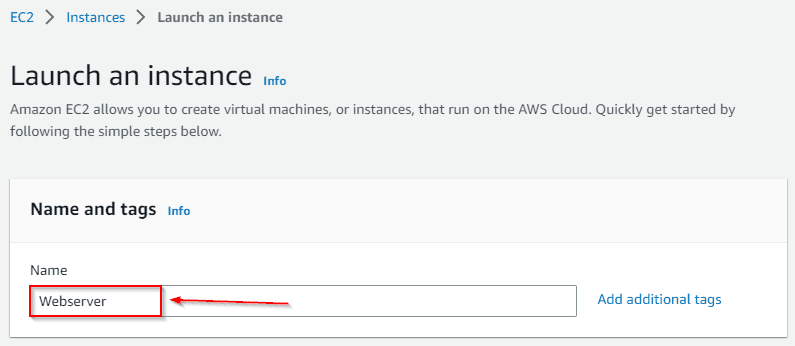
3. Now under the Name, type Value as Webserver and Scroll Down. Tags are added just for specifying names in the key and value field.
4. Choose Amazon Linux 2023 AMI, select 64-bit (x86) architecture, and Scroll Down. Note: Here, in the above step we are selecting the Amazon Linux 2023 AMI which is basically preconfigured with some tools installed on it as Amazon Linux 2023 AMI comes with AWS CLI pre-installed. AWS CLI is basically the Command Line Interface provided by AWS to access any of their services using CLI.
5. Select the t2.micro instance type which is eligible for the free tier.
 Note: Here we must choose the instance type as t2.micro because it is free tier eligible, i.e. you won’t be charged for running the instance.
6. Select an existing key-pair or create a new one, we will create a new one, enter the name of the Key-pair as Linux-Key and rest everything Default.


7. Here we can Configure Network Settings as per our needs. For now, we will keep all the settings as default.

8. Now review all the things you have Configured and Click on Launch Instance.
 9. Now, scroll down and click on View All Instances.
 10. Here, you shall see your instance is launching and the Status check is Initializing, wait for some time.
 11. Refresh and you shall see your instance is Up and Running, and the Status check has changed to 2/2 checks.

Note: Now, wait for the Status check of the instance to change to 2/2 checks pass as the instance is launching from an AMI and it needs time to install all the preconfigured things like AWS CLI and other tools. So, please wait till the Status check becomes 2/2 checks pass and then only proceed with further steps, and if the status check has not passed then you shall get an error in the further steps so please wait.
Thus, we have successfully created our first Linux Instance using EC2.
Note: Now we have launched the instance successfully, further we need to access the instance so, we have two ways of accessing an instance-
- Accessing via Browser using EC2 instance Connect.
- Accessing using Putty (a Secure Shell SSH client).
Accessing EC2 Instance Using EC2 Instance Connect
Note: Till now, we have launched an instance successfully, but we need to access it to run commands so for accessing our instance the easy way is you can access the CLI directly from the browser using the EC2 instance connect that we shall see in further steps.
1. Select your Instance and Click on Connect.
 2. Under EC2 Instance Connect, let everything default, and click on Connect.
 3. Now you shall be redirected to a new window and you shall see the Linux CLI.

Thus, we have successfully connected to the AWS Linux EC2 Instance.
Related Links/References:
- AWS Certified Solution Architect Associate SAA-C03.
- AWS EC2 Instance | Steps to Connect Windows EC2 Instance
- AWS Free Tier Limits
- AWS Free Tier Account Details
- Overview of Amazon Web Services & Concepts
- AWS Certified DevOps Engineer – Professional DOP-C02 Exam
Next Task For You
Begin your journey towards an AWS Cloud by joining our FREE Informative Class on Amazon Cloud Free Class by clicking on the below image.


![AWS DevOps [DOP-C02] Professional Step By Step Activity Guides (Hands-On Labs)](https://k21academy.com/wp-content/uploads/2023/02/DOP-C02-1.png)