


![]()
Oracle Integration Cloud (OIC) provides a large set of connectors/adapters to connect to Oracle’s SaaS and on-premise applications in addition to many third-party Cloud and on-prem applications. Some of these adapters/connectors use a connectivity agent to establish a connection with the on-premise system while a connectivity agent uses the JVM (Java Virtual Machine) to run code on the on-premise system.
This blog post discusses the steps to Download and Install JDK Version 8 on Windows and setting the Environment variables. At this point of time, Oracle has provided documents saying the connectivity agent requires Java to be installed on the on-premise system and it only supports Java version 8 and 9 for the connectivity Agents.
If you are new to Oracle Integration Cloud (OIC), then check our previous blog post at Oracle Integration Cloud (OIC) For Beginners Overview.
Step 1: Download Java JDK 8
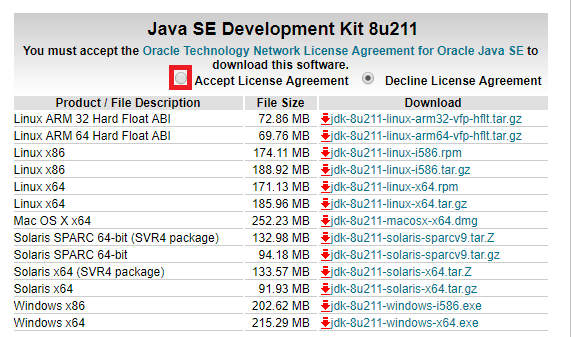
1. You need to download Java 8 from the Oracle’s Official Java Website. Open Java is not supported by Oracle Connectivity Agents.
2. You will see two options, 32-Bit and 64-Bit versions to download. You can choose either of them based on your system.
3. Go ahead, accept the license agreement and download the file.
Also Read : About Oracle Integration Cloud New Homepage.
Step 2: Run the Installer
1. Install Java by opening the location of the downloaded executable.
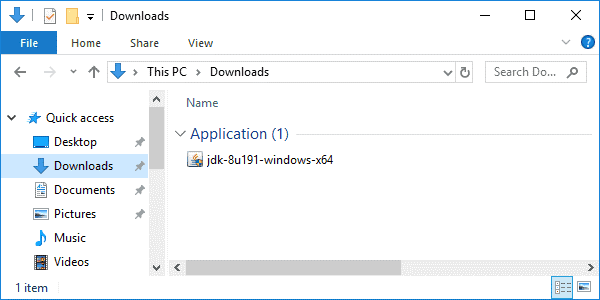
2. Double-click on it to run the installer.
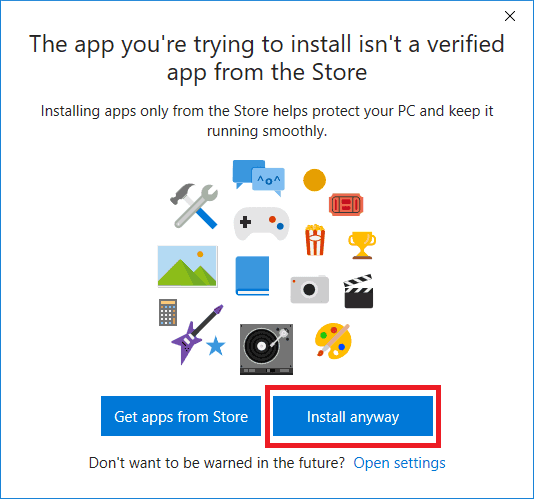
3. On Windows 10, a pop-up window will appear. Click on the “Install anyway” option.
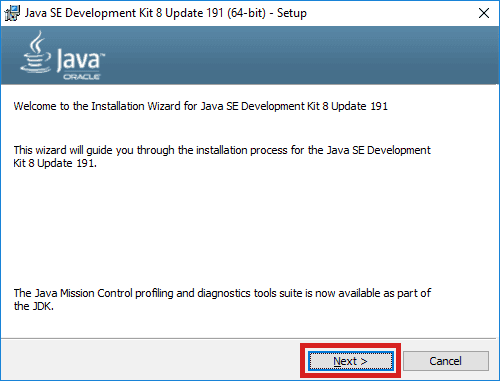
4. The JDK installer will start. Click on “Next”.
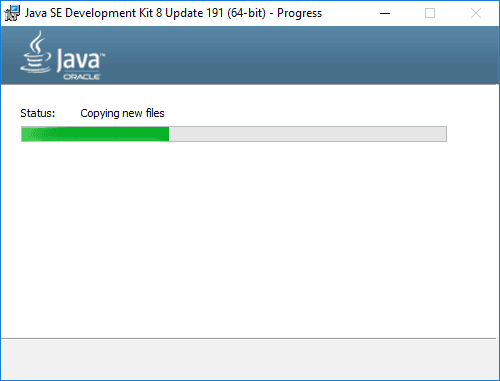
5. The JDK installation will start now. A progress bar shows the various steps being executed.
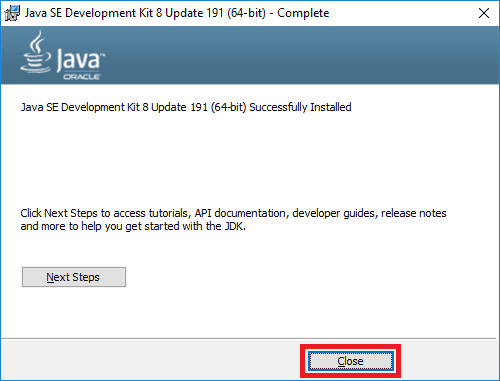
6. Once the installation is complete, click on “Close”.
Step 3: Set JAVA_HOME Variable and Path Variable for JDK8 on Windows 10
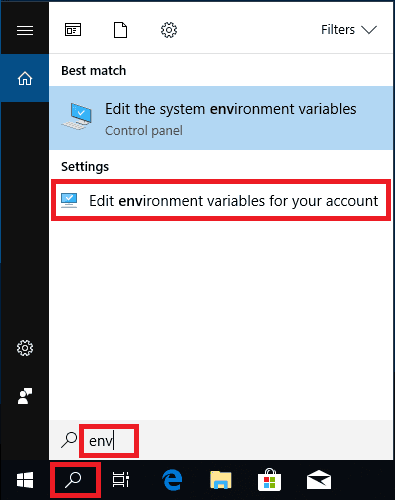
1. Set up an environment variable that will point to the JDK installation.
2. Go to the “Edit environment variables for your account”.
3. Click on “New”.
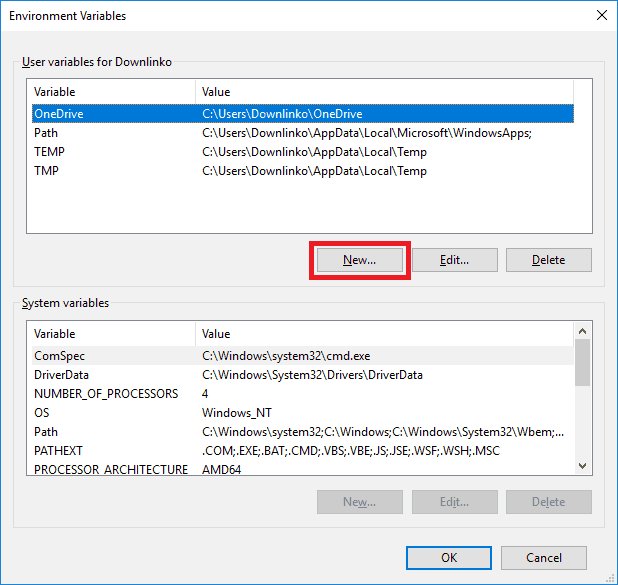
4. Enter “JAVA_HOME” as the variable name and [JAVA_INSTALL_DIR] as the variable value. For us, the Java installation directory is C:\Program Files\Java\jdk1.8.0_191.
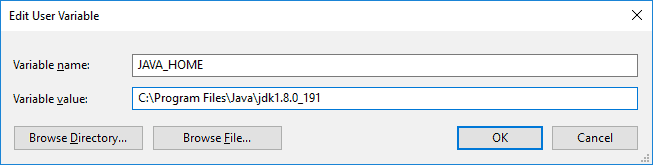
Click on “OK”.
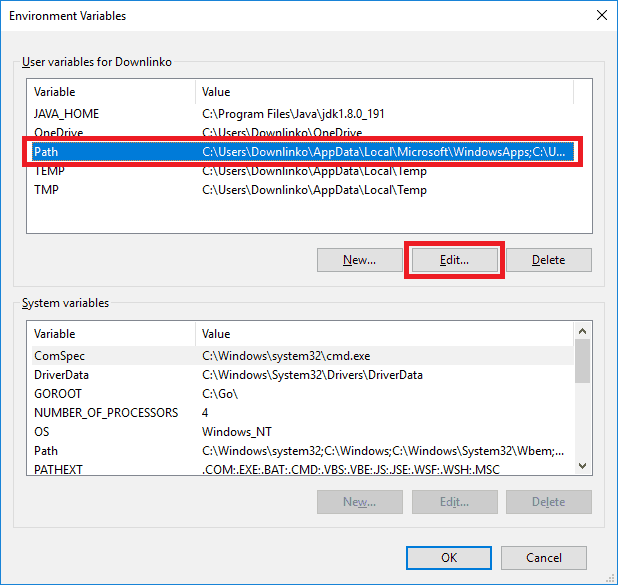
5. Configure the PATH environment variable so we can run Java from the command prompt. Select the Path variable and then click on “Edit”.
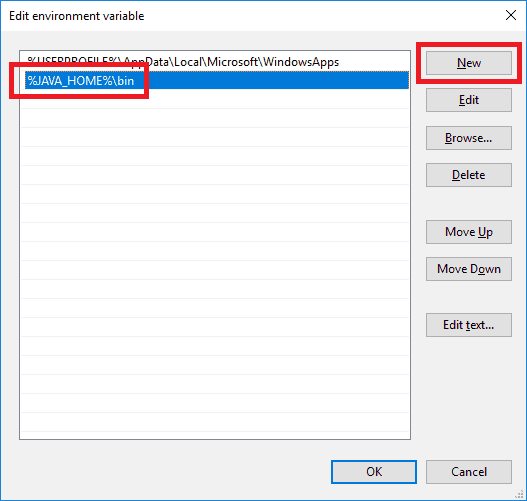
6. Click on “New” and type “%JAVA_HOME%\bin” as shown in the screenshot below. Click on “OK”.
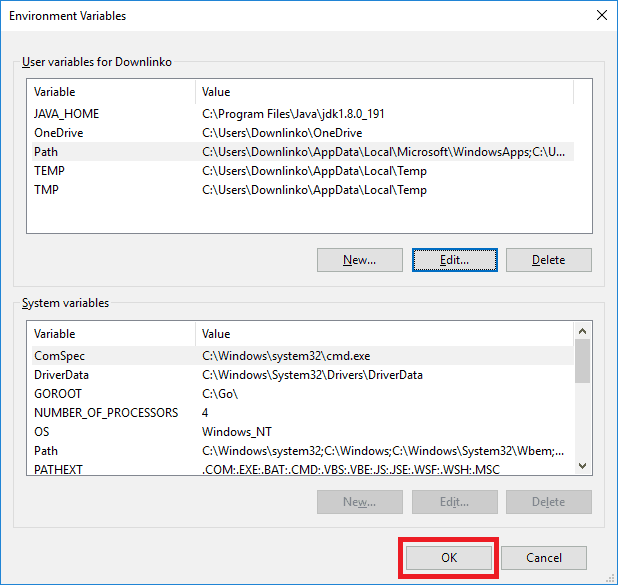
7. Click on “OK” to close the environment variables window.
Step 4: Check the version of Java installed
1. Open the Command Prompt.
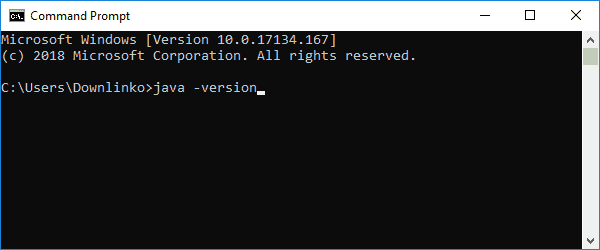
2. Type “java -version” and press the ENTER key on your keyboard.
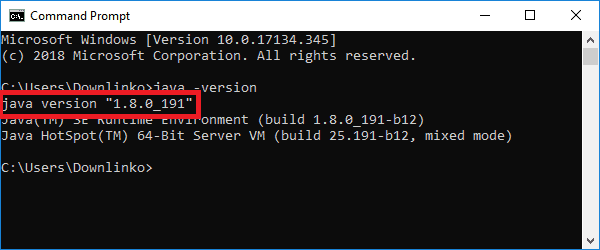
Now, Java has been successfully installed on the system and you can go ahead with Connectivity agent installation at on-premise.
Related Links/References:
- Oracle Integration Cloud (OIC) For Beginners Overview
- [Free Masterclass] Oracle Integration Cloud Services
- 6 Docs Every Oracle Cloud Integrator Must Read
- Oracle Integration Cloud (OIC) Instance Edition, Message Pricing, and License Types
- How to exporting Business Data and Visual Builder Cloud Service (VBCS)
- How Import Business Data in Visual Builder Cloud Service (VBCS)
- Enabling Clone Utility On OIC-C (Doc ID 2481520.1)
- Oracle Documentation: Clone an Integration
Next Task For You
Do you want to learn more about Oracle and confuse where to start or which certification is right for you? Then, click on the register now button below to register for a Free Masterclass on Oracle [1Z0-1042] Certified Cloud Integration Expert, which will help you better understand and choose the right path and clear the certification exam.


![AWS DevOps [DOP-C02] Professional Step By Step Activity Guides (Hands-On Labs)](https://k21academy.com/wp-content/uploads/2023/02/DOP-C02-1.png)