


![]()
This blog post gives a walkthrough of the Step-By-Step hands-on create Azure SQL Database using the Azure portal that we cover in our Azure Data Database Administrator [DP-300] Training program. To understand more about the certification read our blog Microsoft Azure Database Administrator Associate.
Create an Azure SQL Database | Step-by-Step
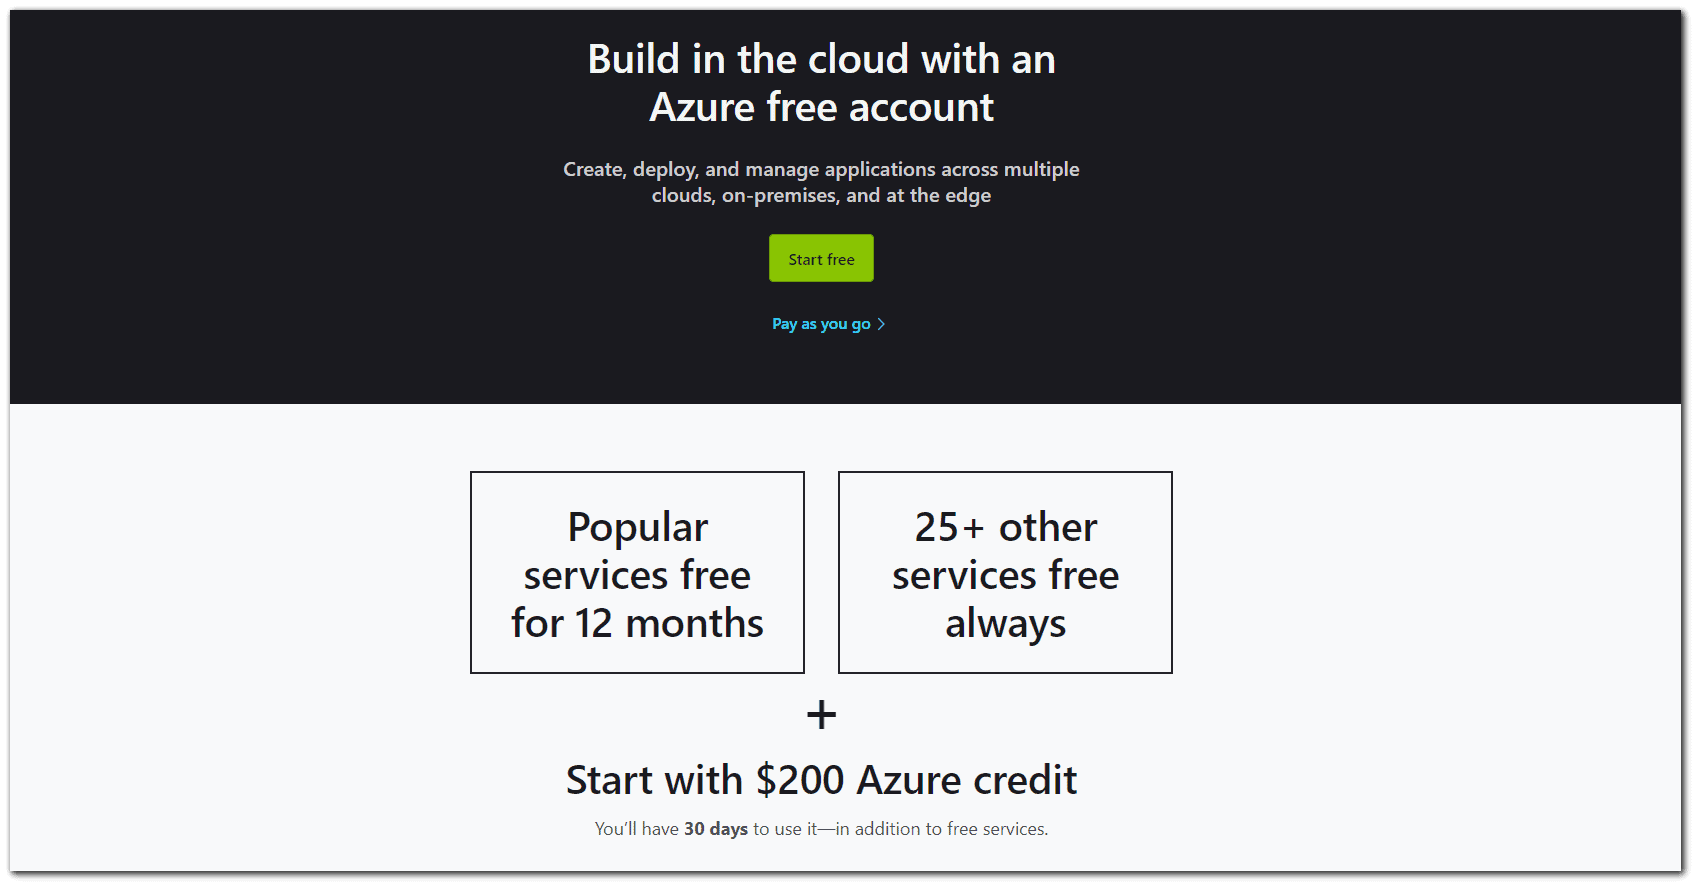
1) The first thing required to perform create an Azure SQL Database is to get a Trial Account of Microsoft Azure. (You get 200 USD FREE Credit from Microsoft to practice)
Microsoft Azure is one of the top choices for any organization due to its freedom to build, manage, and deploy applications. In this activity guide, we will look at how to register for the Microsoft Azure FREE Trial Account.
You can Check out our blog to know more about how to create a free Azure account.
2) After creating an azure account, open a browser and log in to the Azure portal using your Azure credentials: https://portal.azure.com.
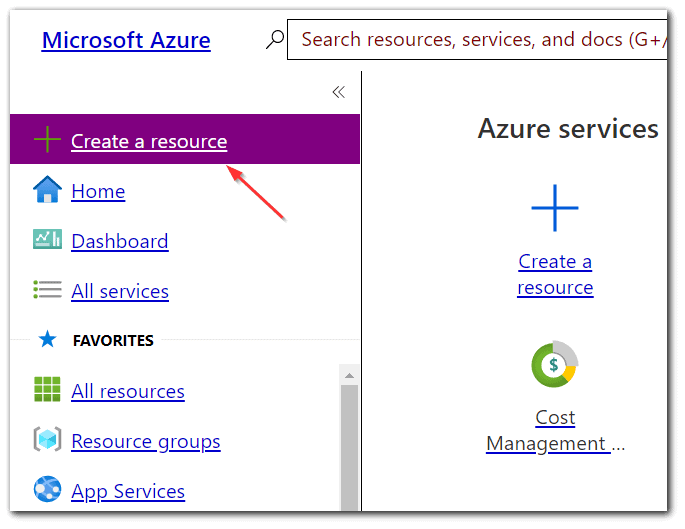
3) In the left-hand navigation pane, choose to Create a resource:
4) On the New page, under Databases, select SQL Database. SQL Server on Microsoft Azure comes in 3 different types (commonly known as the Azure SQL family):
- Azure SQL Database (platform as a service, or PaaS)
- Azure SQL Managed Instance (PaaS).
- SQL Server on Azure VM (IaaS).
The IaaS offering, SQL Server on Azure VM, is similar to an on-premises service where Microsoft manages the virtualization, hardware, and infrastructure, and DBAs manage every aspect of SQL Server.
The PaaS offerings, Azure SQL Managed Instance, and Azure SQL DB allow DBAs to focus more on capacity planning, monitoring, and tuning, while Microsoft takes care of areas such as high availability, backup, and more.

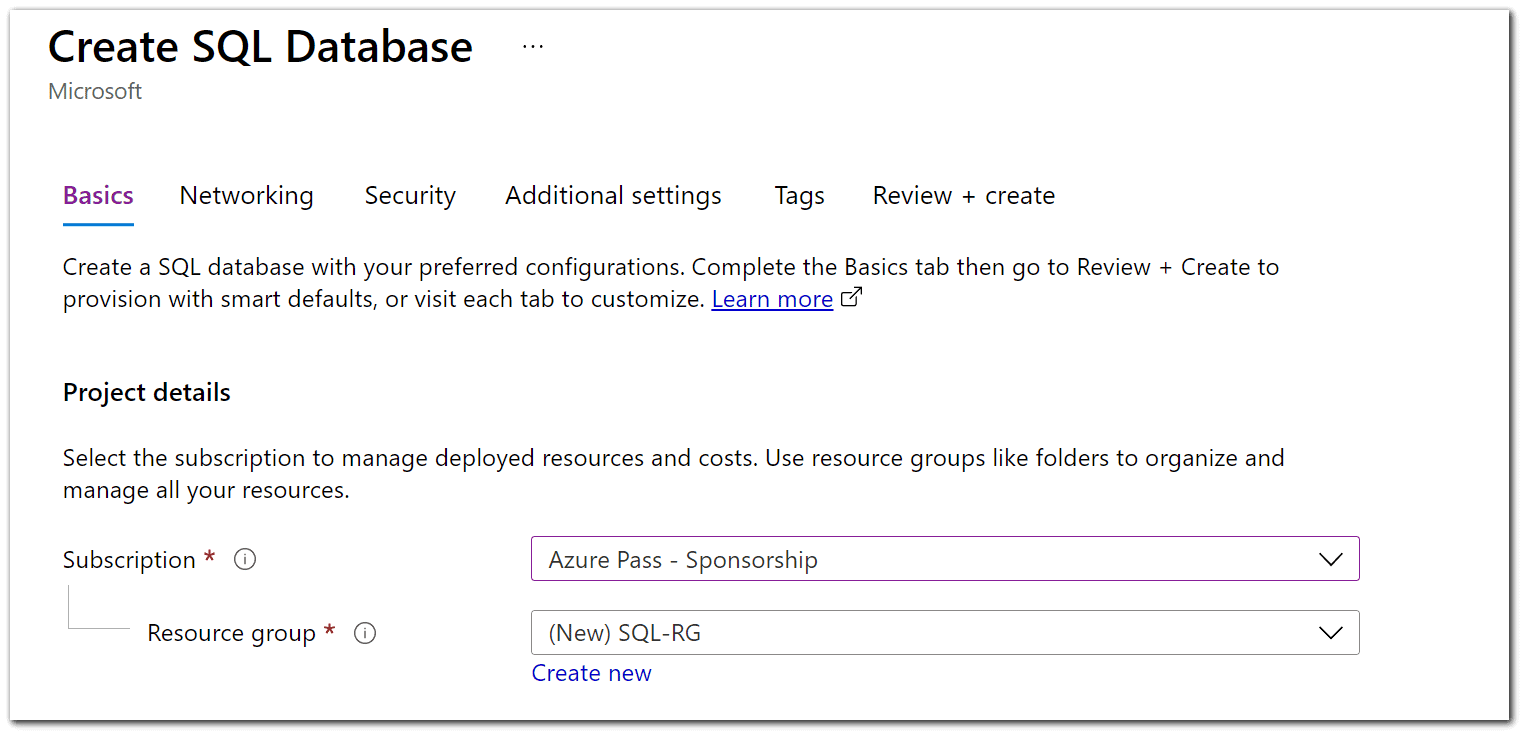
5) On the Next SQL Database page, under the Project details, provide the Subscription and Resource group details. Click the Create new link under the Resource group textbox. In the pop-up box, set the Resource group name as SQL-RG.
Note: RG (resource group) is a logical container that is used to group the resources required to run an application.
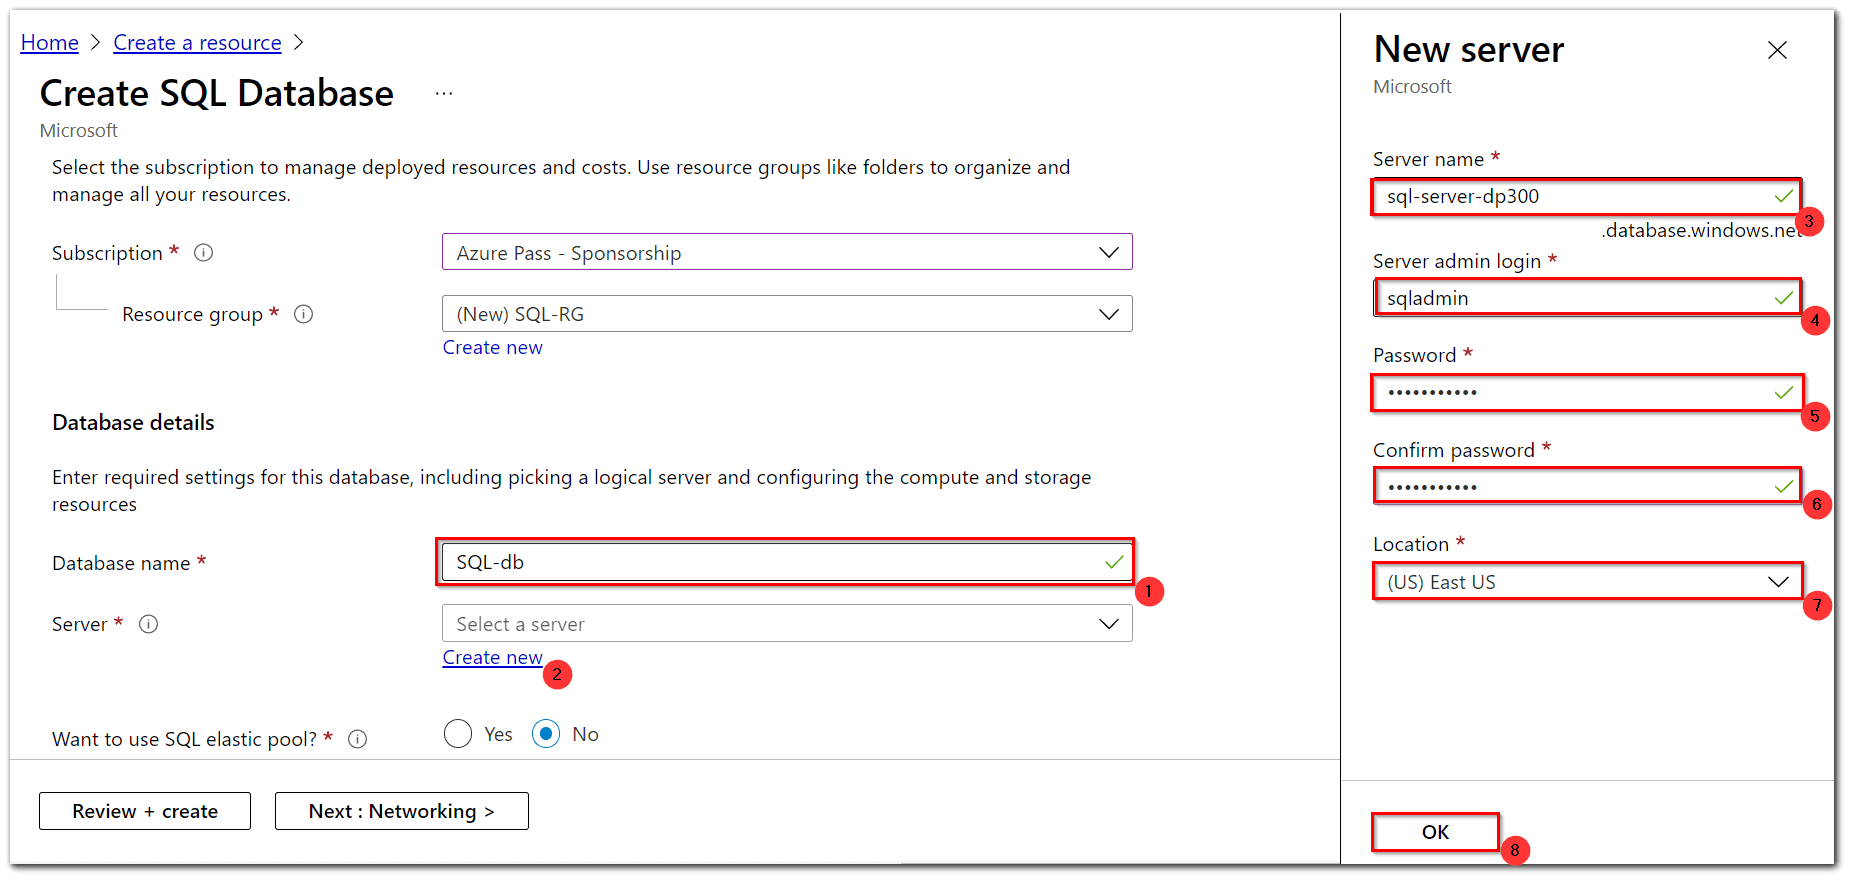
6) The SQL Database name should be unique across Microsoft Azure.
7) Under the Database details heading, enter the database name and server. To create a new server, click on Create new. On the New server page, provide the following details and click Select at the bottom of the page: Server name, Server admin login, Password, Confirm Password and Location.
Note: A server is a piece of computer hardware or software that provides functionality for other devices or programs.
9) Under the Want to use SQL elastic pool? option, select No. Azure SQL Database offers the following deployment options:
- Single Database: It is the original performance configuration option offered for Azure SQL Database. In it, each DB has its own service tier.
- Elastic Pool: It allows a number of databases to share a fixed pool of resources, with resources directed to the busiest databases as demands change. This is built to address the scenario in which several Azure SQL DB have performance demands that vary widely over time—perhaps on a fixed daily or weekly schedule—where it would be time-consuming to switch single database service tiers in response to demand. The service tier is set at the level of the pool.
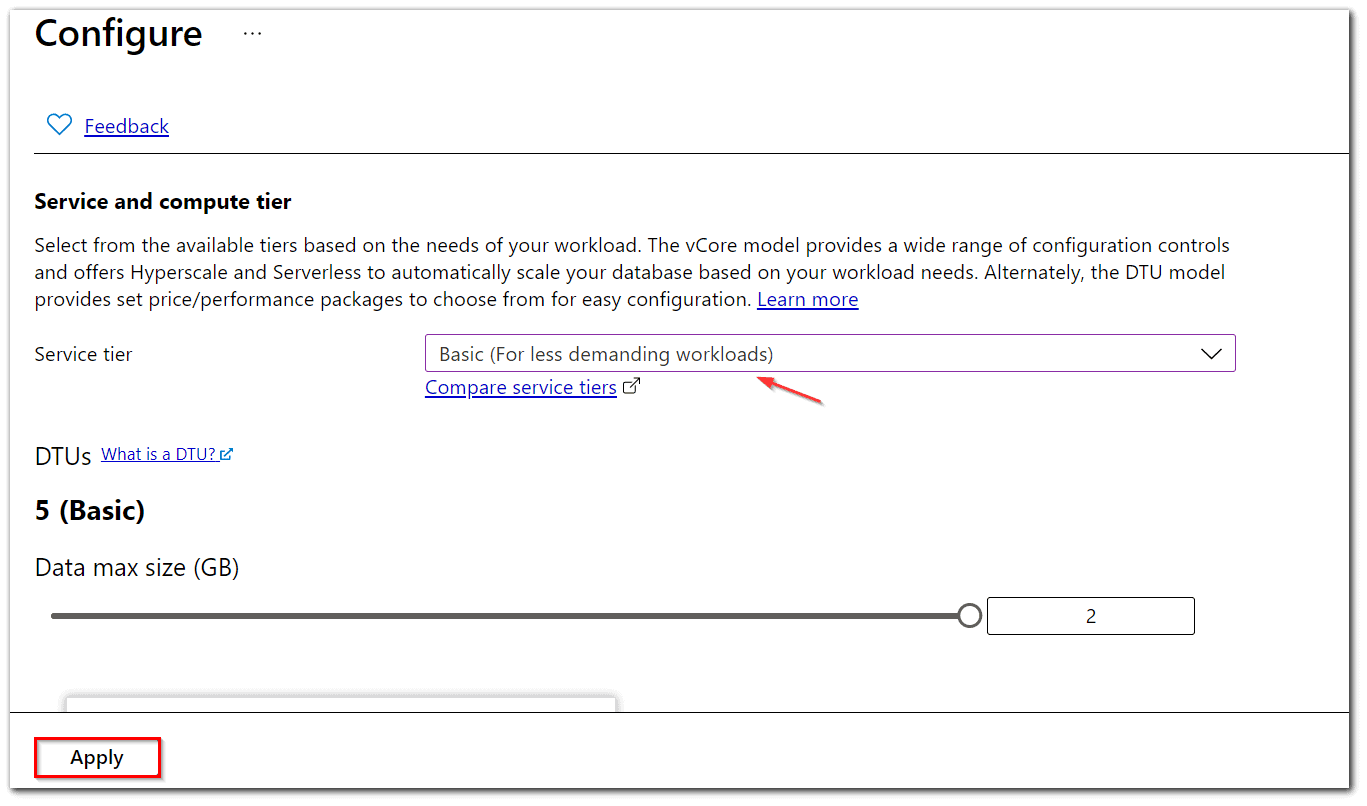
10) In Compute + storage, click Configure database and then select Basic. Two vCore service tiers are available in Azure SQL Database:
- General purpose: it is a budget-friendly tier used for common performance and availability requirements.
- Business critical: tier is used for performance-sensitive workloads with strict availability requirements.
Azure SQL Database also provides the Hyperscale service tier:
- Hyperscale is designed for providing highly scalable storage, most business workloads, read scale-out, fast database restore capabilities, and fast scaling.
11) Skip the options under Networking and Additional settings.
11) In the Additional Settings Tab Use Existing Data, select Sample. This option will create some sample databases that we can use in later steps.
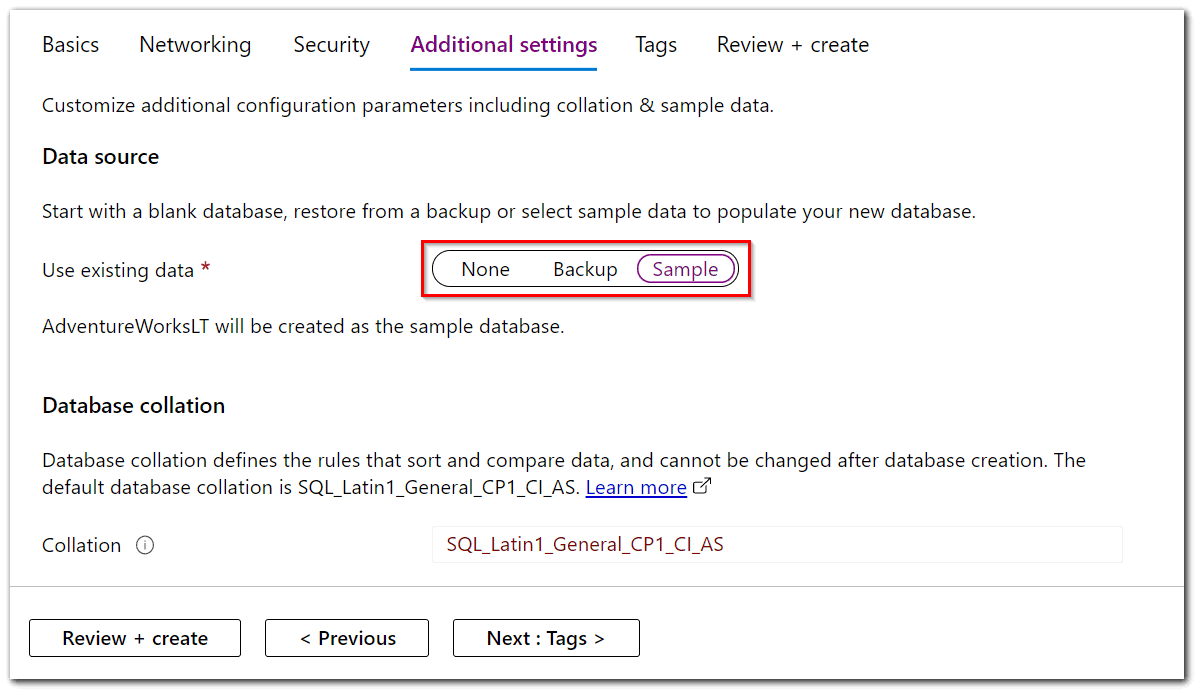
12) Click Review + create to continue.
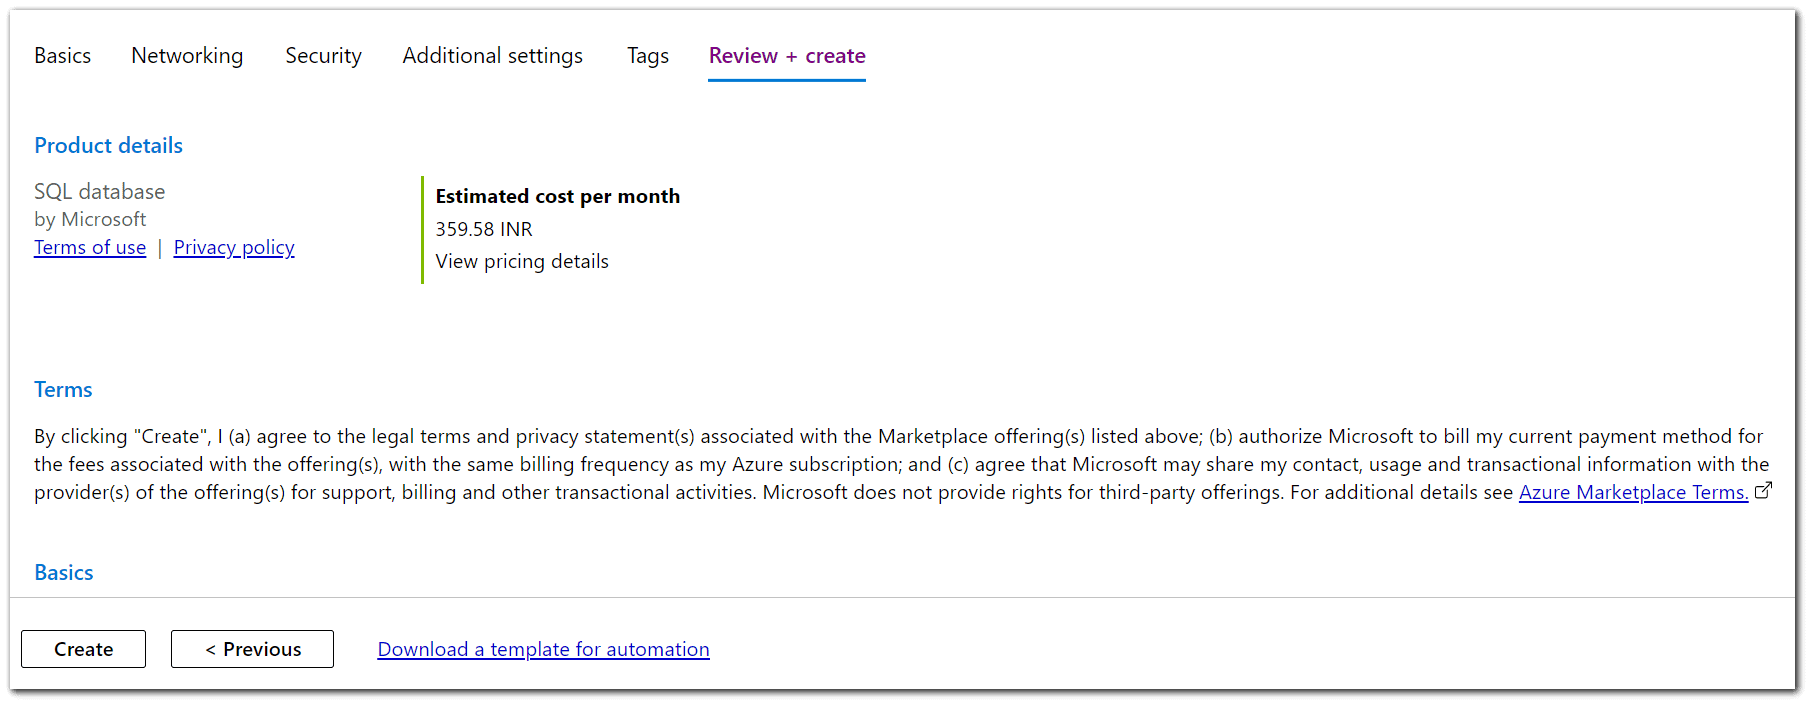
13) On the TERMS page, read through the terms and conditions and the configuration settings made so far:
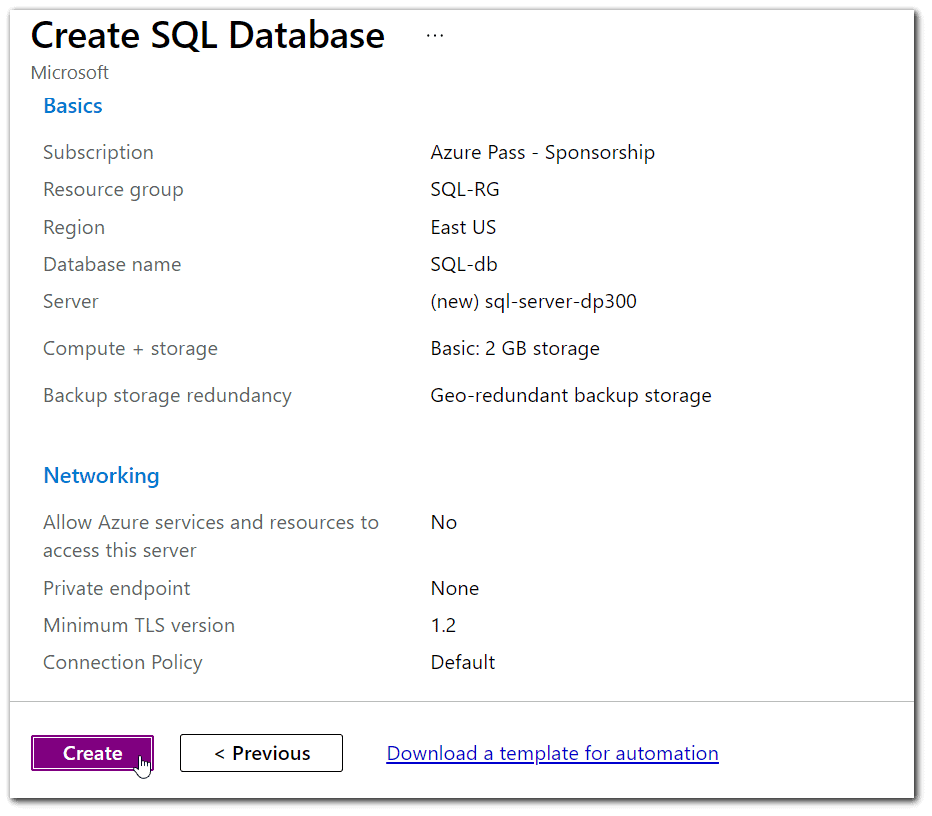
14) Click Create to provision the SQL Database. Provisioning may take 2-5 minutes. Once the resources are provisioned, you’ll get a notification.
15) You can click Go to resource to go to the newly created SQL Database.
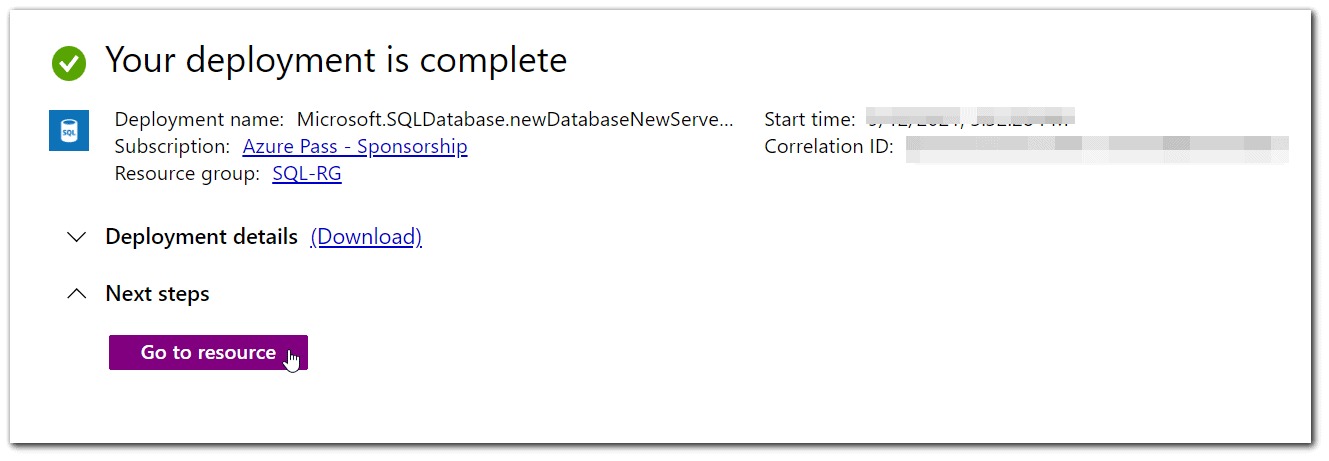
You have now provisioned your first Azure SQL Database.
Connect And Querying the SQL Database from the Azure portal
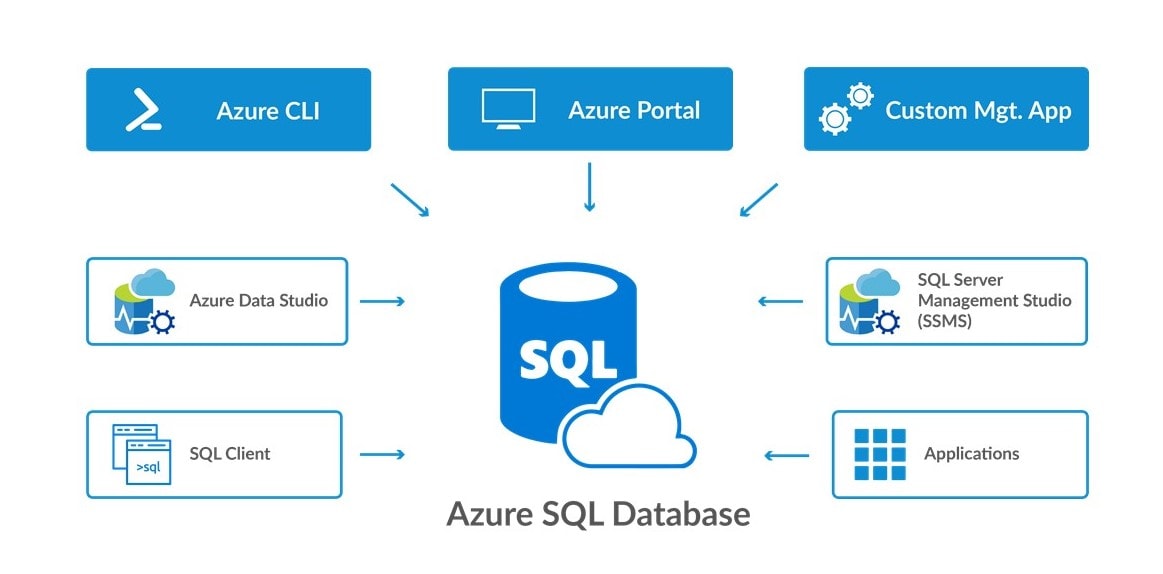
Once your database is created, you can use the different software to connect to your database and Query your data but here we are using the Query editor in the Azure portal to connect to the database and query data.
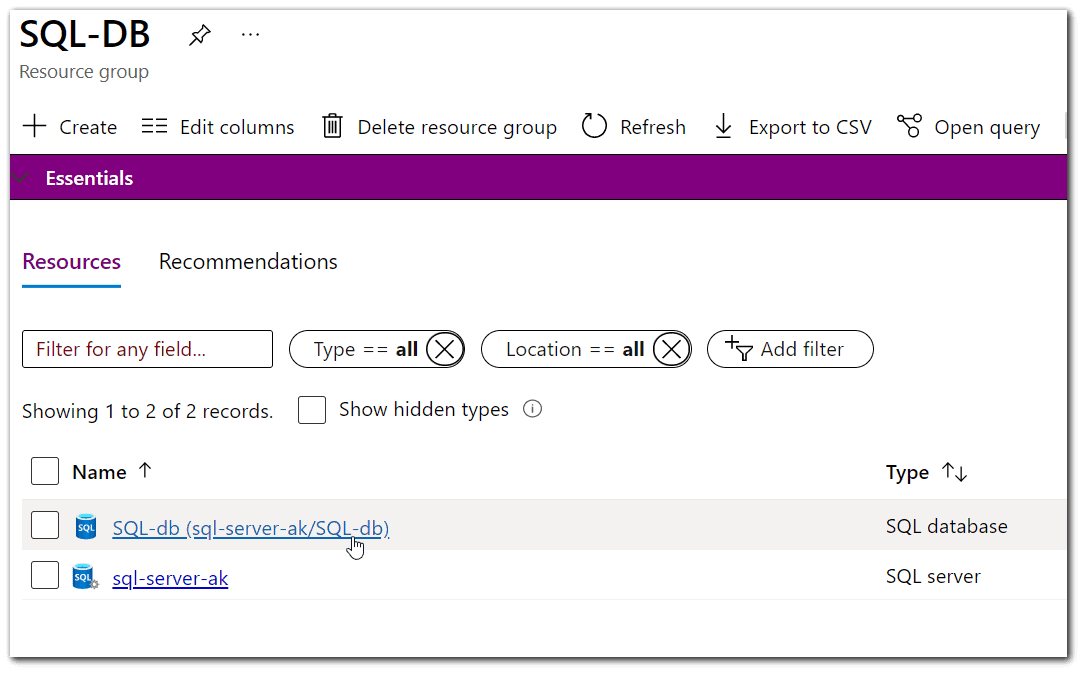
1) You can see both the SQL Server & Database created in the resource group (SQL-DB) we created in the previous step. Click on it.
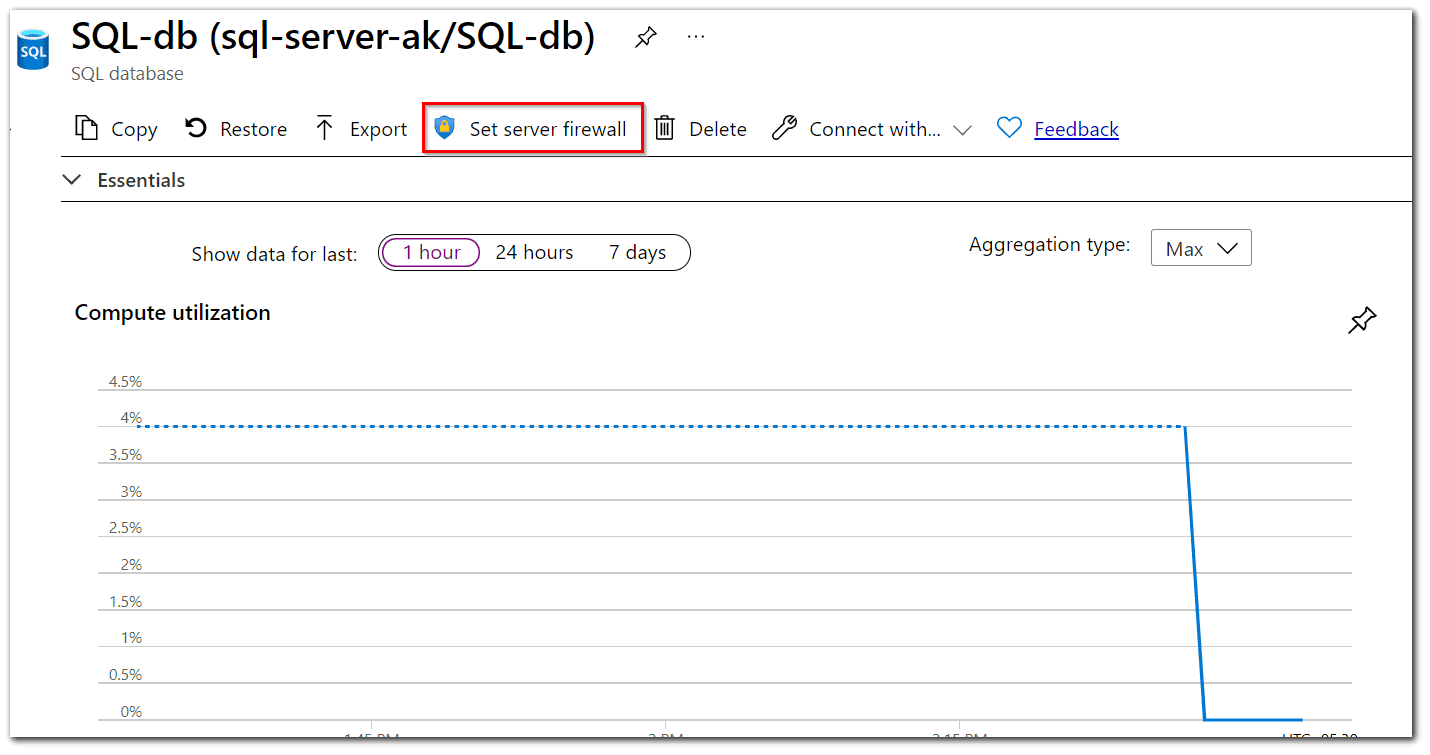
2) Click on Set Server Firewall.
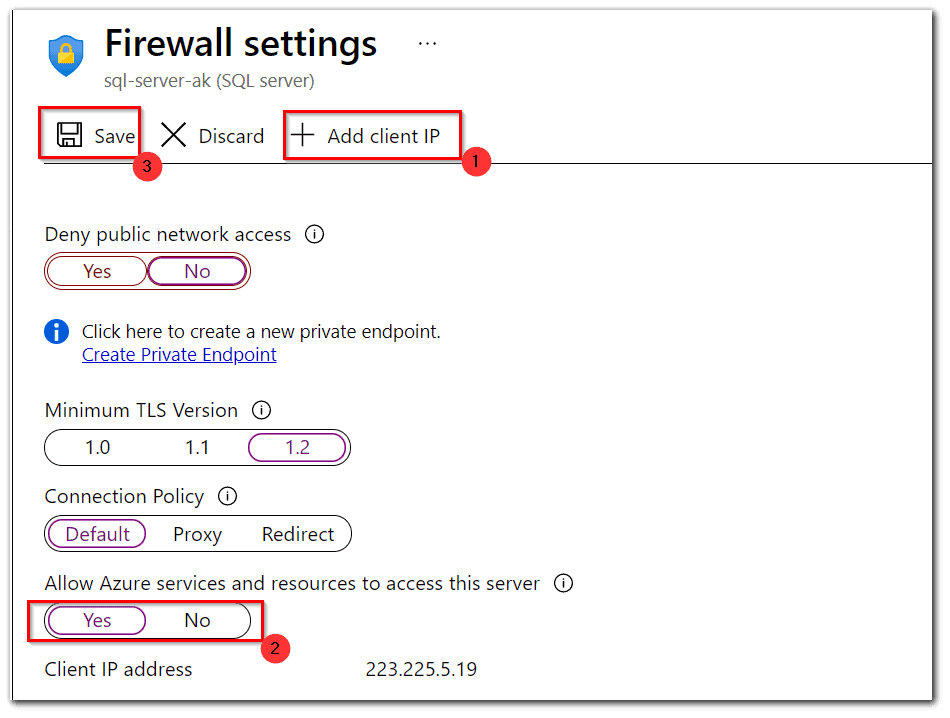
 3) Click on Add Client IP and enable (yes) azure resources to access Azure SQL DB server, then click on Save.
4) Navigate back to the database (Demo-database) and click on QueryEditor. Enter your login credentials that we created earlier for accessing the SQL Server.
 5) There will be lots of tables in the tables folder as we have selected the sample option while creating the database.
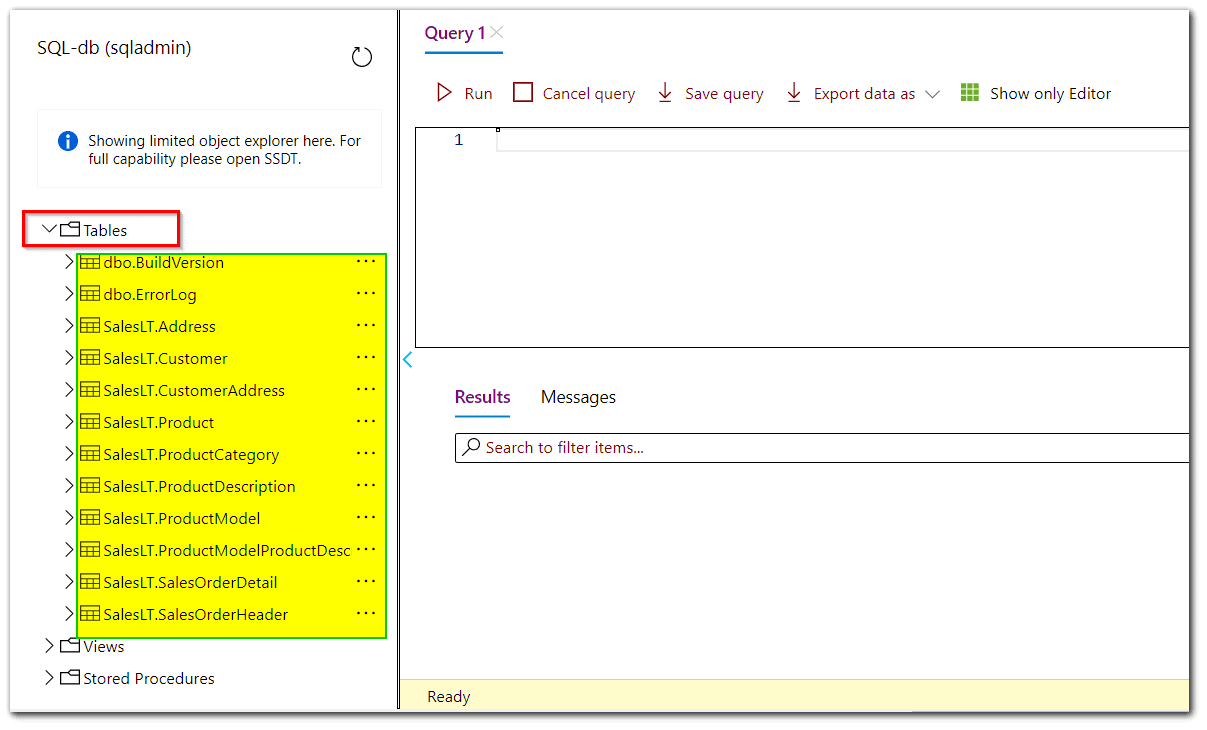
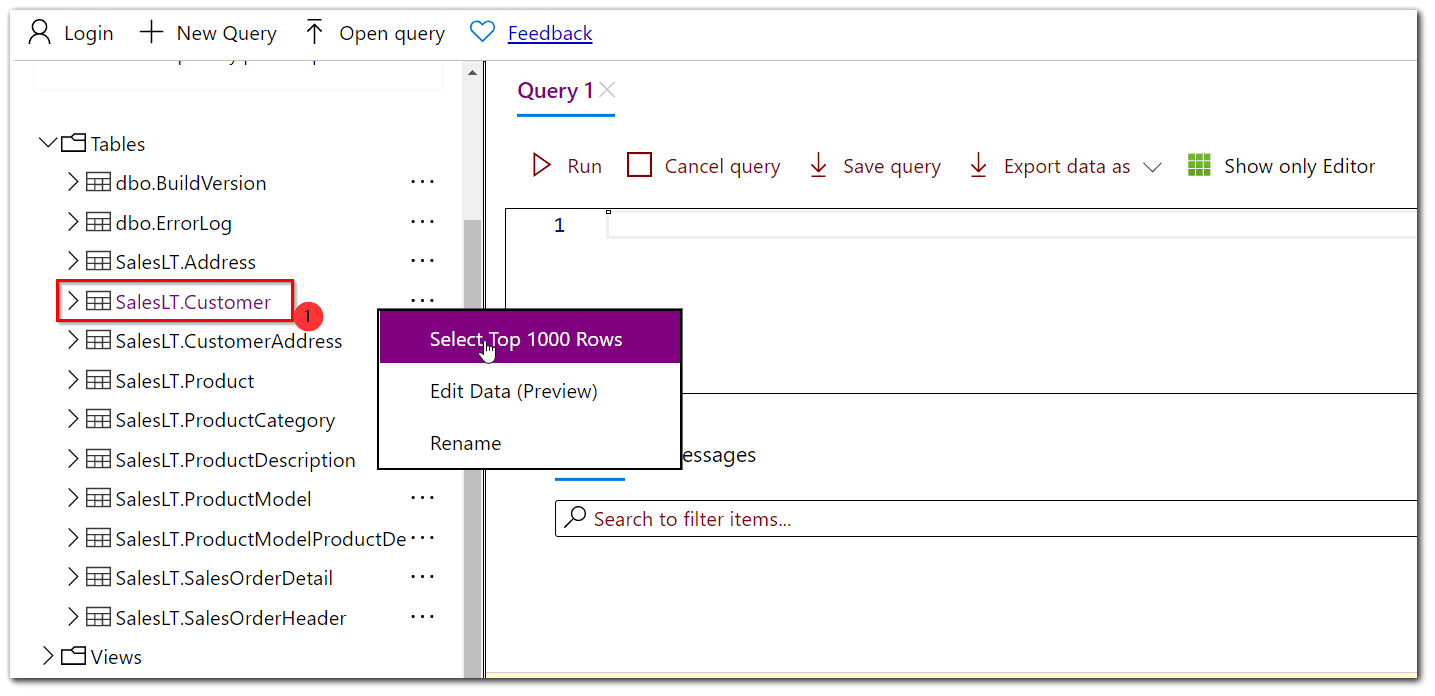
6) In the Tables Folder, select the SalesLT.Customer table and select the top 100 rows option.
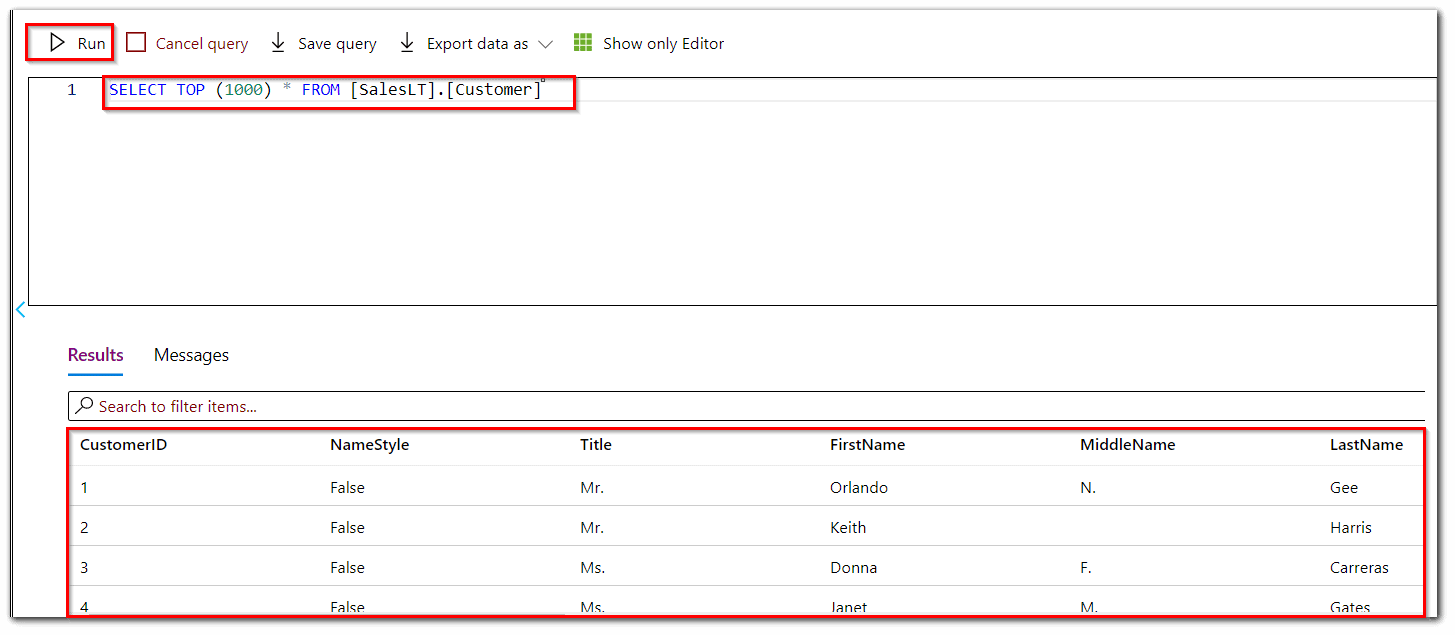
7) Click on the run button to execute the query. We can see the data in the result window.
8) Close the Query editor page, and select OK when prompted to discard your unsaved edits.
Additional Tips And Resources
I hope this Introduction to Azure SQL Database blog helps you. I also highly recommend that you open a free Azure account if you don’t have one yet. You can create your free Azure account here. Also, check out my blog posts about Microsoft Azure Database Administrator Certification:
- Exam DP-300: Microsoft Azure Database Administrator Associate
- Microsoft Certified Azure Database Administrator Associate | DP 300 | Step By Step Activity Guides (Hands-On Labs)
- Azure SQL Database | All you need to know about Azure SQL Services
Next Task For You
In our Azure Database Administrator training program, we will cover all the exam objectives, 24 Hands-On Labs, and practice tests. If you want to begin your journey towards becoming a Microsoft Certified: Azure Database Administrator Associate by checking our FREE CLASS.


![AWS DevOps [DOP-C02] Professional Step By Step Activity Guides (Hands-On Labs)](https://k21academy.com/wp-content/uploads/2023/02/DOP-C02-1.png)