

![]()
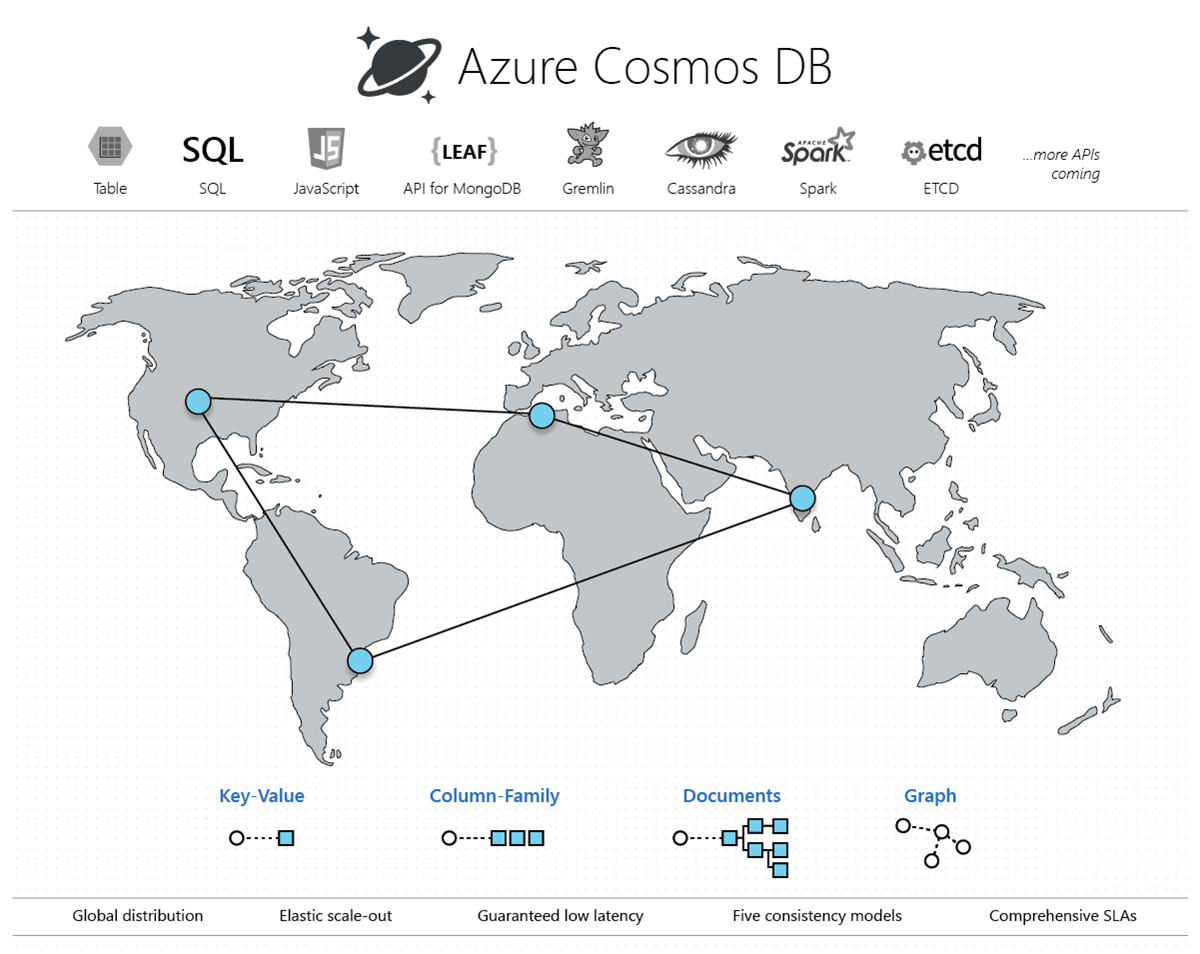
Azure Cosmos DB is the globally distributed database service from Microsoft. Build applications with guaranteed high availability and low latency anywhere, at any scale, or migrate Cassandra, MongoDB, and other NoSQL workloads to the cloud.
In this blog, we are going to cover about Cosmos DB, Key features and Capabilities, create a Cosmos DB account, and create a database and container.
What Is Azure Cosmos DB?
- It is the globally distributed database service from Microsoft.
- It gives natural support for all major NoSQL data models – document, graph, key-value type, and columnar-exposed through various APIs so we can use familiar tools and frameworks.
- Azure Cosmos DB provides various services that no other database service platform provides. It’s the only database service that offers five well-defined consistency levels.
- Because it is a fully managed Microsoft Azure service, we won’t need to manage VM, deploy and configure software, or deal with upgrades. Every database is backed up automatically, secured from regional failures, and encrypted, so we need not worry about those things and focus on our app.
Check Out: Our blog post on DP 900.
Cosmos DB Key Features And Capabilities
1) Multiple data models
- SQL API for access to the core schema-less JSON document-oriented database engine with SQL querying facility.
- Cassandra API for access to the column-based globally distributed Cassandra-as-a-service, which cause it easy to migrate existing Apache Cassandra apps to the cloud.
- Gremlin API is a fully managed horizontally scalable database service that holds Open Graph APIs.
- Azure Table API built to provide guaranteed low latency, automatic indexing, global distribution, and other features of Azure Cosmos DB to existing Azure Table storage apps with very minimum effort.
Check out this blog, we are going to cover Data, types of Data, and Structured Vs Unstructured Data, and suitable Datastores.
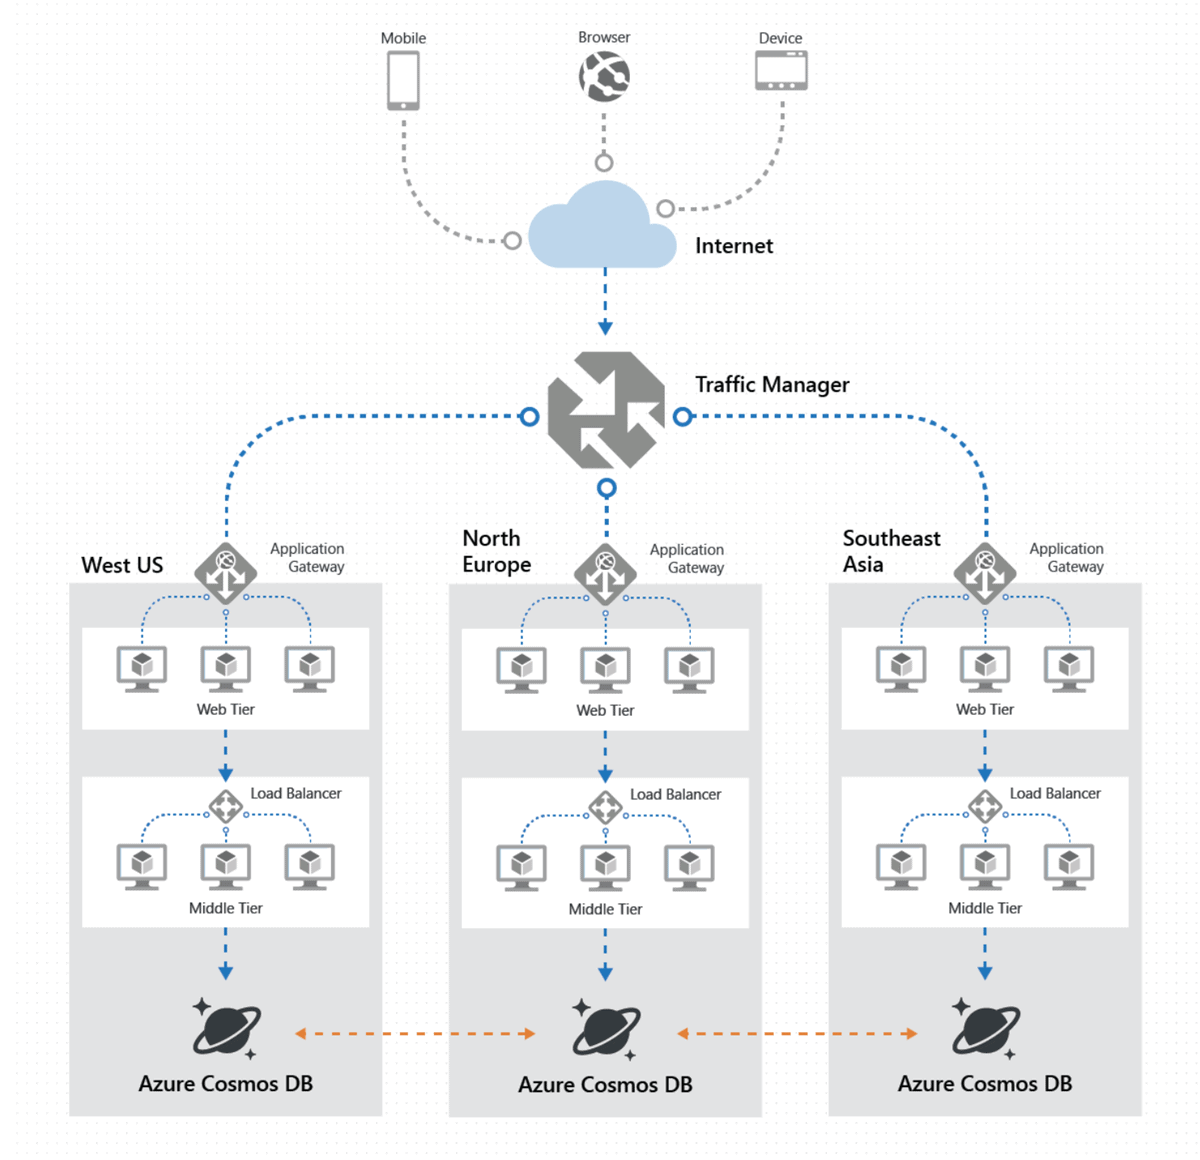
2) Turnkey global distribution
- Azure Cosmos DB is the only database service that gives turnkey global distribution.
- It lets us distribute our data to several numbers of Azure regions with just a few mouse clicks.
- Keeping our data close to our users to boost app performance.
- With the multihoming APIs, our app always knows where the nearby copy of our data lies, without any configuration changes, even as we can add and remove regions.
3) Multi-master support
- With multi-master support, we can write data to any region associated with our Cosmos DB account and have those updates propagate asynchronously, enabling you to seamlessly scale both write and read throughput anywhere around the world.
- We’ll get single-digit millisecond to write latencies at the ninety-ninth percentile, 99.999 percent write (and read) availability and comprehensive and flexible built-in conflict resolution. Multi-master support is crucial for building globally distributed apps and significantly simplifies their development.
Also Check : Microsoft Azure Databricks Architecture & Diagram
How To Create An Azure Cosmos DB Account
1) Sign in to the Azure portal from the account which you have activated.
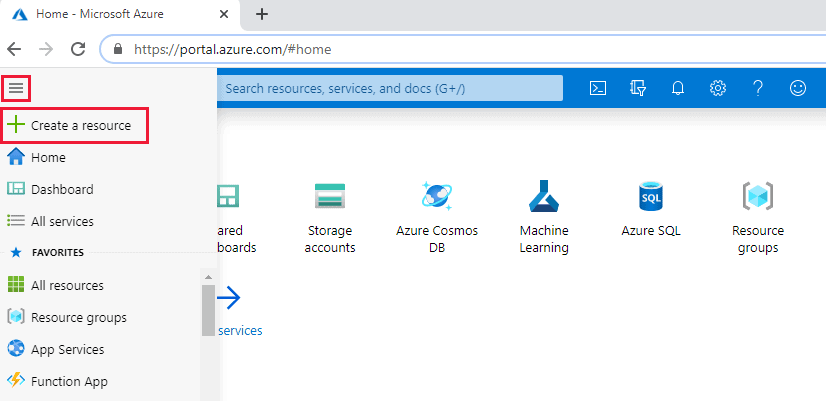
2) Click on the Azure portal menu on the left side of the page, select Create a resource.
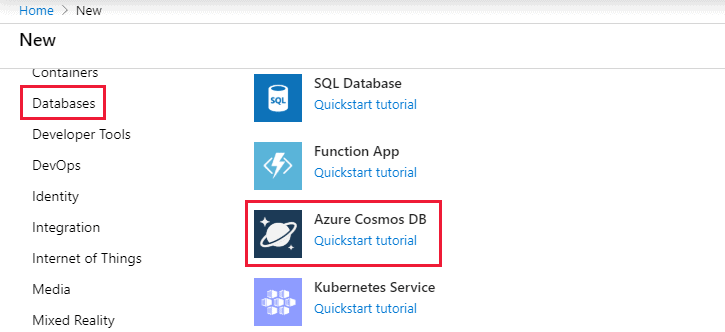
3) Click on Databases and then select Cosmos DB.
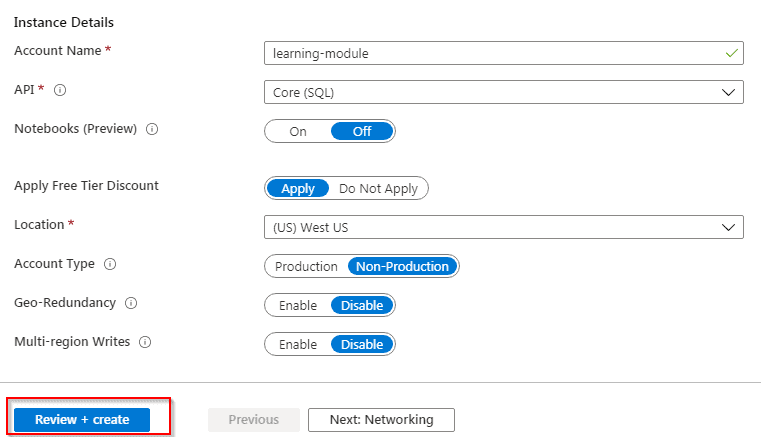
4) Enter the settings for the new Azure Cosmos DB account, including the location on the Create Cosmos DB Account page.
To Know More About azure event hub click here
5) Click on the Review + Create option.
6) After the settings are reviewed then click on Create to create the account.
7) The account creation within a few minutes. Wait for the portal to display the notification that the deployment succeeded and click the notification.
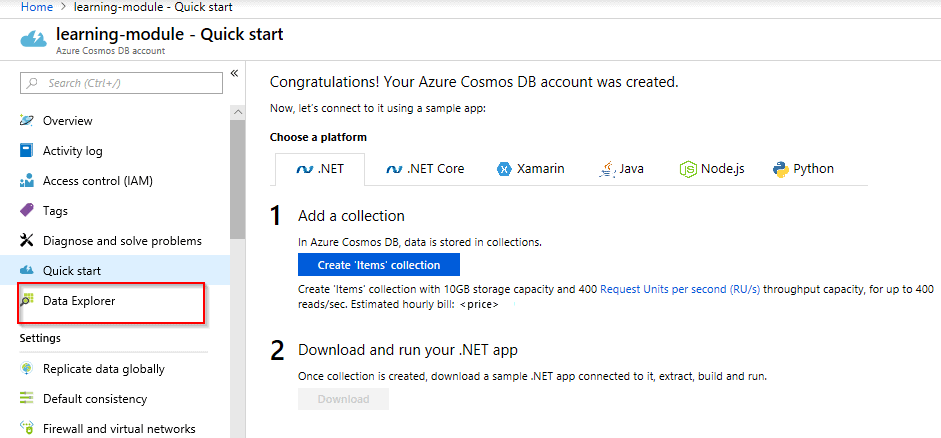
![]()
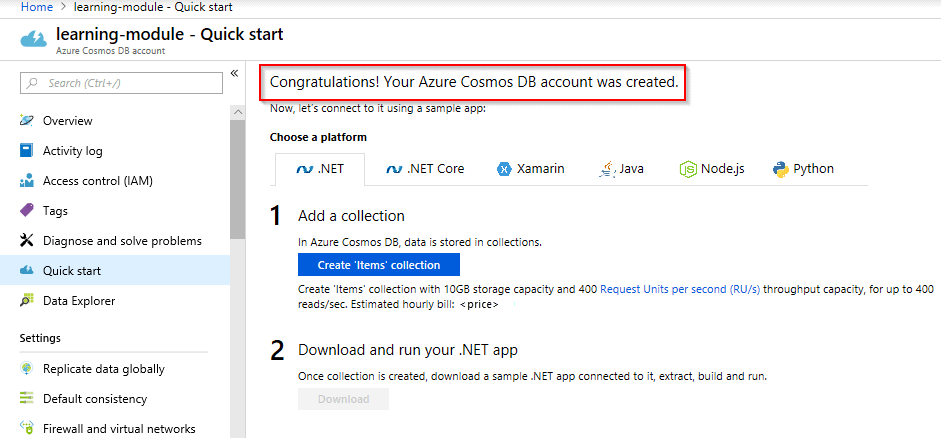
8) In the notification window, click on Go to the resource. Then the portal shows the Congratulations! Your Cosmos DB account created page.
Also Read : Benefits Of Azure Stream Analytics
Azure Cosmos DB Partition Key
A partition strategy assure that our database can grow to accurately run queries and transactions.
What Is The Strategy For Partitioning?
A partitioning strategy facilitates us to add more partitions to our database when need them. This scaling strategy is called scale-out or horizontal scaling. When we create a container and can’t be changed. Selecting the right partition key is an important choice to make early in our development process.
We’ll learn how to choose a partition key that’s right for our case study, which will enable us to take advantage of Cosmos DB autoscaling.
What is the partition key?
A partition key is a value by which Azure organizes our data into logical divisions. It focuses on evenly distributes operations across the database to bypass hot partitions.
A hot partition is a single partition that gets many more requests than the others, which can make a throughput bottleneck.
In our online shopping scenario, using the ProductID or UserID value as the partition key is a better option because it will be uncommon and likely used to look up records. UserID is a better choice, as our application frequently needs to retrieve the shopping cart, order history, personalization settings, and profile information for the user, just to name a few. ProductID is also a good option, as our application needs to query color options, shipping costs, inventory levels, warehouse locations, and more.
For each Azure Cosmos DB container, we will specify a partition key that satisfies the following properties:
- Have a high cardinality: This option allows data to distribute evenly across all physical partitions.
- Evenly distribute requests: Remember the total number of RU/s is evenly divided across all physical partitions.
- Evenly distribute storage: Each partition can grow up to 20 GB in size.
To Know More About Azure Data Lake click here
Create A Database And Container
1) Sign in to the Azure portal from the account which you have activated.
2) Click on the Azure portal menu on the left side of the page, select All services.
3) Click on Databases and then select Azure Cosmos DB and then click on Data Explorer.
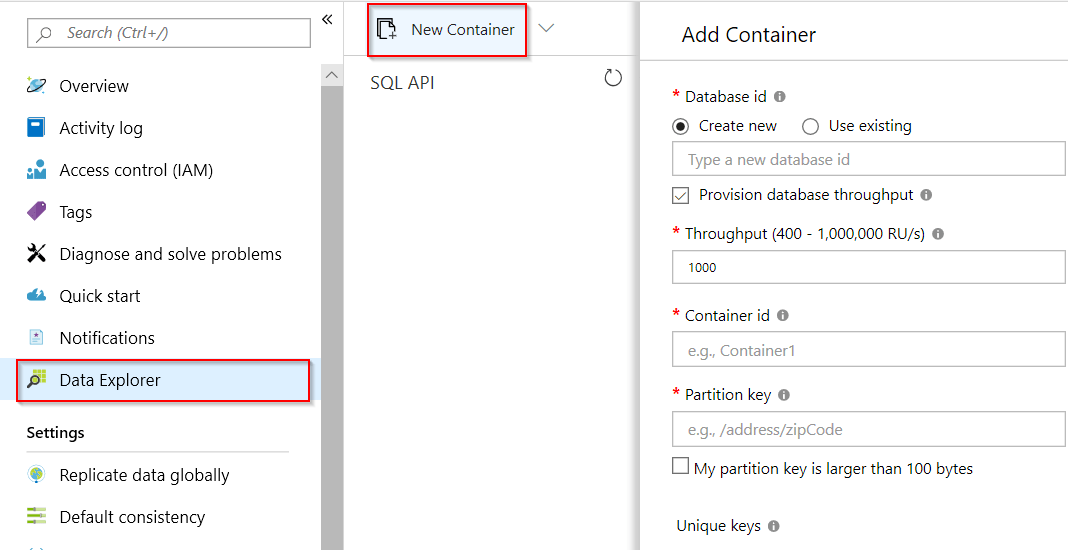
4) Click on the New Container button in the toolbar.
Read More : About azure sql Everything you need to know.
5) In the Add Container page, enter the following settings for the new container.

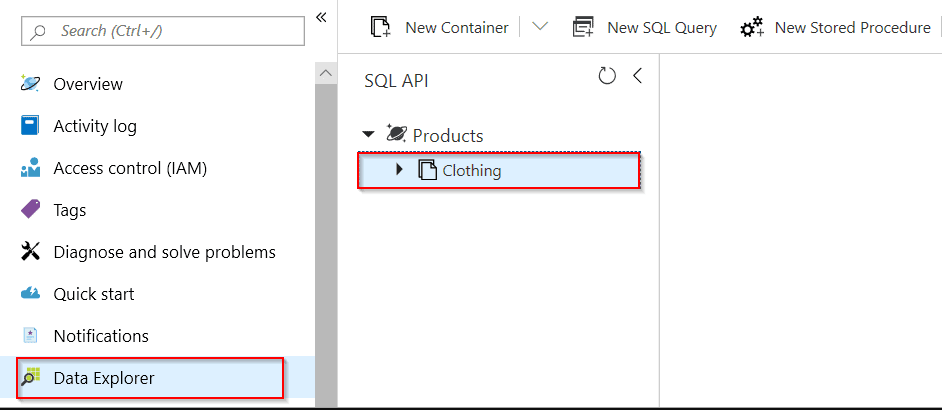
6) Accept all defaults setting as it is for any remaining options, and then click OK. Then the Data Explorer shows the new database Products and container Clothing.
Related/References
- [DP-100] Microsoft Certified Azure Data Scientist Associate: Everything you must know
- Microsoft Certified Azure Data Scientist Associate | DP 100 | Step By Step Activity Guides (Hands-On Labs)
- [AI-900] Microsoft Certified Azure AI Fundamentals Course: Everything you must know
- Microsoft Azure AI Fundamentals [AI-900]: Step By Step Activity Guides (Hands-On Labs)
Next Task For You
In our Azure Data Engineer training program, we will cover 40 Hands-On Labs. If you want to begin your journey towards becoming a Microsoft Certified: Azure Data Engineer Associate by checking our FREE CLASS.![[DP.200.201]_CU](https://k21academy.com/wp-content/uploads/2020/10/DP.200.201_CU.gif)


![AWS DevOps [DOP-C02] Professional Step By Step Activity Guides (Hands-On Labs)](https://k21academy.com/wp-content/uploads/2023/02/DOP-C02-1.png)