


![]()
In this blog, we are going to cover the steps to Migrate SQL Server To An Azure SQL Managed Instance [Offline] using a database migration service (Adventureworks2016 database ) with minimal downtime and these roles are mainly performed by the database administrator.
Topics we’ll cover :
- What Is Azure SQL Managed Instance
- What is Database Migration Service
- Register the Azure DataMigration resource provider.
- Create an instance of Azure Database Migration Service.
- Create a migration project by using Azure Database Migration Service.
- Monitor the migration.
What Is Azure SQL Managed Instance
SQL Managed Instance is a PaaS deployment option of Azure SQL. It gives you an instance of SQL Server but removes much of the overhead of managing a virtual machine. Most of the features available in SQL Server are available in SQL Managed Instance.
This option is ideal for customers who want to use instance-scoped features and want to move to Azure without re-architecting their applications. (Instance-scoped features are features that are tied to an instance of SQL Server, as opposed to features that are tied to a database in an instance of SQL Server.).
What Is Database Migration Service
Azure Database Migration Service is a tool that helps you simplify, guide, and automate your database migration to Azure. Easily migrate your data, schema, and objects from multiple sources to the cloud at scale. It supports Microsoft SQL Server, MySQL, PostgreSQL, MongoDB, and Oracle migration to Azure from on-premises and other clouds.
Register the Azure DataMigration Resource Provider
1. The first thing required to perform Migrate SQL Server To An Azure SQL Managed Instance [Offline] is to get a Trial Account of Microsoft Azure. (You get 200 USD FREE Credit from Microsoft to practice).
You can Check out our blog to know more about how to create a free Azure account.
2. After creating an azure account, open a browser and log in to the Azure portal using your Azure credentials: https://portal.azure.com.
3. Sign in to the Azure portal From the search bar select Subscriptions.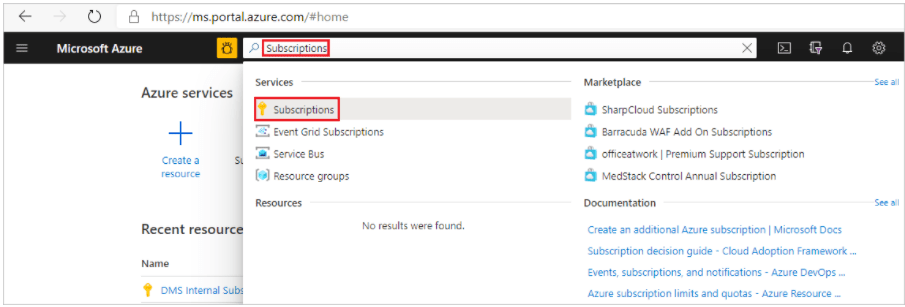
4. Choose your subscription in which you want to create the instance of azure database migration service and then select the resource providers.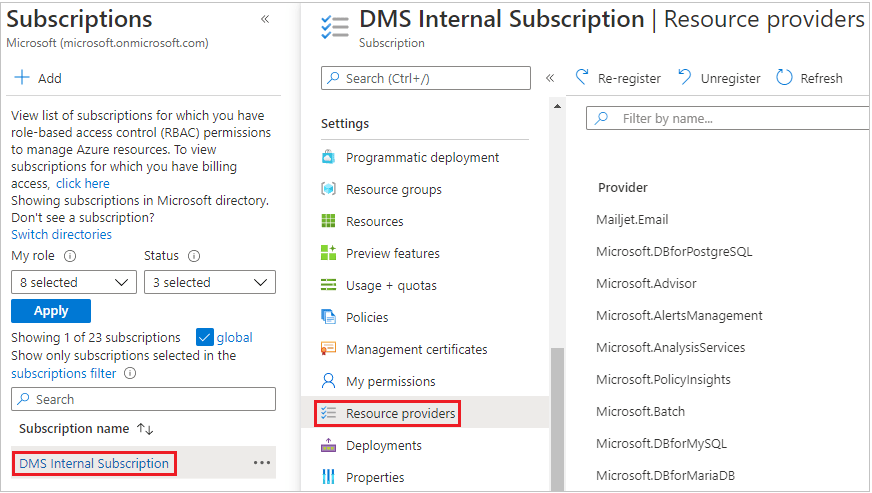
5. Click on migration and select Register for Microsoft. data migration.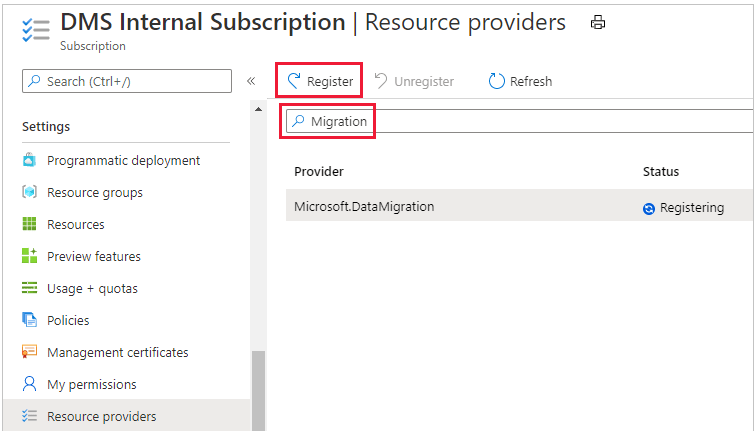
Create An Instance Of Azure Database Migration Service.
1. On the Dashboard select create the resource and search for the Azure Database Migration Service.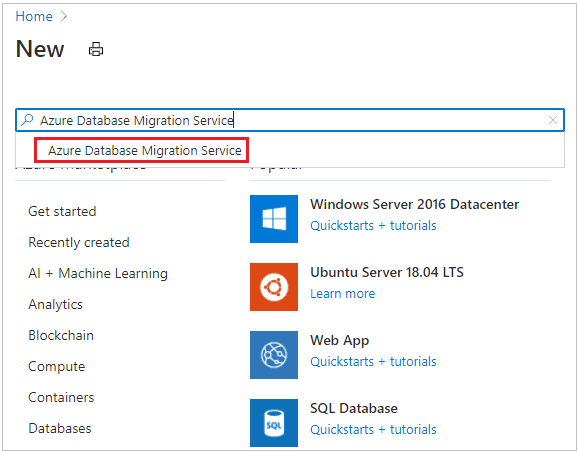
2. Click on Create Button.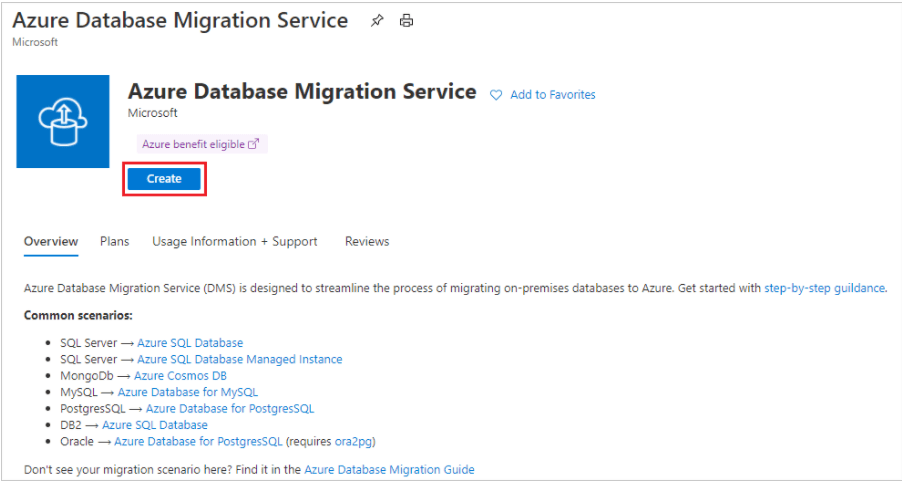
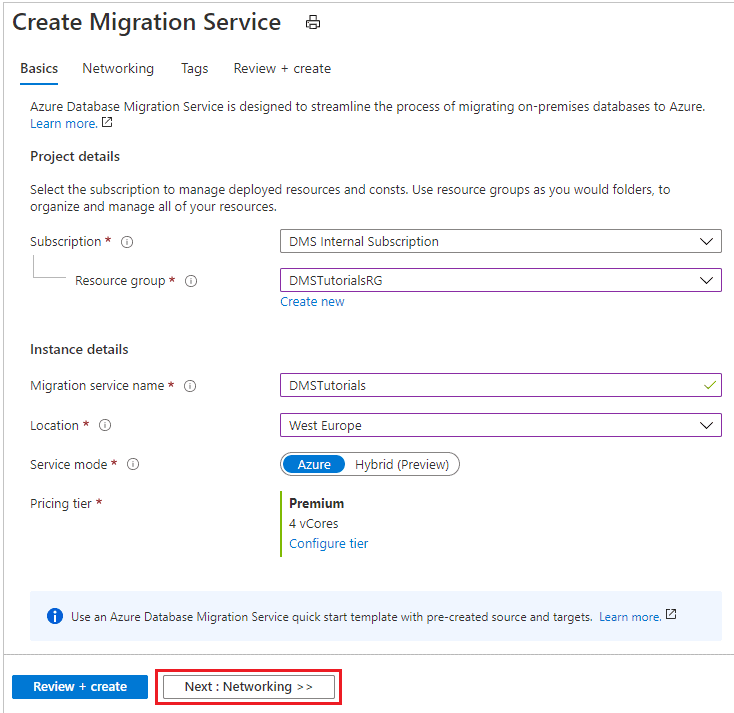
3. On the Create Migration Service basics screen:
- Select the Subscription.
- Create a new resource group or choose an existing one.
- Specify a name for the instance of the Azure Database Migration Service.
- Select the location in which you want to create the instance of Azure Database Migration Service.
- Choose Azure as the service mode.
- Select a pricing tier. And click on Networking.

4. On the Create Migration Service networking dialog: Select an existing virtual network or create a new one. It provides the Azure Database Migration Service with access to the source SQL Server and the target Azure SQL Managed Instance.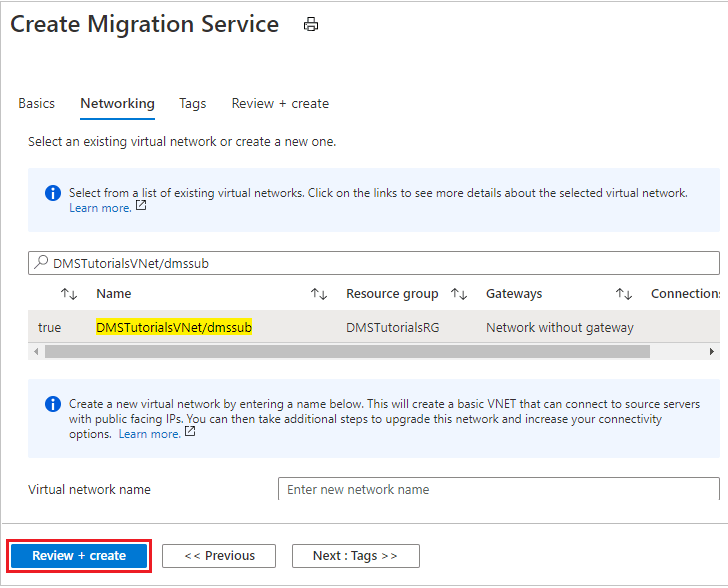
5. Then click on Review + Create to review the details and then select create to create the service to migrate SQL Server.
Create A Migration Project By Using Azure Database Migration Service.
1. In the azure portal dashboard select all services and search for the Azure Database Migration Services.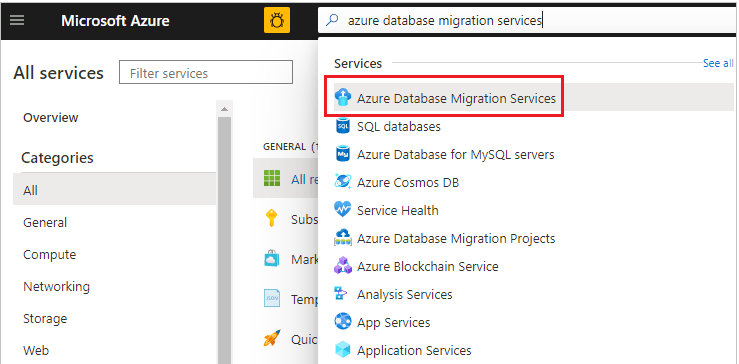
2. Select the azure database migration service that you have created.
3. Select the New Migration Project.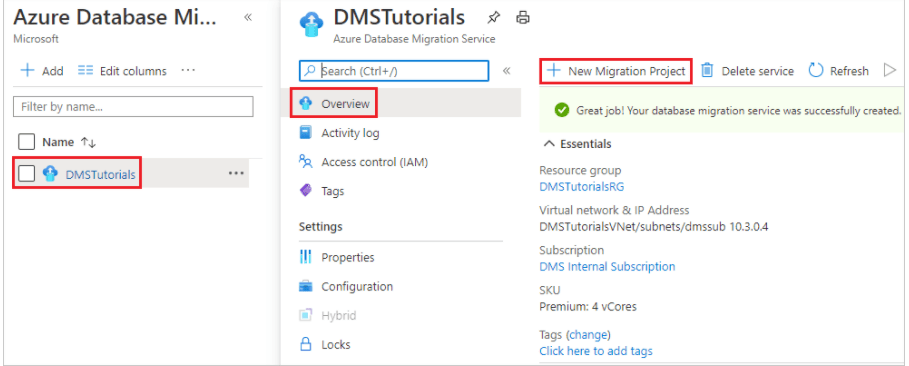
4. On the New Migration Project screen, specify a name for the project, in the Source Server Type text box, select SQL Server, in the Target Server Type text box, select Azure SQL Database Managed Instance, and then for Choose Type of Activity, select Offline data migration.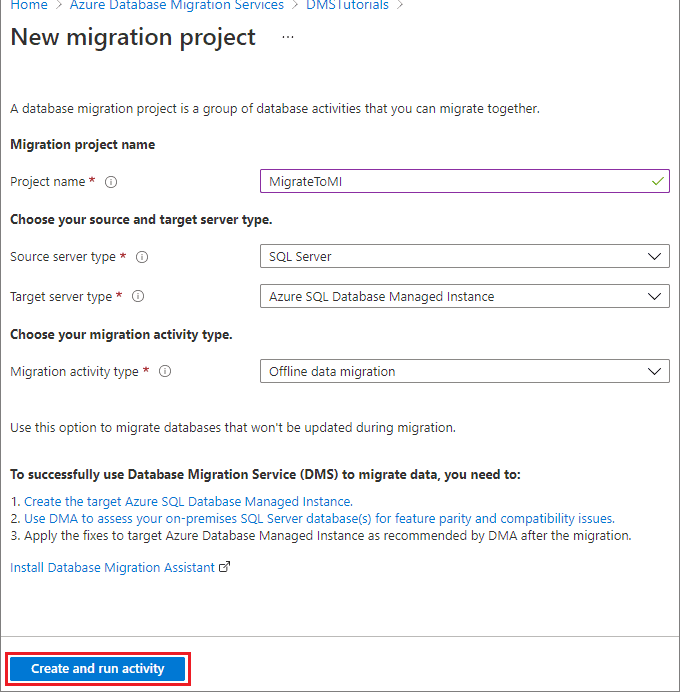
5. Then Click on the Create and Run activity button.
6. Then we have to specify the source details on the Source Screen for the source SQL Server instance (Make sure you use a fully qualified domain name you can also use the IP address for situations in which DNS name resolution isn’t possible. )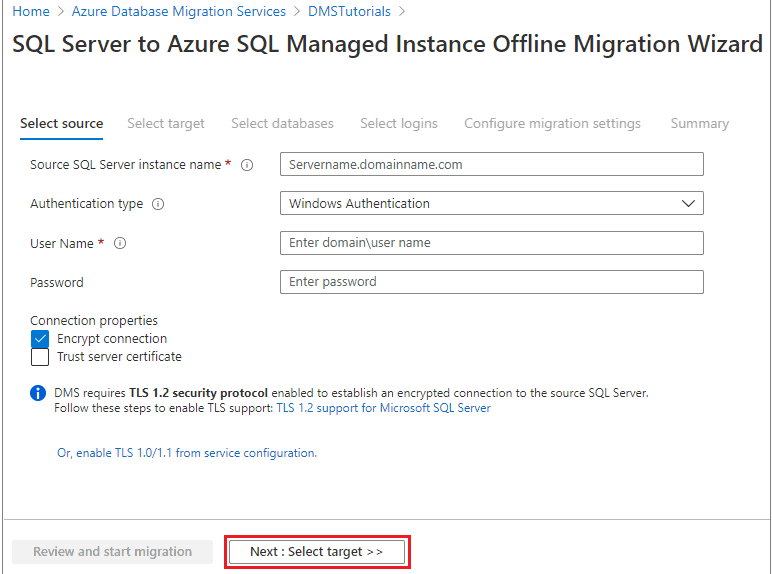
7. Then click on Select Target.
8. On the Select target pane, specify the connection details for the target, which is the pre-provisioned SQL Managed Instance to which you’re migrating the AdventureWorks2016 database.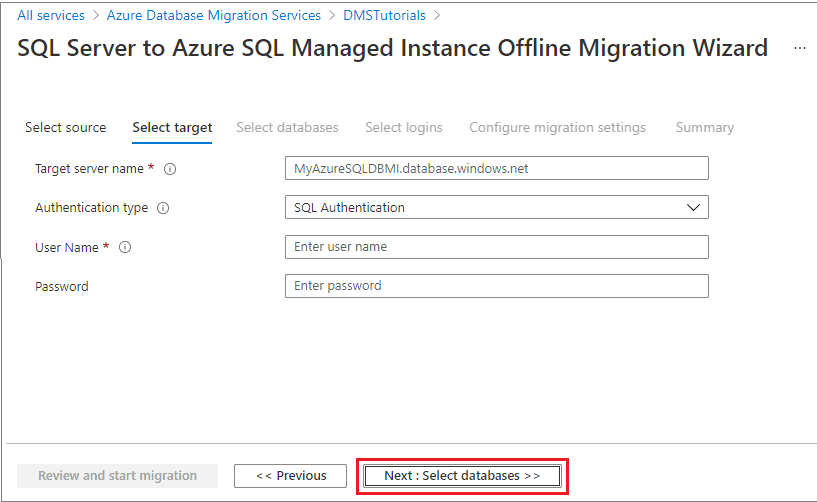
9. Select Next: Select databases. On the Select databases pane, select the AdventureWorks2016 database for migration. And move to logins.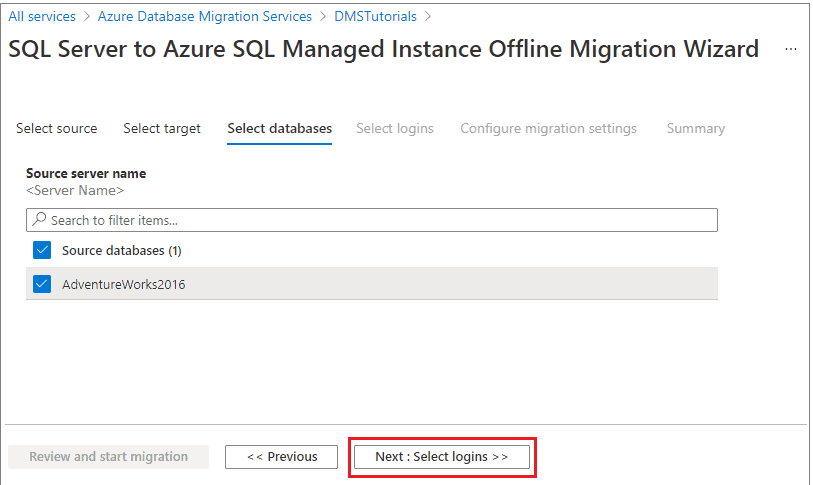
10. On the Select logins screen, select the logins that you want to migrate. And click on Next: configure migration settings.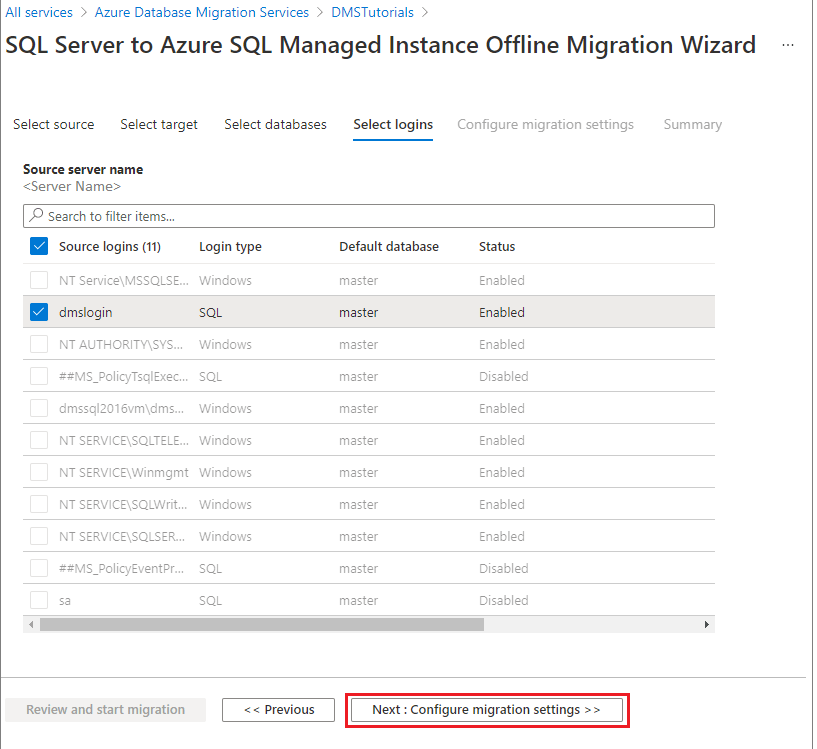
11. On the Configure migration settings screen, provide the following details: Choose source backup option, Network location share, Network location share, Password, username, storage account settings, TDE Settings. And then click on the Summary button.
12. On the summary screen in the activity name text box specify a name for the migration activity. Then Review and verify the details associated with the migration project. And finally, click on Start Migration.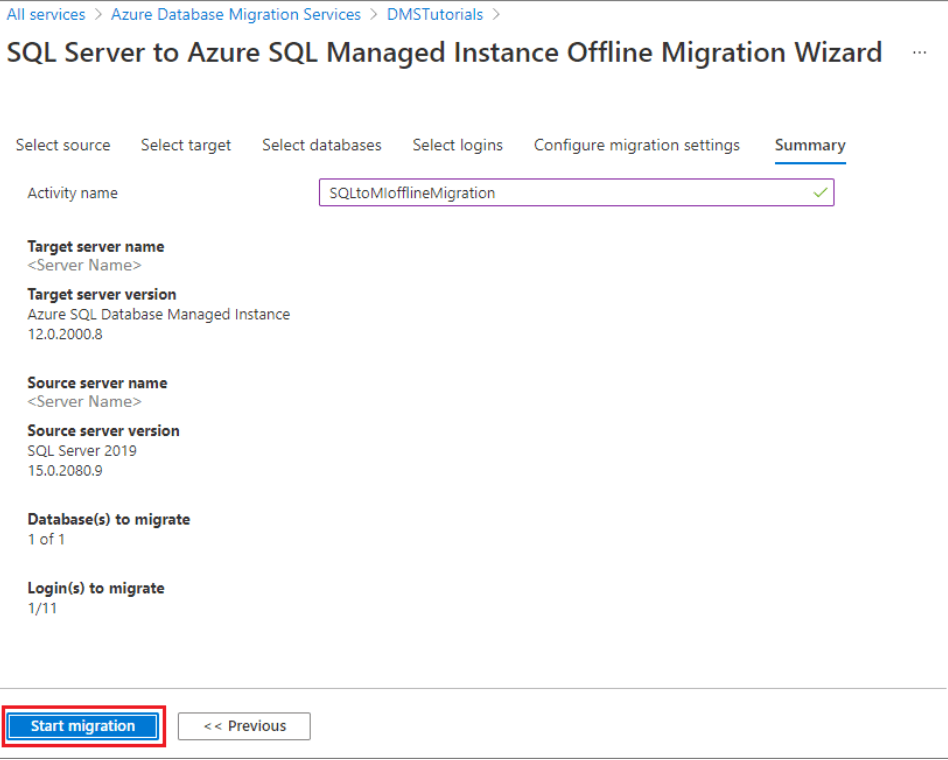
Monitor The Migration
1. In the migration activity screen, select Refresh to update the display.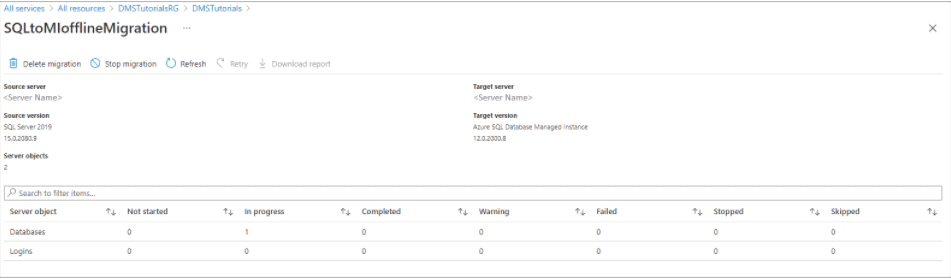
2. You can further expand the databases and logins categories to monitor the migration status of the respective server objects.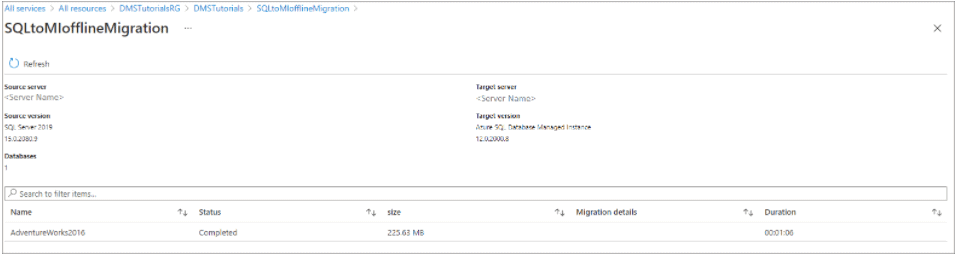
3. After the migration completes, verify the target database on the SQL Managed Instance environment.
You Should Also Try
- Exam DP-300: Microsoft Azure Database Administrator Associate
- Microsoft Certified Azure Database Administrator Associate(Hands-On Labs)
- Azure SQL Deployment Options | SQL Managed Instance | SQL Database| SQL On VM
- Migrate SQL Server To Azure SQL Database
Next Task For You
We will cover all the exam objectives, Hands-On Labs, and practice tests in our Azure Database Administrator training program. If you want to begin your journey towards becoming a Microsoft Certified: Azure Database Administrator Associate by checking our FREE CLASS.


![AWS DevOps [DOP-C02] Professional Step By Step Activity Guides (Hands-On Labs)](https://k21academy.com/wp-content/uploads/2023/02/DOP-C02-1.png)