


![]()
This blog post gives an understanding of how to deploy Azure SQL Server in using different deployment options ranging from SQL on Azure Virtual machine, SQL managed instance, and SQL Database.
Topics, we’ll cover:
- Introduction
- SQL Server on a virtual machine
- Hands-on deploy SQL Server on a virtual machine
- SQL managed instance
- Hands-on deploy SQL managed instance in Azure
- SQL database
- Hands-on deploy SQL database in Azure
Here’s the quick sneak-peak of how to start learning design and implement SQL deployments & to clear Microsoft Certified – Azure Database Administrator Associate DP-300 by doing hands-on.

Introduction
Within the Azure SQL Platform umbrella, there are various database deployment options for you to meet your needs with pay as you go, which gives you flexibility. We will also cover technical specifications for each of the options. The deployment options that we have discussed here include SQL Server on a virtual machine, Azure SQL managed instance, SQL database, Azure SQL Database elastic database pools, Azure SQL managed instance pools.
Azure SQL Server On Virtual Machine
SQL Server on Azure virtual machine is referred to as IaaS ( Infrastructure as a service ) in this we are responsible for patching and updating the Operating and SQL server and we have full access to all the capabilities of the SQL server.
Here are some considerations for deploying SQL Server on a virtual machine :
- Consider memory-optimized or storage-optimized virtual machine sizes for maximum performance.
- Use the right storage configuration and take advantage of azure blob storage read caching.
- You can integrate your database with azure blob storage and automated backups.
Key Features
- SQL Server and Operating System server access
- Windows, Linux, containers
- File stream, DTU, and simple recovery model
Also Check: Our blog post on Azure Database Migration Service.
Lab To Deploy SQL Database Server On Azure Virtual Machine
1.) Types virtual machine in the search bar and select it after selecting click on add button to add virtual machine.
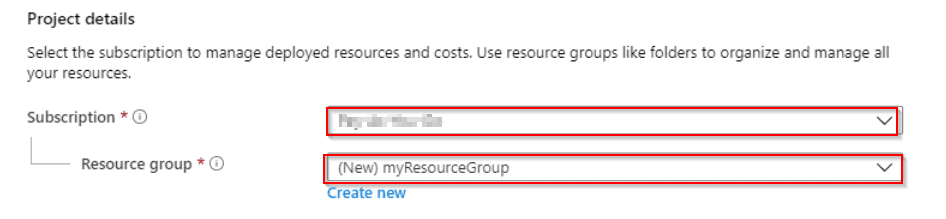
2.) In the basic Tab make sure you have selected your subscription and resource group if you do not have a resource group then create using the create-new button.
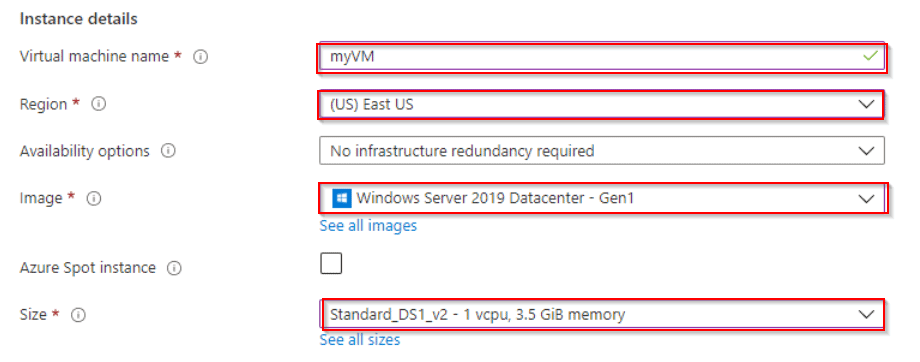
3.) Under the instance details name give the virtual machine name, region, select the image and size of the VM.
4.) Under the administrator account select and fill in the username and password for your VM.

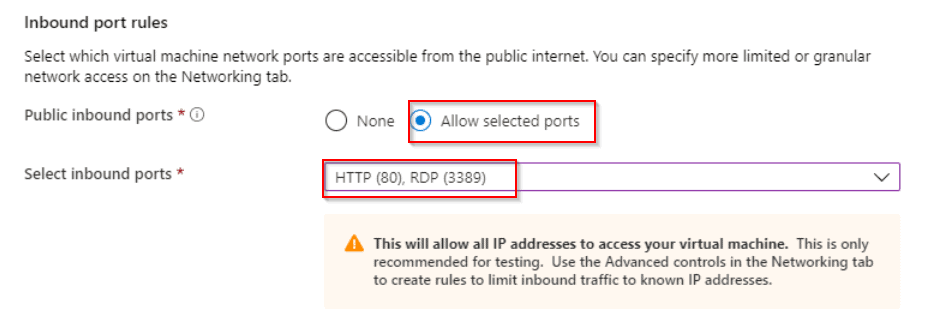
5.) In the inbound port rules select the RDP with port number 3389 and select the allowed selected ports.
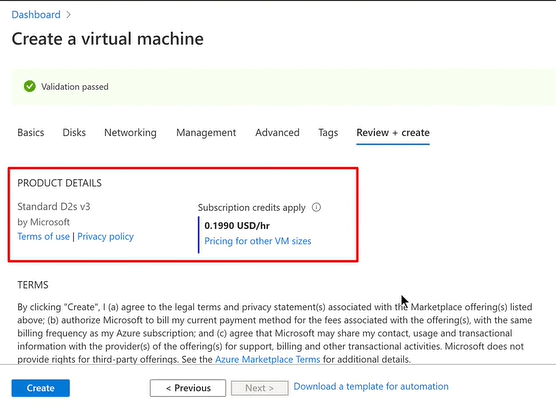
6.) Leave the remaining as it is and click on review + create. and if the validations are passed then click on create button.
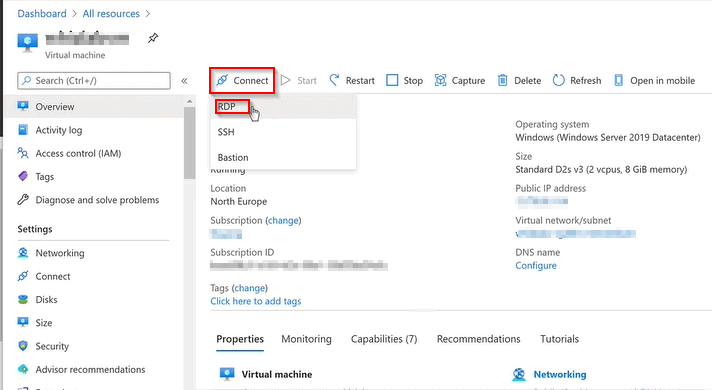
7.) After completing the deployment procedure go-to resources and on virtual machine click on connect and then select RDP option to connect with the virtual machine.
8.) After the connection of the virtual machine open the local server in the virtual machine that you have created and turn off the IE Enhanced Security Configuration Settings.
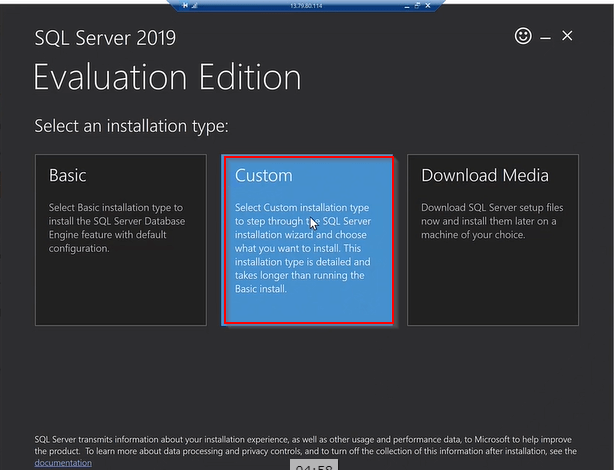
9.) Then download the SQL Server Evaluation edition 2019 and do a custom install.
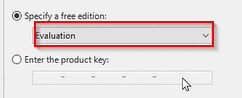
10.) On clicking the New SQL Server standalone installation or add features to an existing installation so after this you need to specify that you want to enter the product key or else you want to use 180 days trial version.

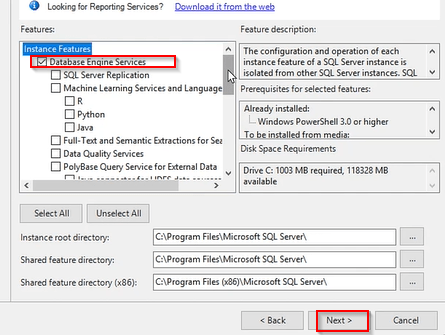
11.) When clicking next it will ask for features that you want to install then select the database engine service to run your server then next.
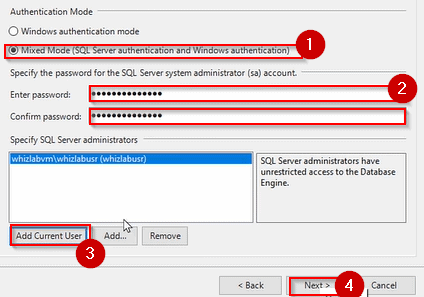
12.) In the next wizard, it will ask for the authentication mode select one as mixed-mode this mode have the same credentials that your virtual machine has already and add the current user.
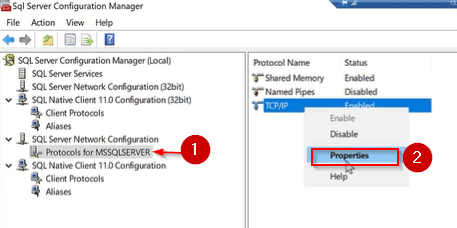
13.) Go to the SQL Server Configuration and then go to the SQL Server Network configuration then protocols for MSSQLSERVER then select TCP/IP using right click go to properties and enable it.
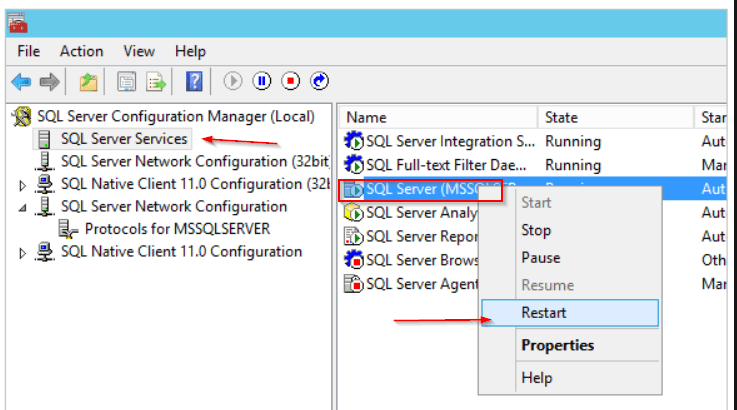
14.) After setting up the IP address go to the SQL Server Services and select your MSSQLSERVER and restart to complete the setup.
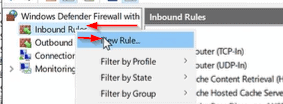
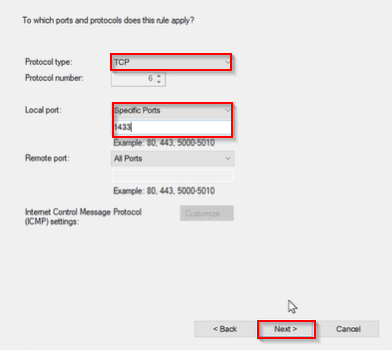
15.) After this we have to create a firewall rule where we have to set up port number is 1433 with protocol type TCP.
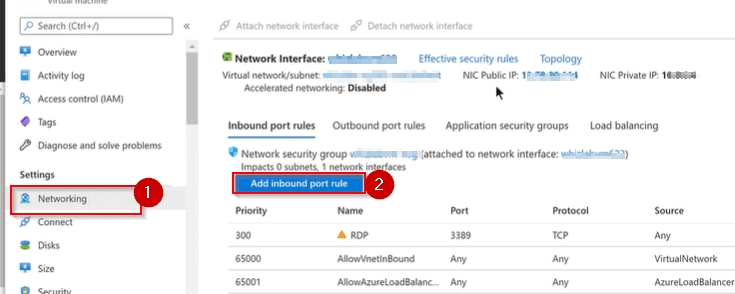
16.) Then return to your azure portal and go to the virtual machine and then click the networking settings and set a new inbound port rule with port number 1433 with protocol type TCP.
17.) Then in the final step go to the SQL server management studio and gives the server name and select authentication type as SQL server authentication and log on to your server.
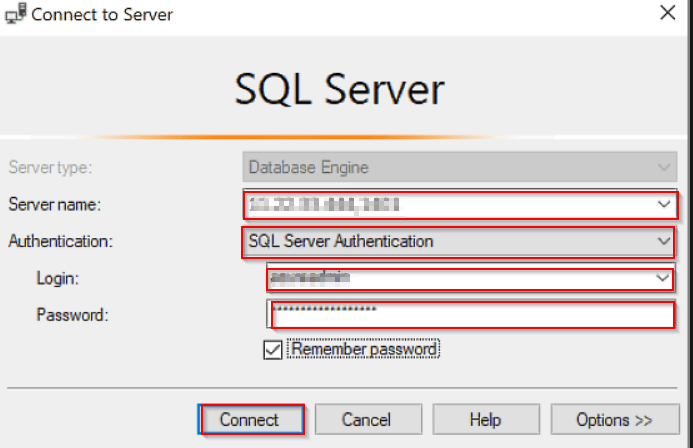
18.) Now, you are successfully login into your server here you can create your database as shown in the figure.

Azure SQL Managed Instance
In azure, it is a platform as a service deployment option. It gives the instance of the SQL server but removes the full access for managing the virtual machine SQL managed instance includes features like SQL server agent, service broker, database mail, linked servers, machine learning, and distributed transactions.
Key Features
- Single instance or instance pool
- Native virtual network support
- On-Premises identities enabled with azure ad and ad connect.
Lab To Deploy SQL Managed Instance On Azure
1.) Go to the Search panel and search for Azure SQL Managed Instance and click on create button.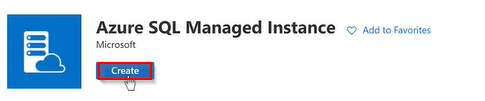
2.) After selecting the subscription and resource group you have to fill in the managed instance details like managed instance name, region and select the appropriate compute + storage solution as per your needs.
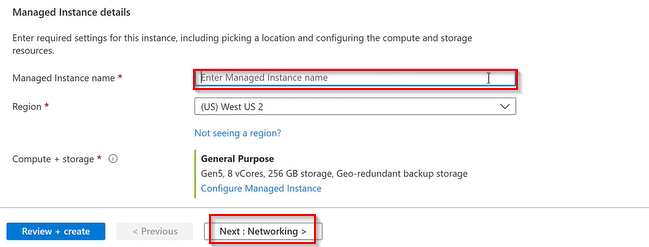
3.) And right below the managed instance details, there is an option for an administrator account in this section you have to fill in the admin login username and password.

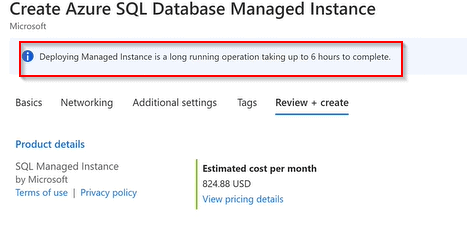
4.) Then leave the networking and additional setting (optional ) option and click on review + create and then after the validation is passed click on create button after this it takes 6 hours of deploying time.
Azure SQL Database
The SQL Database is a platform as a service option in azure SQL that encapsulates both the operating system and the SQL server instance away from the users. This deployment option is very simple you just get a database to deploy applications. That supports all the scenarios that require a vast amount of storage and providing autoscaling for the unpredictable workloads. It also provides the highest availability SLA in the industry.
Key Feature
- Single database or elastic pool
- Hyperscale storage
- Serverless computing
- High availability with AZ isolation
Lab To Deploy SQL Database On Azure
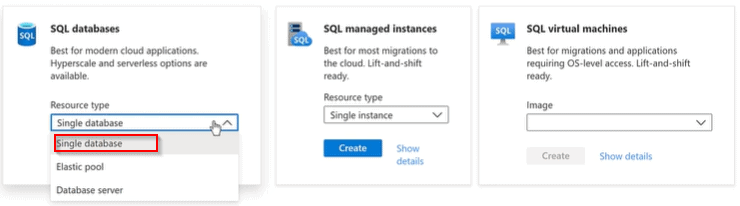
1.) Type Azure SQL in the search bar and select it and click on create button.
2.) After Clicking on create button select the SQL databases with resource type as a single database.
3.) Then after click on create button fill the database name and server detail in the database details section and in the configure section we can configure our storage and compute power uses it depends on your usages.

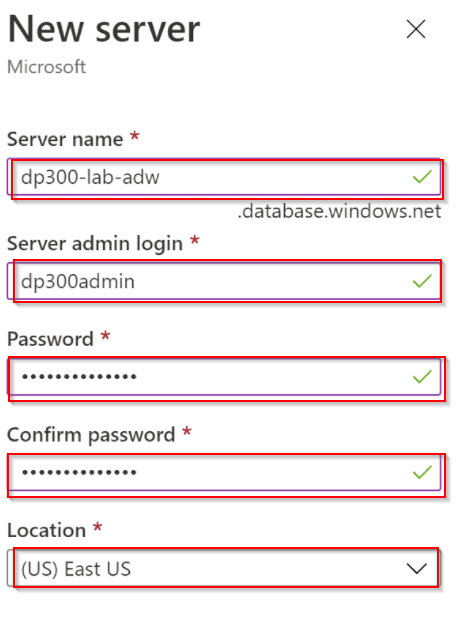
4.) If you do not have a server already created with you then click on create a new button and fill the server name and password in the new wizard.
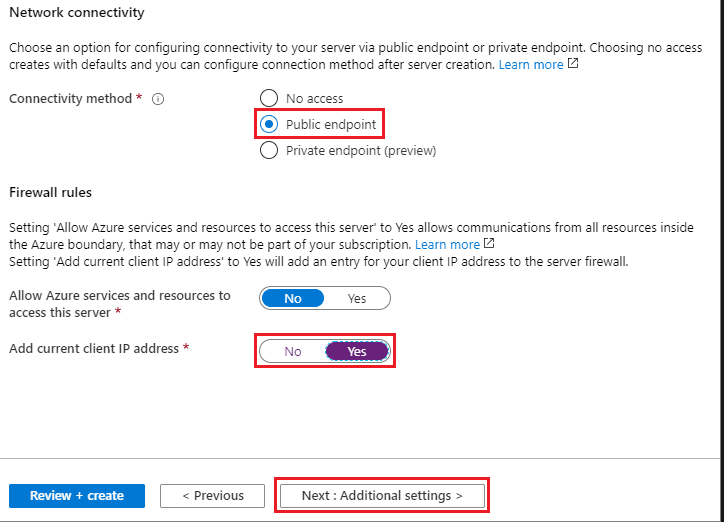
5.) Then in the networking section click on the public endpoint as your connectivity method and also enable your current client IP address for the firewall rules.
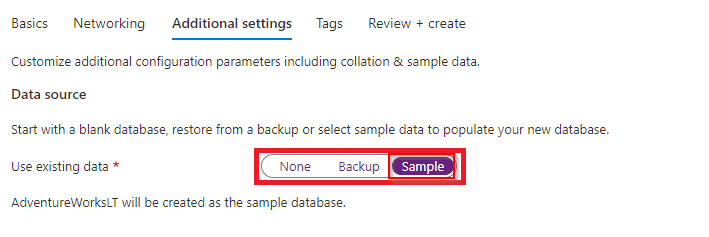
6.) In the additional settings tab in the data source wizard select use existing data as simple, it will give you the readymade sample data to perform your queries.
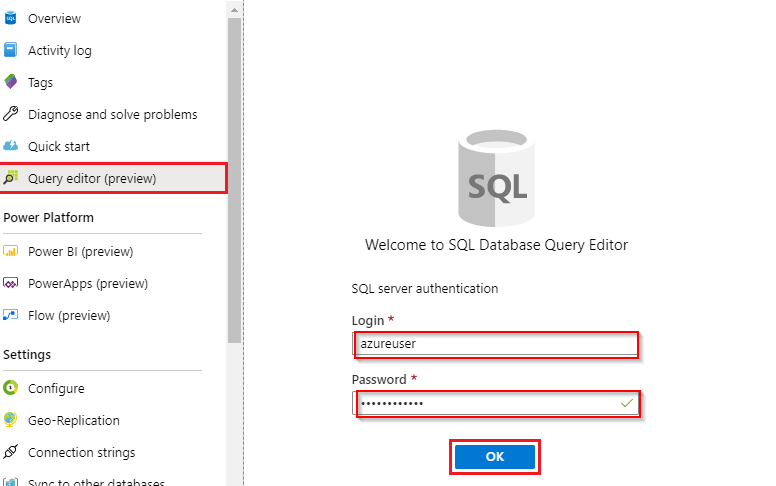
6.) Once your database is created then go and click the database that you have created and select the query editor option after clicking it, it will ask for username and password enter the credentials into it. And you can use other tools to run your database like:- SQL Server management studio.
Related/References
- Azure Data Science And Data Engineering Certifications: DP-900 vs DP-100 vs DP-200/DP-201
- Exam DP-300: Microsoft Azure Database Administrator Associate
- Exam DP-203: Data Engineering on Microsoft Azure
Next Task For You
In our Azure Database Administrator training program, we will cover all the exam objectives, 24 Hands-On Labs, and practice tests. If you want to begin your journey towards becoming a Microsoft Certified: Azure Database Administrator Associate by checking our FREE CLASS.


![AWS DevOps [DOP-C02] Professional Step By Step Activity Guides (Hands-On Labs)](https://k21academy.com/wp-content/uploads/2023/02/DOP-C02-1.png)