


![]()
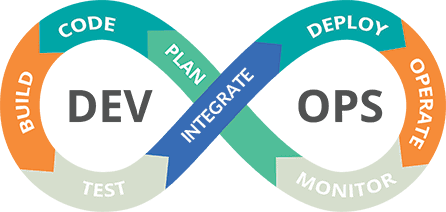
Software Companies run on Code. The primary motivation behind the code is communication. For example, the developer who develops code might in the future wants to pursue, comprehend and alter the code, maybe to add new features. Hence software businesses need to deliver those changes to the users consistently. But making changes in the code and integrating with existing code is something Rocket Science, so to ease the process, Continuous Integration and Continuous Deployment come into the picture. Enabling Azure CI CD is like building a better mousetrap.
Topic covered in the following blog:
- What is Continuous Integration?
- What is Continuous Deployment?
- What is Azure DevOps?
- What is Azure Pipelines?
- CI-CD Pipelines with Azure DevOps
Before building our own CI-CD Pipeline, let’s have insight into the fundamental terms.
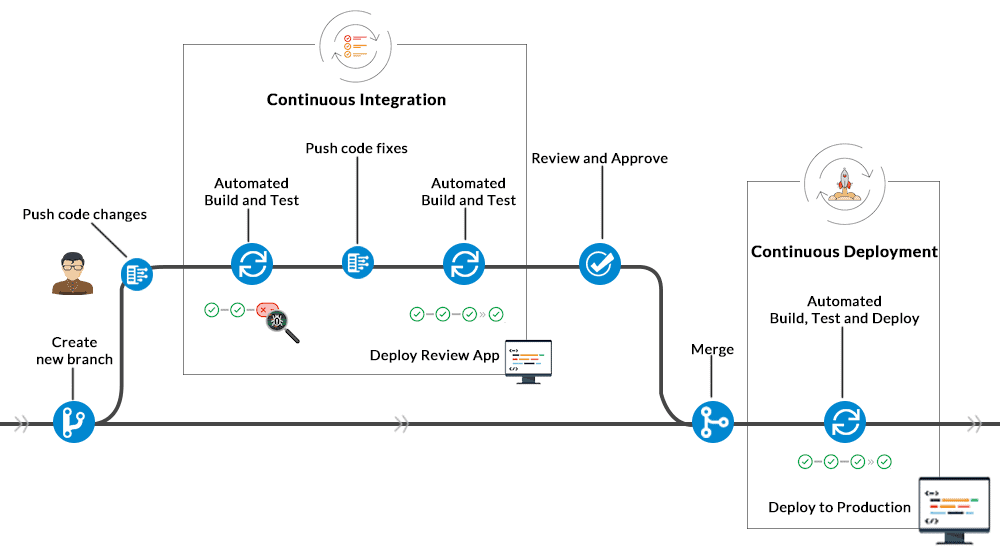
What is Continuous Integration (CI)?
Code Integration has always been a costly process both in terms of time and money. Manually making changes to the code and deploying each time is like reinventing the wheel again and again. Therefore comes the CI to save you from thrash.
Continuous Integration is the process that helps developers to deliver changes in the code frequently without worrying them to integrate with existing code. CI makes it possible to streamline the code and automate the testing of the code continuously. Consequently, consistency is achieved in the Integration process leading to better software usability and collaboration.
What is Continuous Deployment (CD)?
As CI is to build and run the test, the CD is to deploy and deliver.
Continuous Deployment is the next step after Continuous Integration. The ultimate goal for the software companies should be Continuous Deployment as it will help to pass the code changes automatically to the production line or development environment. The changes are run through the CI/CD pipeline. CD ensures that applications are deployed automatically without human interventions.
What is Azure DevOps?
Azure DevOps provides facilities to plan, build, create CI-CD, process, monitor, operate, and gain feedback on applications. Azure DevOps helps an organization deliver services at a quicker pace; not only this, it even ensures customer satisfaction and provides a competitive edge. Security is the main thing that needs to leverage in today’s scenario, and Azure DevOps rightly performs all the security checks early throughout the SDLC.
What is Azure CI CD Pipelines?
CI-CD Pipelines are part of the bigger picture of the DevOps framework, where continuous Integration and Continuous Deployment work together. Software companies are shifting their goals to ensure that bugs and error are caught beforehand in the delivery process. So, CI-CD work together to make this process happen quickly and smoothly.
Azure CI CD Pipelines is automated pipelines that help depict the SDLC process, build and test code, integrate code with the codebase, release strategies, automate delivery and deployment of the application. In short, It allows companies to deliver better software that too efficiently and effectively.
Azure CI CD Pipeline with DevOps Starter
In the following hands-on lab, we will create an Azure CI CD pipeline with Azure DevOps Starter.
Prerequisites – Before following this guide, make sure that you have an active Microsoft Azure account. If you don’t have one, create a FREE trial Azure account.
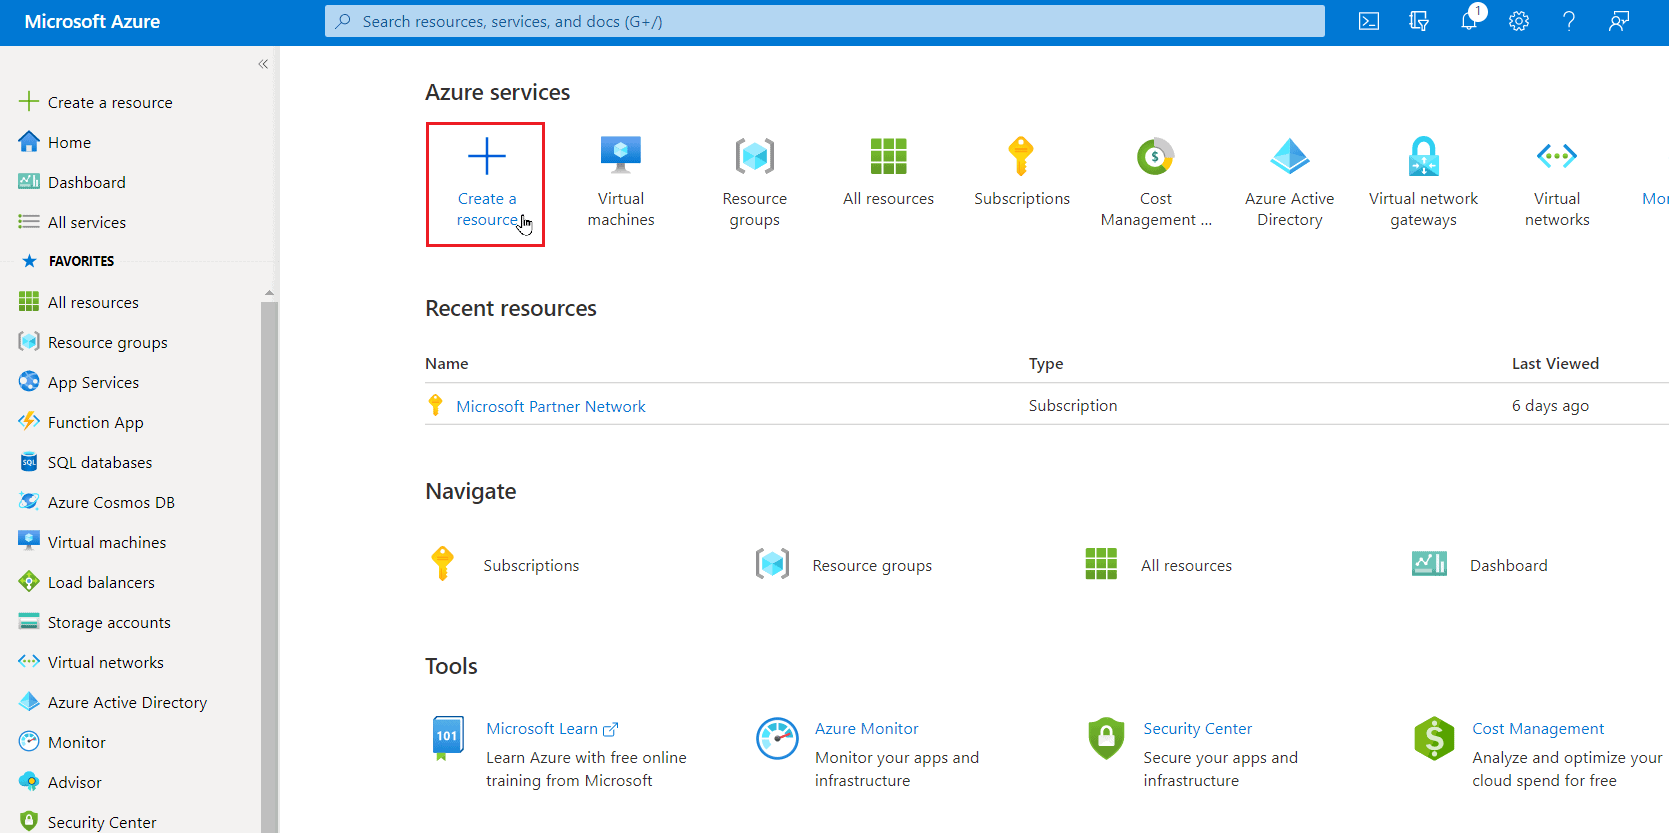
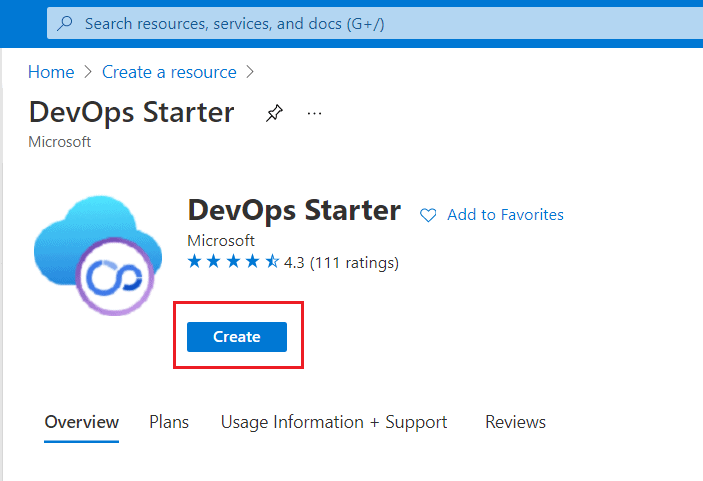
Step 1) The next step is to click on the + Create a Resource button from the home page of Azure Portal and search for DevOps Starter.
Step 2) So, to get started with DevOps, select the DevOps Starter and click on Create.
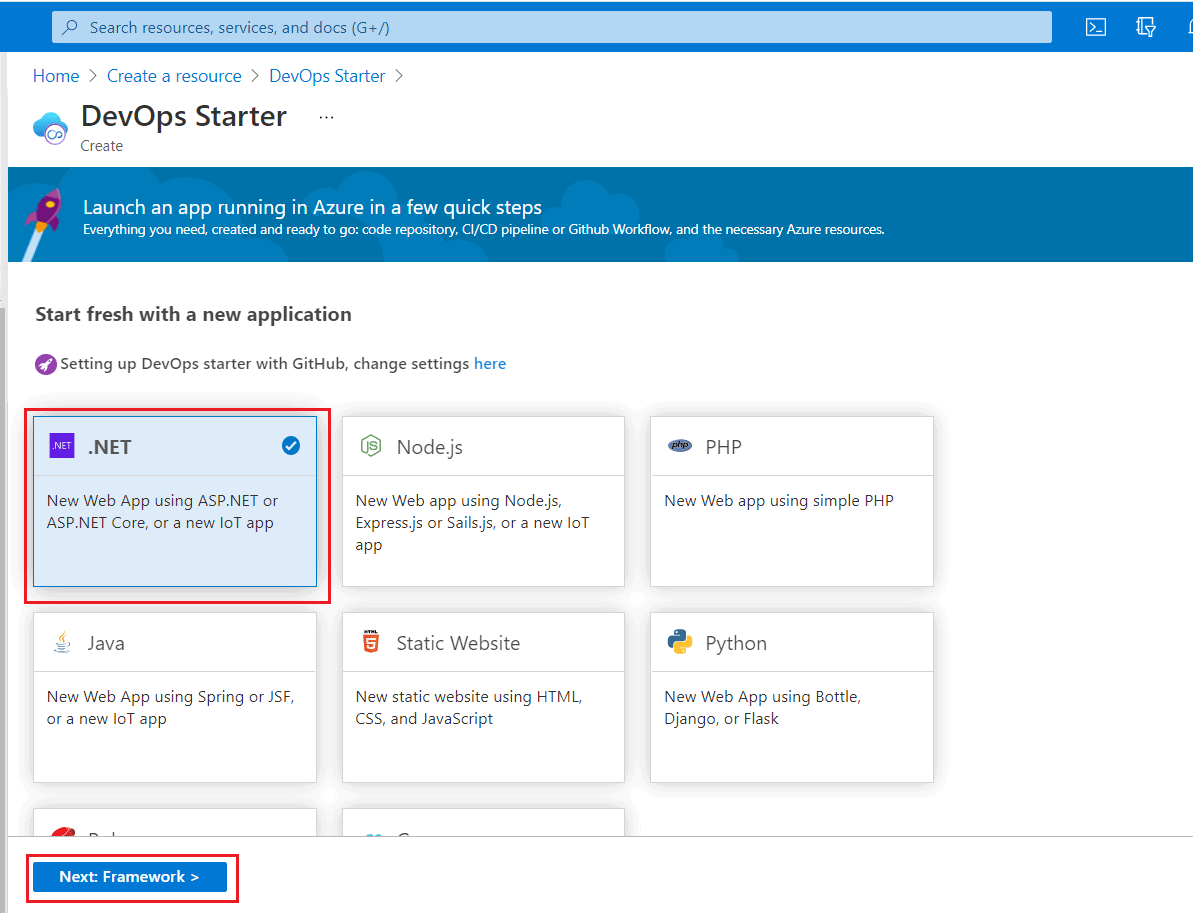
Step 3) Since we are deploying a .NET application, select .NET as shown in the image below.
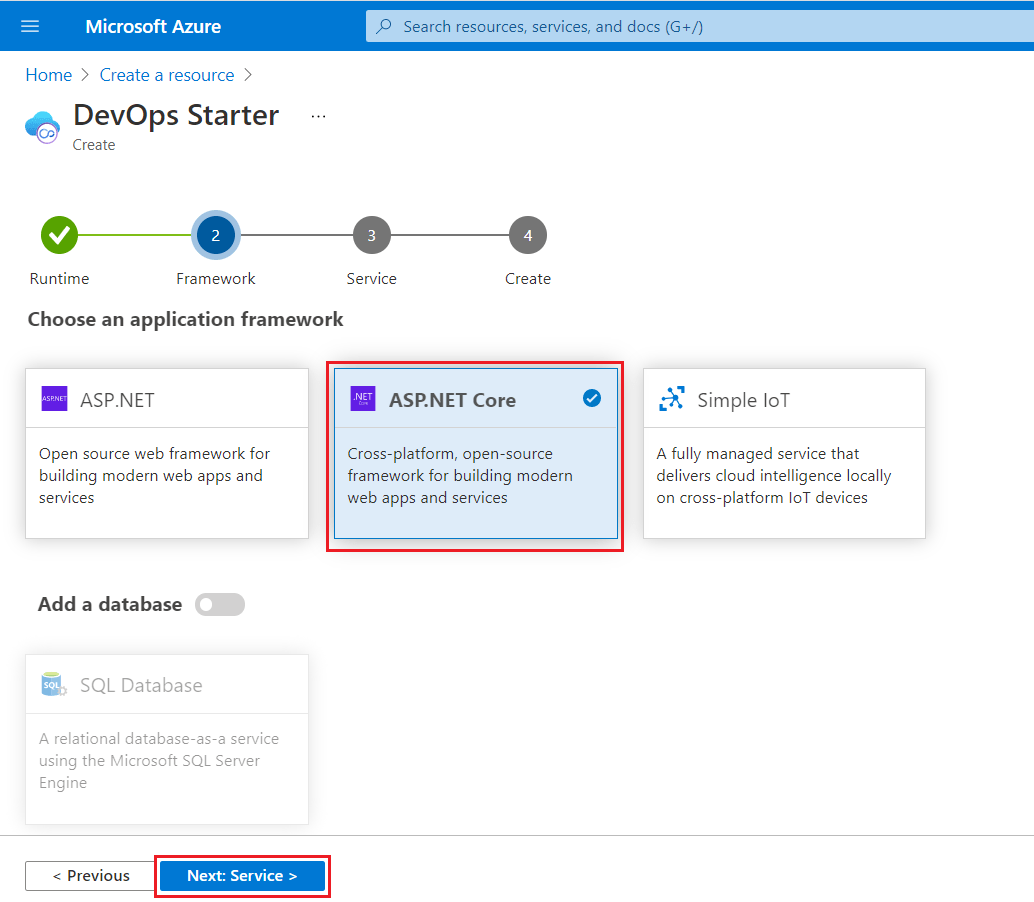
Step 4) The sample .NET application consists of either the Open-source ASP.NET framework or cross-platform ASP.NET Core framework. For our demo, we will be opting for ASP.NET Core and Database(Add a Database) can be added as an option.
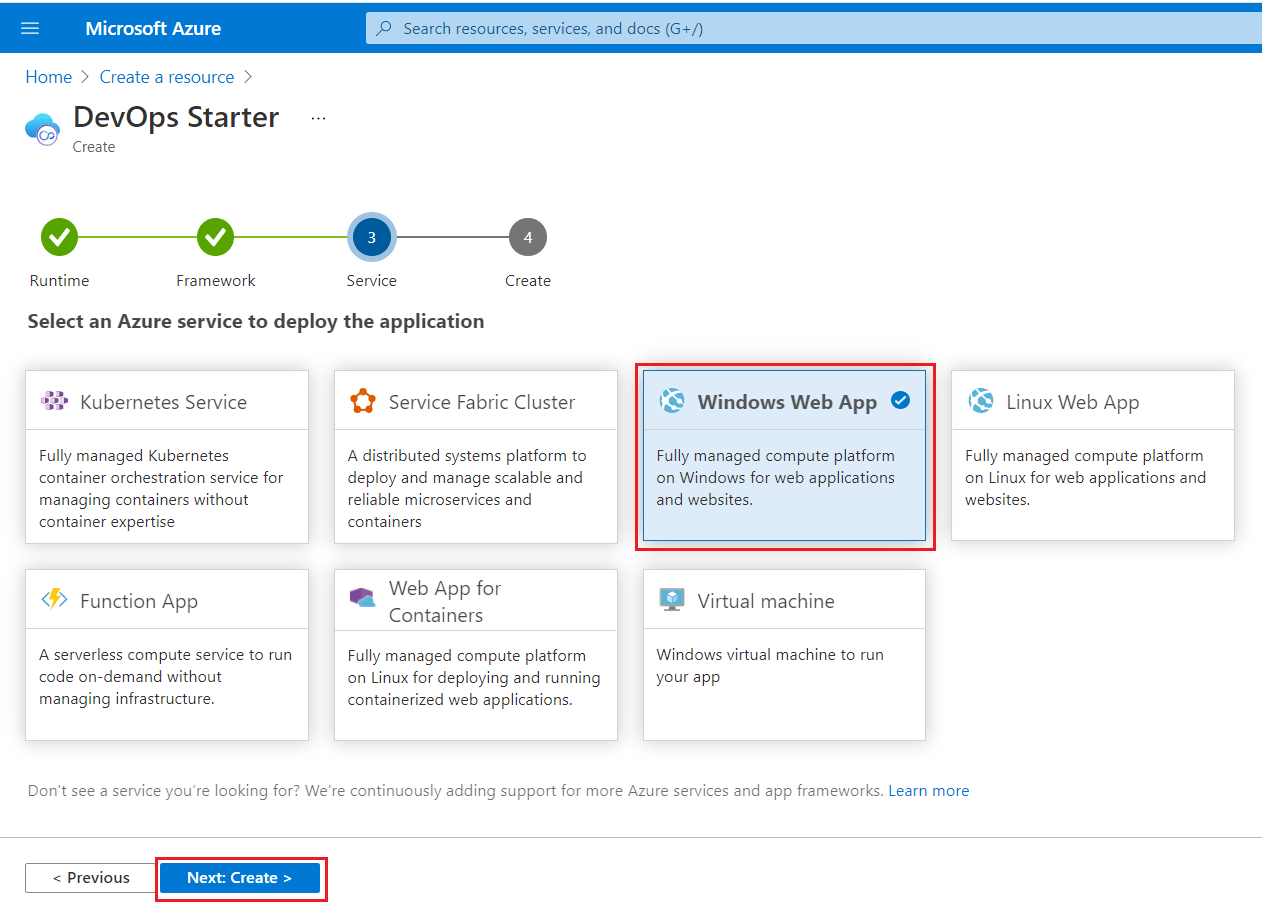
Step 5) By default, your application is deployed on Windows Web App. However, you can also select a virtual machine. Click Next to proceed.
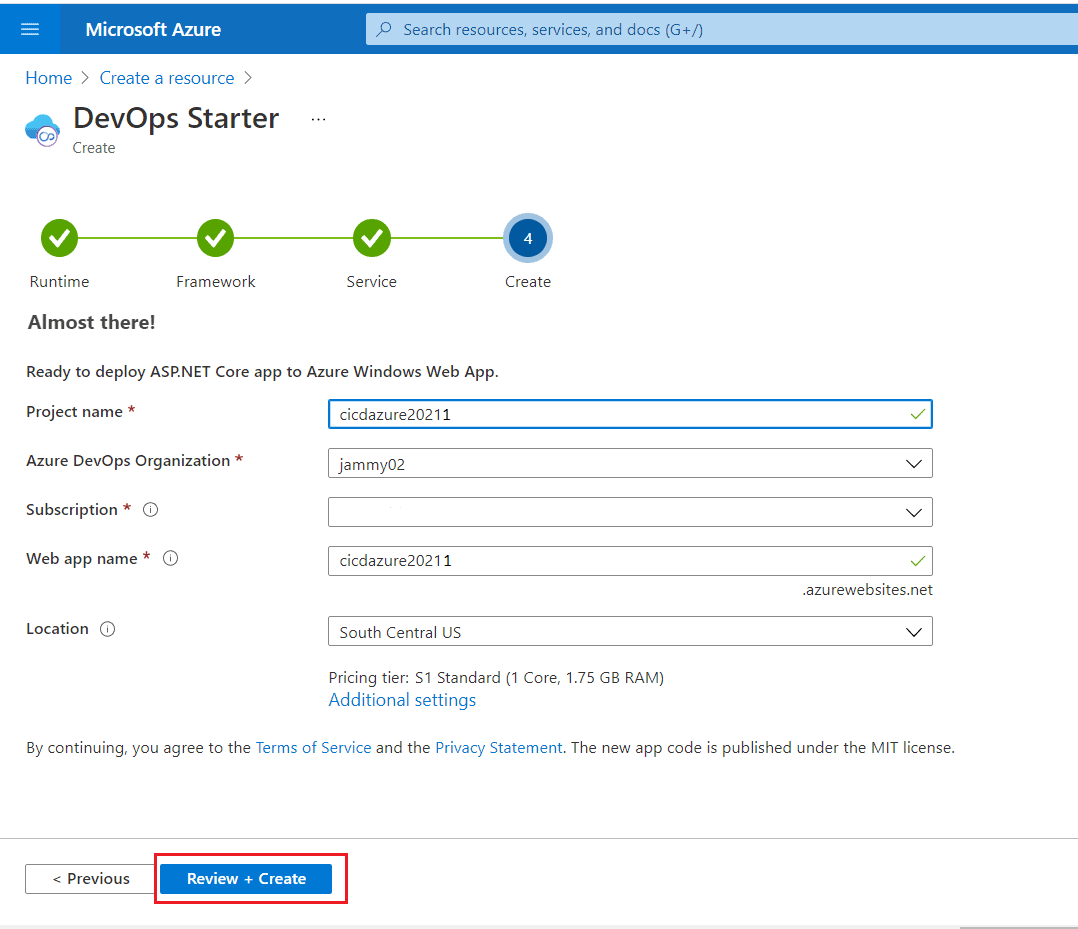
Step 6) The next screen will ask you for some info on the Project name, Azure DevOps Organization, Subscription, and Web app name.
Note: Web app name should be unique in Azure. Click on Done to start the deployment.
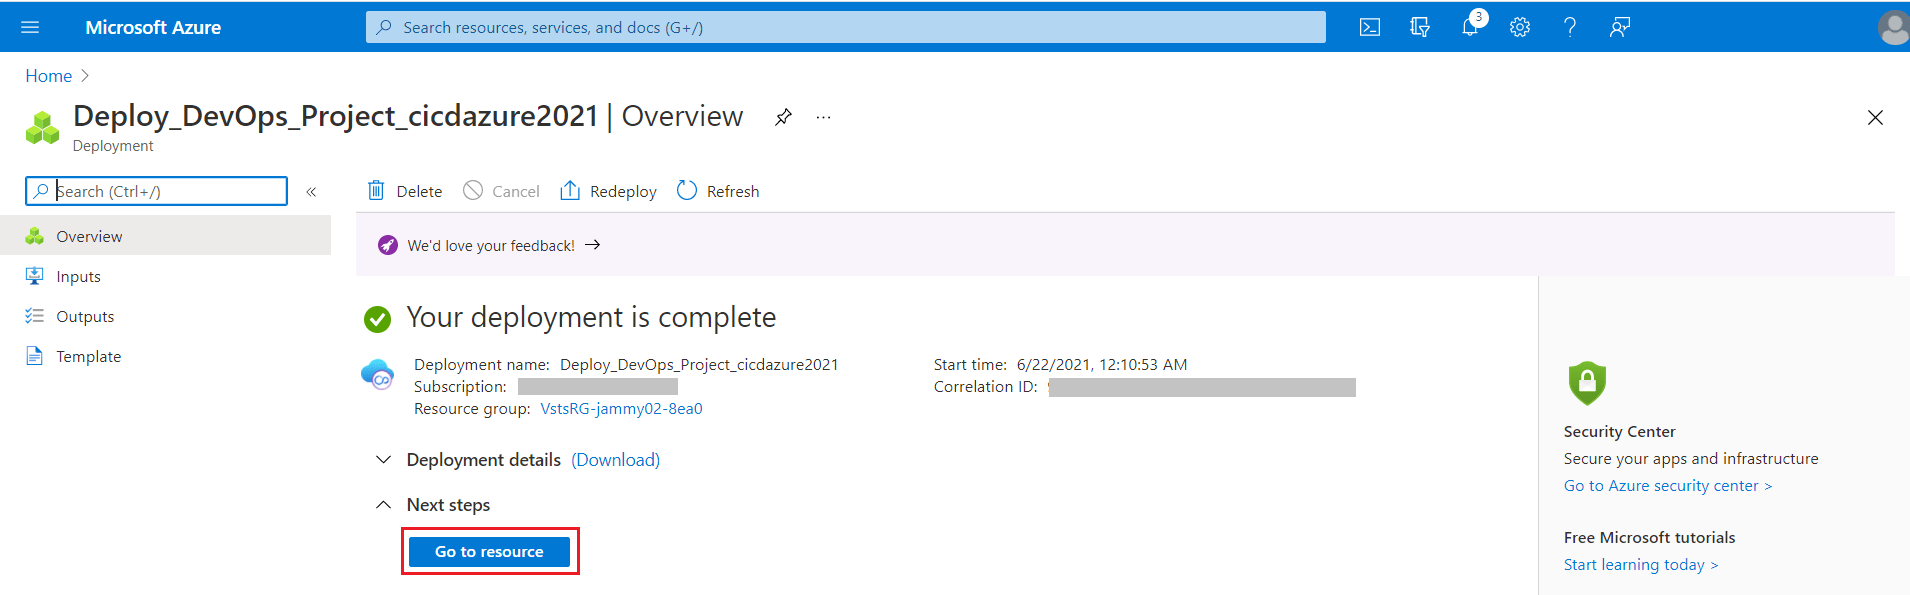
Step 7) Once the deployment is complemented, select Go to resource to view it.
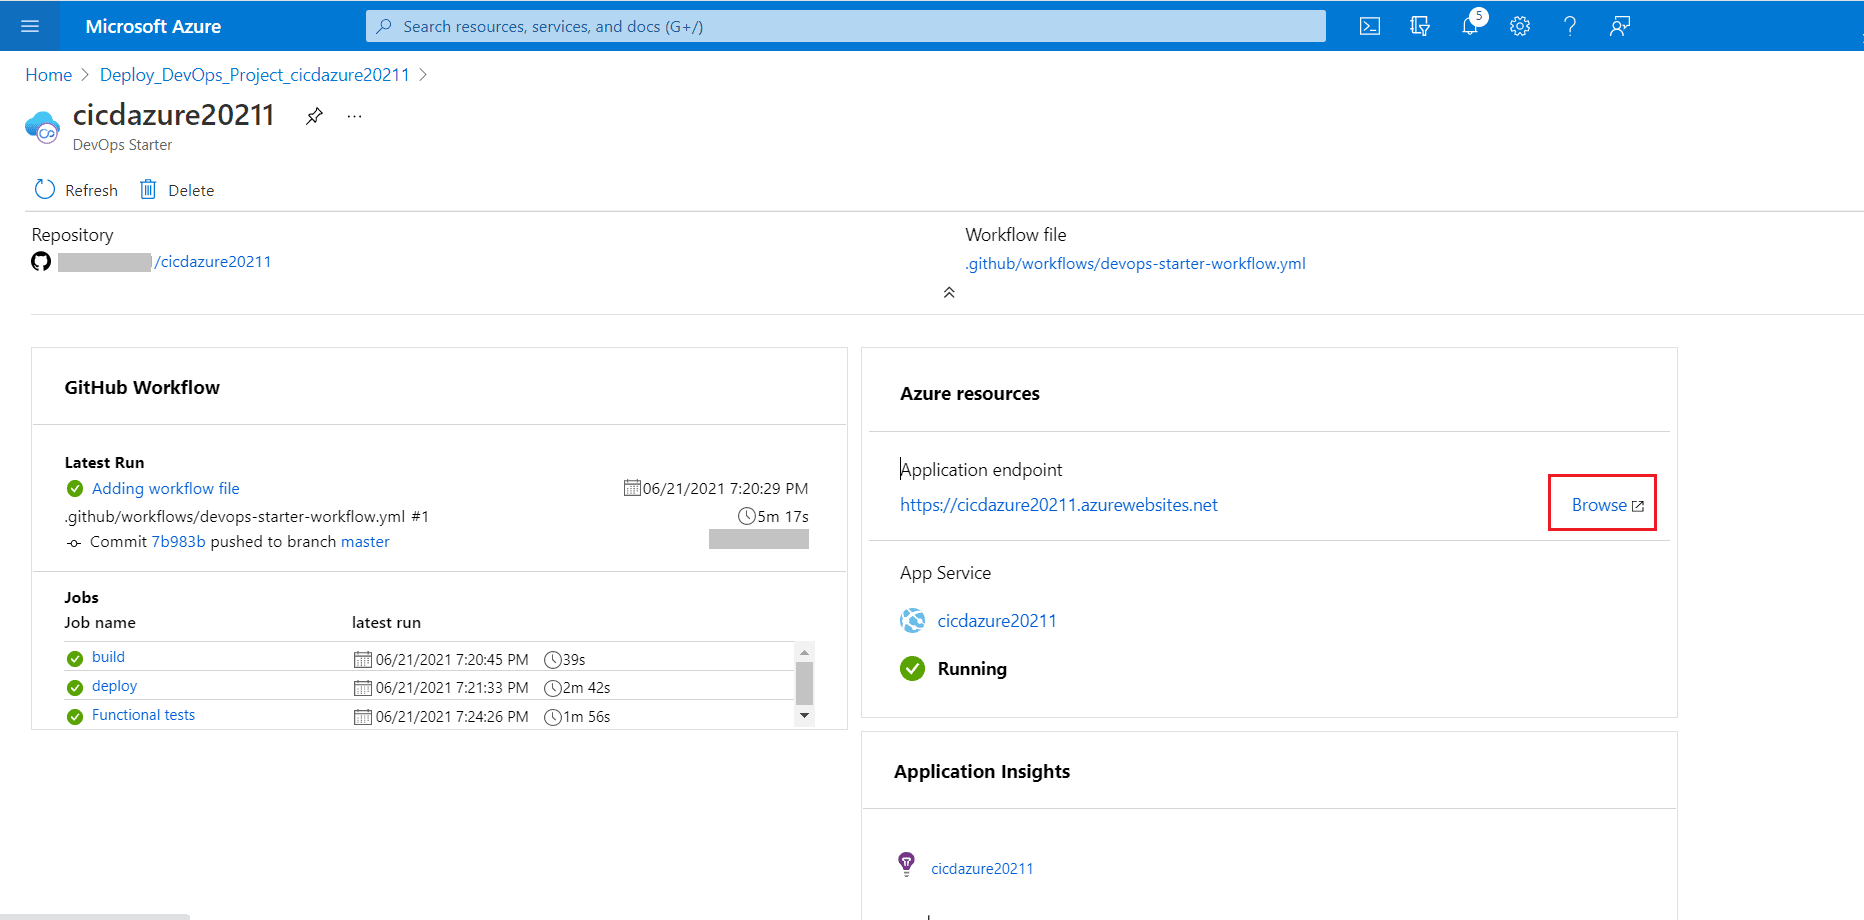
Step 8) Voila! We have created the Azure CI CD Pipeline, and the resources will take some time to load. So, the project also makes –
-
- A team project with a sample .NET code repository.
- Azure Web App.
- A Build Pipeline to compile and test the app.
- And also a Release Pipeline to deploy the application.
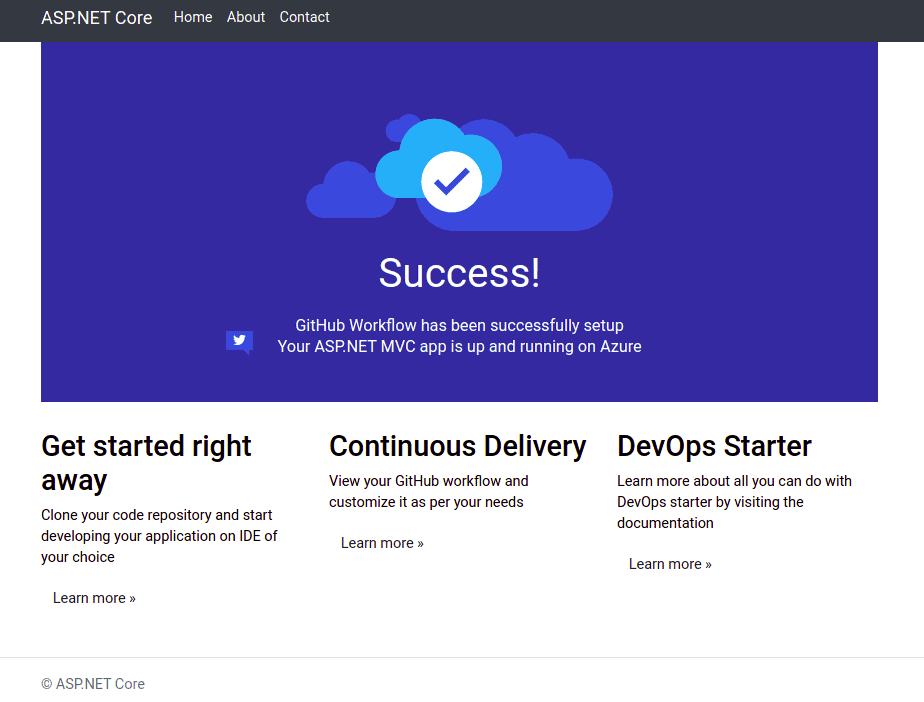
Step 9) Finally, you can collaborate with your team on the ASP .NET Core App with an automated CI/CD process.
On the right side of the Azure resources, you will find all your applications. You can browse your application from there, and you should be able to see the below screen.
Conclusion
Thanks for reading the article!
Hence, enabling Azure CI CD is like catching low hanging fruits. It eases the task of developers and allows them to make frequent changes in the code and quickly deploy them automatically to the codebase. Therefore the whole CI-CD process can be thought of as a set of principles, services, practices and culture working integrated to deliver the best service and software results.
Related/References
- [DOFD] DevOps Foundation Certification Exam: Everything You Need To Know
- What Is DevOps | DevOps Principles | Advantages Of DevOps | Why DevOps?
- Agile Methodology and DevOps | DevOps and Agile Relationship
- DevOps Best Practices
- [AZ-400] Microsoft Azure DevOps Certification Exam: Everything You Need To Know
Next Task For You
Begin your journey toward Mastering Azure Cloud and landing high-paying jobs. Just click on the register now button on the below image to register for a Free Class on Mastering Azure Cloud: How to Build In-Demand Skills and Land High-Paying Jobs. This class will help you understand better, so you can choose the right career path and get a higher paying job.


![AWS DevOps [DOP-C02] Professional Step By Step Activity Guides (Hands-On Labs)](https://k21academy.com/wp-content/uploads/2023/02/DOP-C02-1.png)