


![]()
In this Post, We’ll be exploring JCS (Java Cloud Service). This post is for the beginners who have just started their journey in JCS and covers some of the very basic topics like Overview, Features, Software release & Creating JCS Instance on Cloud.
What is JAVA Cloud Service (JCS)
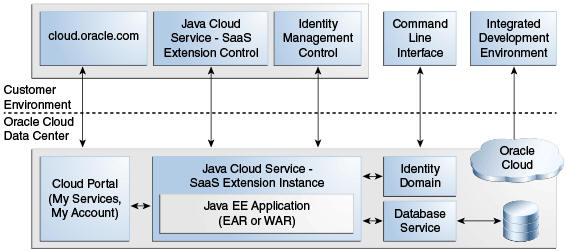
Oracle Java Cloud Service is a part of the platform service offerings (PaaS) in Oracle Cloud. Powered by Oracle WebLogic Server, it provides a platform on top of Oracle’s enterprise-grade cloud infrastructure for developing and deploying new or existing Java EE applications. All Oracle Java Cloud Service instances are integrated with one or more database deployments in Oracle Database Cloud Service. You can also use Oracle Database Exadata Cloud Service.
Software Releases
The Oracle Latest WebLogic Server software releases and versions supported at the service levels
- Oracle WebLogic Server 12c (12.2.1) with Java Required Files 12c (12.2.1) This is the foundation for Oracle Fusion Middleware 12c (12.2.1). WebLogic Server 12c (12.2.1) is Java EE 7 compatible.
Features and Uses of Java Cloud Service(JCS)
- With the use of Oracle Java Cloud Service rapidly provision an application environment with Oracle WebLogic Server as the application container, Oracle Coherence as a caching and data grid tier, and Oracle Traffic Director as the software load balancer—all on top of infrastructure provided by Oracle Compute Cloud Service.
- All nodes in your WebLogic Server domain and cluster are started automatically
- you can begin to deploy applications to your service instance. You can quickly go from zero to HelloWorld!
JCS builds on three other Oracle Public Cloud Services that we need to be aware of:
- DBaaS (Database)
- Compute Cloud Service
- Storage Cloud Service.
Prerequisites
If you use a QuickStart template to create an Oracle Java Cloud Service instance, you do not need to fulfill any prerequisites. But in order to create a custom service instance, you must first provision an Oracle Database Cloud Service deployment. You may also need to satisfy additional prerequisites depending on your requirements.
Various Methods for Creating Oracle JCS Instances
There are several ways in which you can create an Oracle Java Cloud Service instance, depending on your requirements and experience level.
1. using a QuickStart template: The fastest and easiest way to create a service instance is by using a QuickStart template. This method also creates the required Oracle Database Cloud Service instance as well.
2. Oracle Cloud Infrastructure Compute Classic region: Create a service instance on an Oracle Cloud Infrastructure Compute Classic region that meets your precise specifications, and associate it with an existing Oracle Database Cloud Service instance.
3. Oracle Cloud Infrastructure region: In this, Each region has multiple isolated availability domains, with separate power and cooling. The availability of domains within a region are interconnected using a low-latency network. When creating an instance, you can select the availability domain that the instance should be placed in.
In this Post, we are using QuickStart template to Create Java Cloud Service Instance
Creating an Oracle Java Cloud Service Instance by Using a QuickStart Template
- To get started, you need valid credentials for an Oracle Cloud account that has an active subscription to Oracle Java Cloud Service. if you don’t have Oracle Cloud Account click here to Register for Oracle Cloud Trial Account
- Sign in to Oracle Cloud.
- On the Dashboard, click Create Instance.
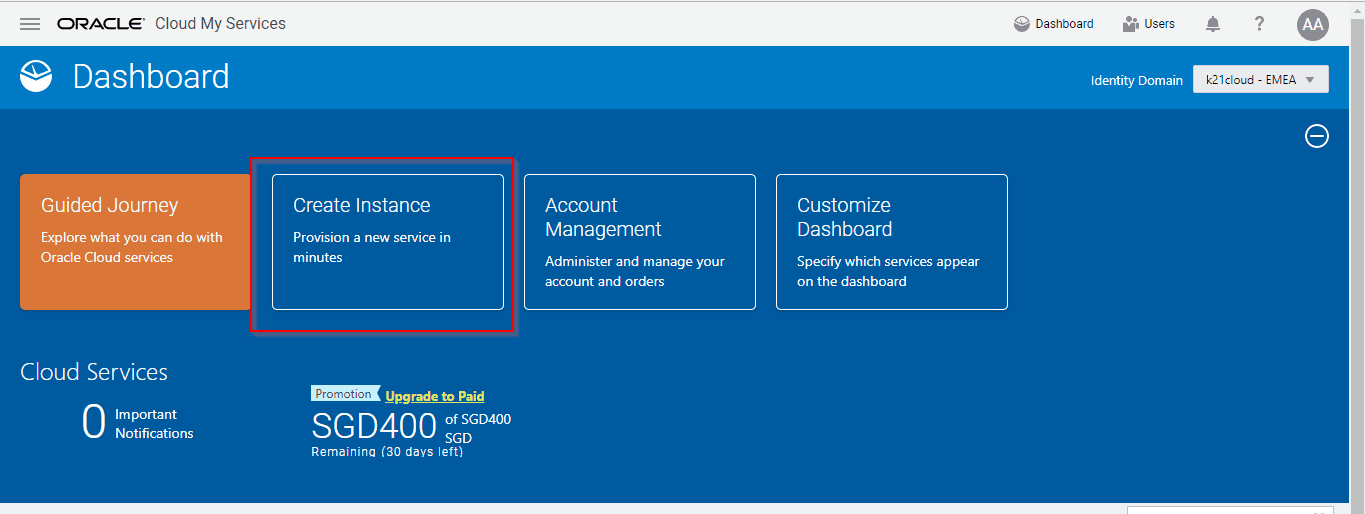
4. Below Create Instance, next to Java, click Create.

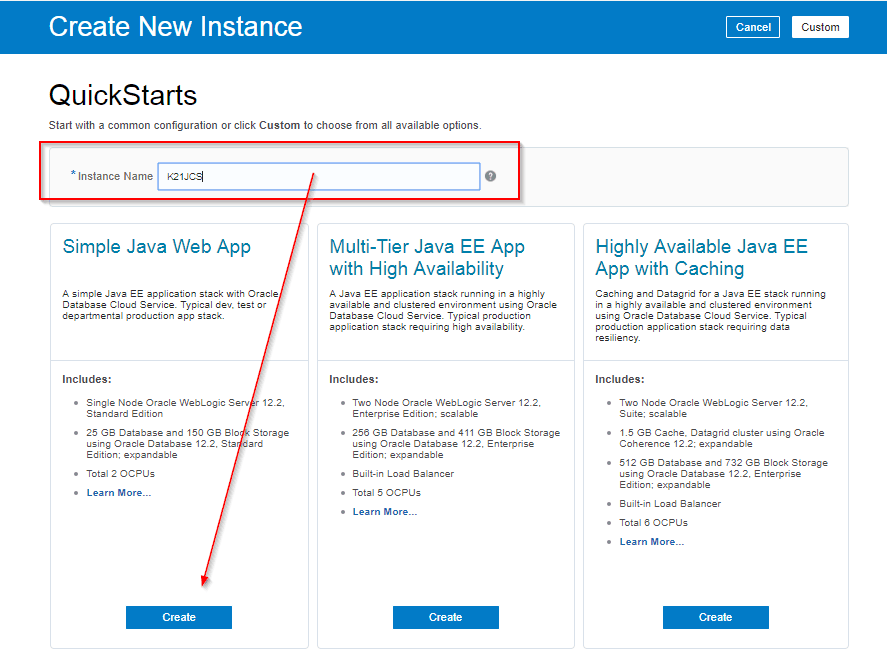
5. Enter an Instance Name. Enter as K21JCS and Select the template as “Simple Java Web App”
This template includes:
- WebLogic Server 12c (12.2) Enterprise Edition installation.
- Oracle Database 12c (12.2) Standard Edition installation.
For More Details about these template check here
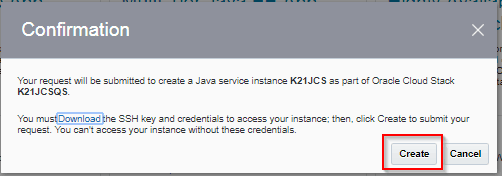
6. Click Download. Save the file to your machine. It contains:
- The username and password that you use to administer Oracle WebLogic Server
- The system password that you use to administer Oracle Database
- SSH keys that you use to access the VMs that host your service instances

7. Once you Save File in your local Machine, Click Create
8. Verify that the status of your k21JCS cloud stack is waiting or Creating a stack
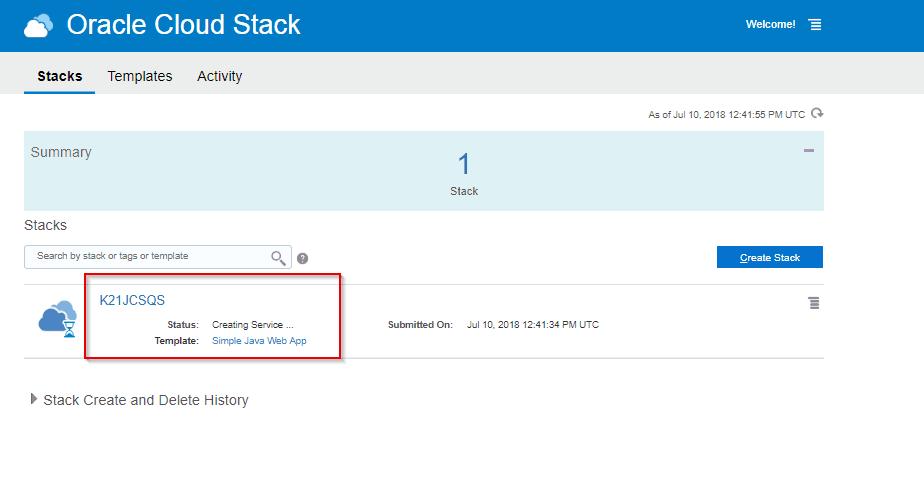
9. Periodically, click Refresh on the right side of the page until the status of the k21JCS instance is no longer Waiting or Creating Service.

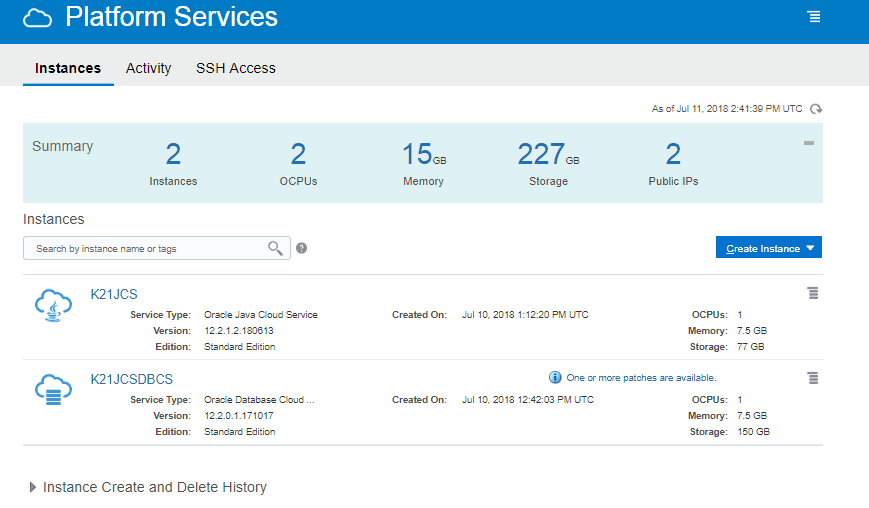
10. JCS Instance has been created now along with JCS Instance JCSDBCS will automatically Come.
This post is from our Oracle Java Cloud Service – Weblogic on Cloud, in which we cover AdminTool, JCS Instance, Configure & Deployment, Monitoring, Security, AppToCloud.
Next Task For You
Click on the image below to download your FREE Guide, 5 Java Cloud Serice Docs, Every Oracle DBA, Cloud DBA or Weblogic Administrator Must Read, & Learn More.


![AWS DevOps [DOP-C02] Professional Step By Step Activity Guides (Hands-On Labs)](https://k21academy.com/wp-content/uploads/2023/02/DOP-C02-1.png)