

![]()
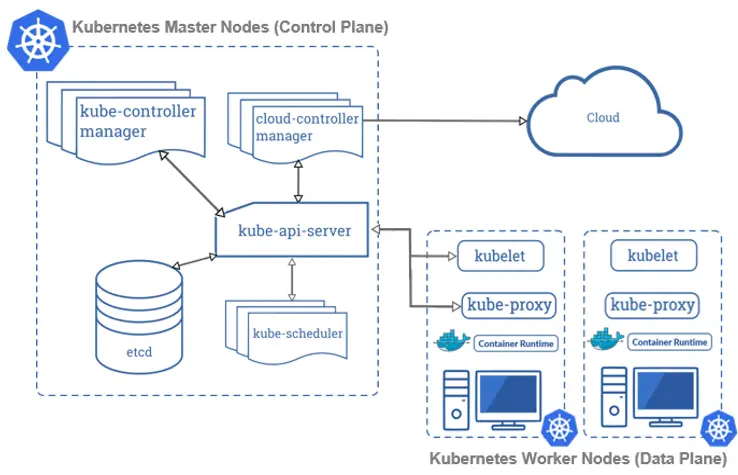
A Kubernetes cluster is a collection of machines, also known as nodes, that run applications packaged in containers. These applications are managed by Kubernetes, an open-source platform designed to orchestrate containers effectively. The primary purpose of Kubernetes is to automate various tasks related to deploying, scaling, and managing applications that are packaged in containers.
In a Kubernetes cluster, there are distinct roles for different nodes. The master node oversees the entire cluster, making important decisions and managing the overall state of applications. On the other hand, the worker nodes are responsible for running the actual containerized applications.
In this blog post, we will explore how to set up a Kubernetes cluster on SUSE Linux, demonstrating a robust approach to efficiently managing containerized applications. By following these step-by-step instructions, you’ll learn how to install a 3-node Kubernetes cluster on SUSE Linux. This will allow you to unlock the advantages of streamlined container orchestration.
There are 4 ways to deploy a Kubernetes cluster
- Minikube
- Kubeadm
- Managed Kubernetes Services
- Kubernetes Distributions
In this blog, our focus will be on:
- Prerequisites
- How to install Containerd, Kubectl, and Kubeadm packages
- Create Your Own Kubernetes Cluster
- Connect Worker Nodes to the Kubernetes Cluster
- Install Addons to Kubernetes Cluster
- Conclusion
Prerequisites for Cluster Setup
Deploying three nodes on-premises can be difficult and challenging. An alternative approach is to utilize a Cloud Platform for deployment. For this demonstration, we will use Azure Cloud as the chosen platform. Before proceeding with cluster creation, ensure that you have the following prerequisites in place:
I) Create an Azure Free Account, as we will be using Azure Cloud to set up a Kubernetes Cluster.
To create an Azure Free Account, please refer to our blog post on the Azure Free Trial Account.
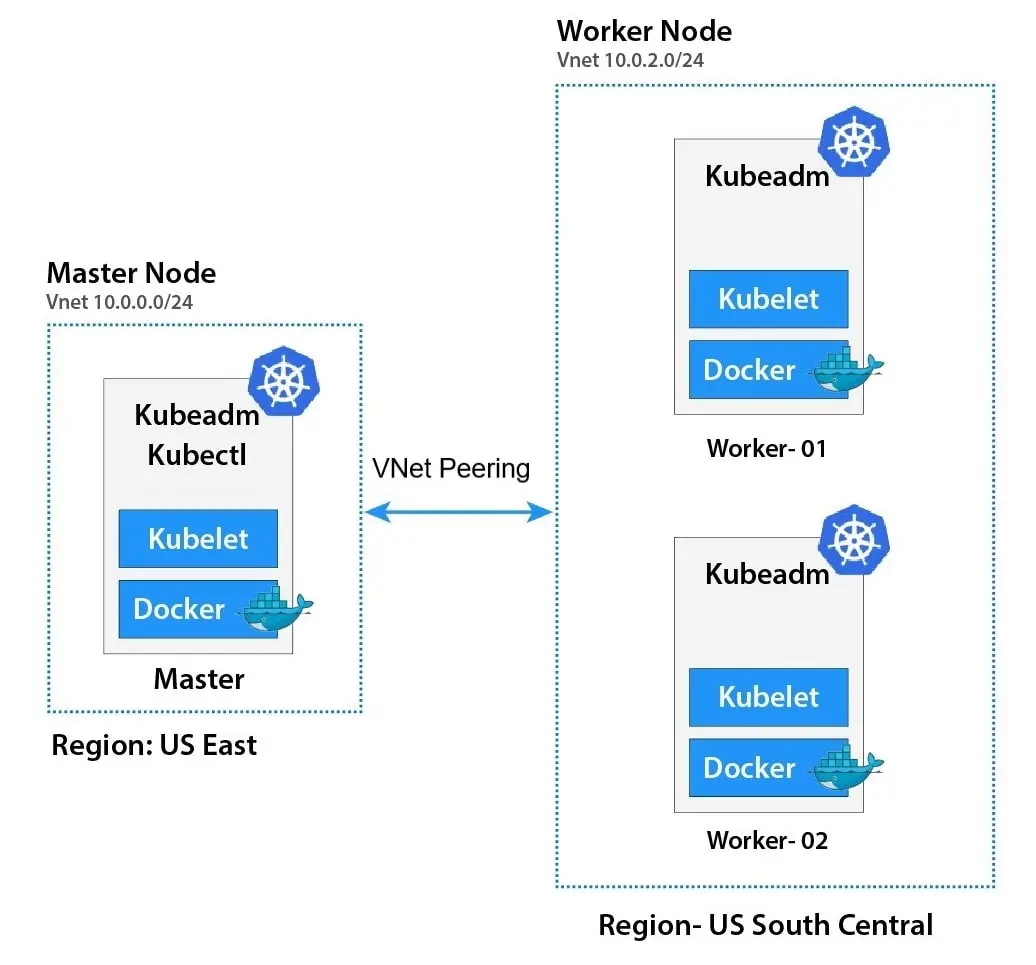
II) Launch 3 Virtual Machines – one Master Node and two Worker Nodes. These VMs will be deployed in different regions because the Azure Free tier account restricts creating three virtual machines in a single region due to service limitations. Therefore, we will set up the Master node in the US East Region and the two Worker nodes (worker-1 and worker-2) in the US Southcentral Region.
Note: Since we are creating a cluster on SUSE Linux, please select SUSE Linux Enterprise 15 in the image section.
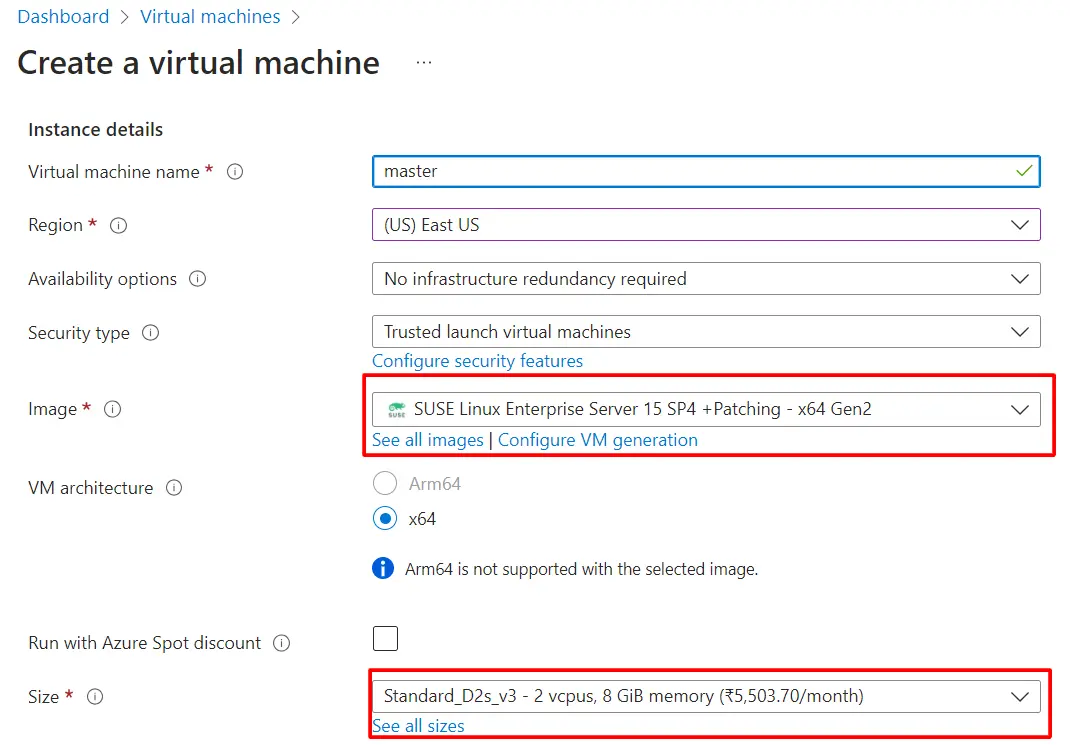
The specifications necessary for a Node are as follows:
- One or more machines running a Linux OS compatible with deb/rpm packages, such as Ubuntu or SUSE Linux. (Please note: In this setup, we will be utilizing SUSE Linux.)
- Each machine should have a minimum of 8 GiB of RAM or more.
- The control-plane node requires a machine with at least 2 VCPUs.
III) To connect the worker node with the master node, given that they are in different regions and separate VNets, VNet Peering needs to be set up.
To learn more about Virtual Networks, please refer to our blog post on Azure VNet Peering.
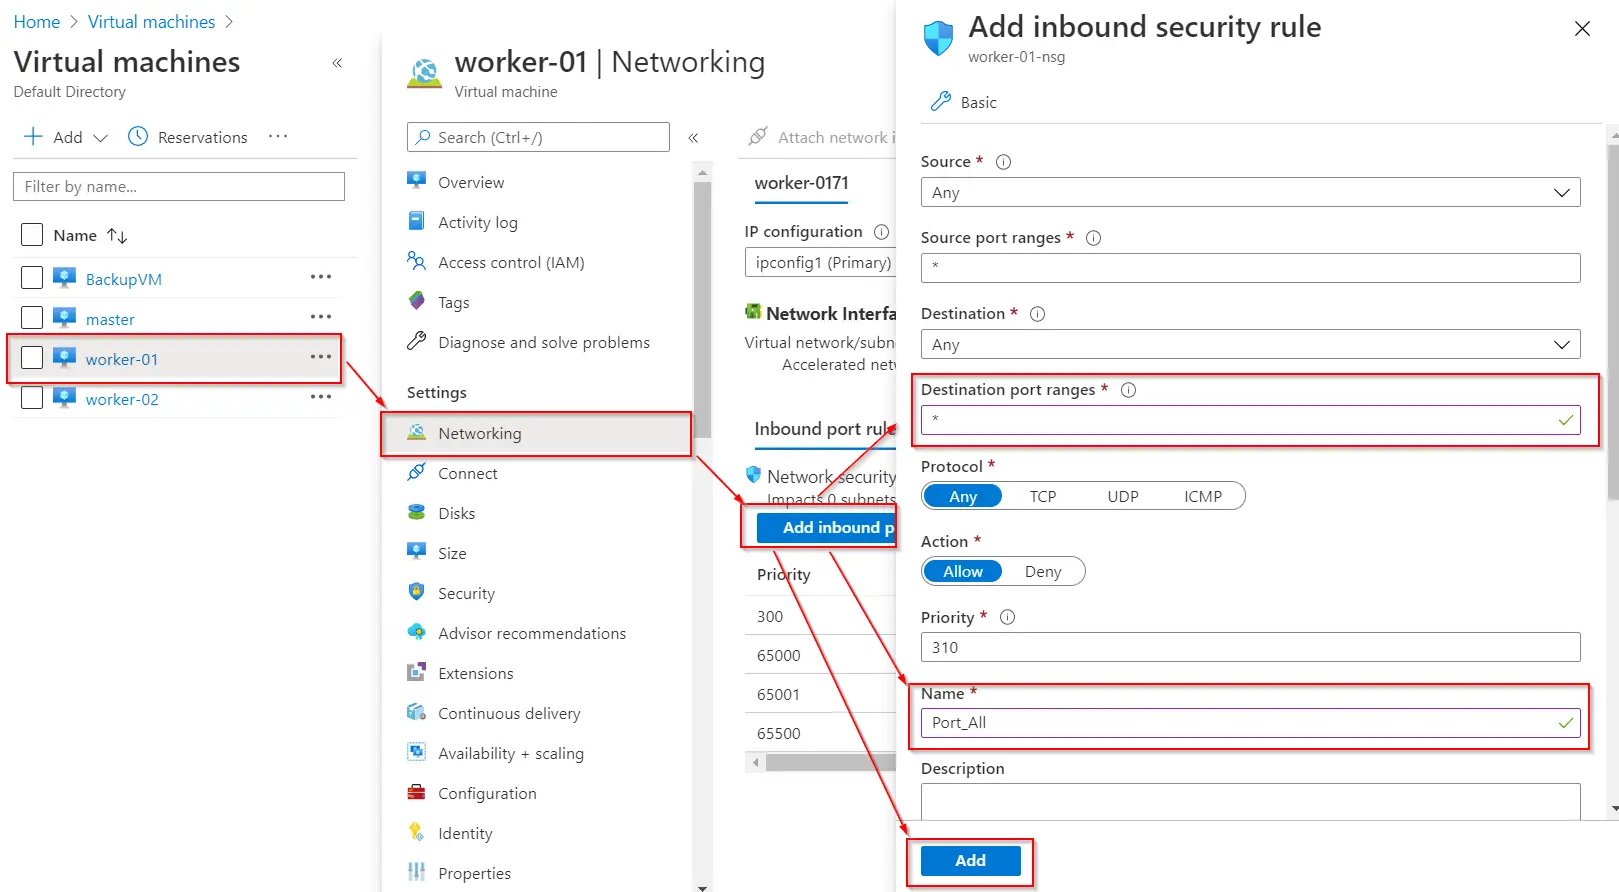
IV) In Kubernetes (k8s), there are various default ports that have important roles in enabling communication and management within the cluster. These ports serve different purposes in coordinating and facilitating interactions within the cluster.
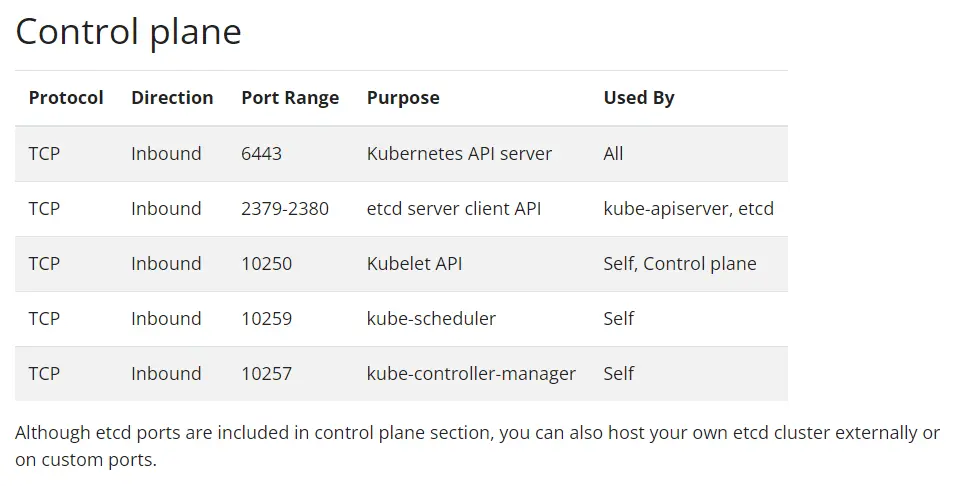
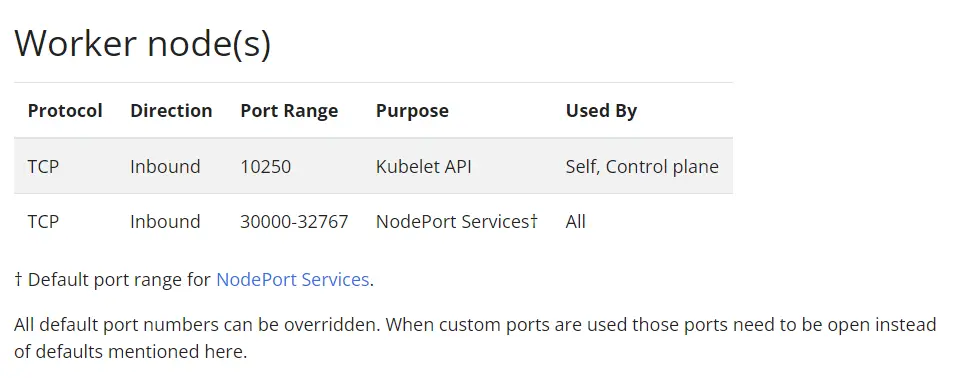
Note: Since we’re creating this cluster for testing purposes, it’s better to open all ports instead of restricting access to specific ones.
Also check our Kubernetes training & enhance your knowledge of Kubernetes fundamentals to improve container orchestration.”
Install Containerd, Kubectl, and Kubeadm packages
After completing the above mentioned process, it is necessary to install certain packages on our machines. These packages include:
- Kubeadm: Tool for bootstrapping Kubernetes clusters by automating control plane setup and worker node joining.
- Kubelet: Manages containers on nodes, ensuring their proper execution and health within the Kubernetes cluster.
- Kubectl: Command-line tool to interact with Kubernetes, enabling resource management and monitoring in the cluster.
- CRI (Container Runtime Interface): Standardizes interaction between Kubernetes kubelet and container runtimes, allowing flexibility in runtime choices.
If you’re new to the Docker and Kubernetes world, take a look at our blog on Kubernetes for Beginners. It will provide you with an understanding of the components and concepts of Kubernetes.
To install these packages, follow the steps mentioned below on both the Master and Worker nodes:
Step1: Initiate SSH into your virtual machines, use the SSH command for Linux or Mac users; for Windows users, Putty can be utilized.
Become root to acquire superuser privileges, enabling an interactive session with the root account.
sudo -i

Step2: Kubernetes doesn’t perform well with swap enabled. Disable it on each node:
$ swapoff -a
$ sed -i '/ swap / s/^\(.*\)$/#\1/g' /etc/fstab

Step3: Configure persistent loading of modules.
$ tee /etc/modules-load.d/containerd.conf <<EOF
overlay
br_netfilter
EOF

Step4: Load at runtime
$ modprobe overlay
$ modprobe br_netfilter

Step5: Update Iptables Settings
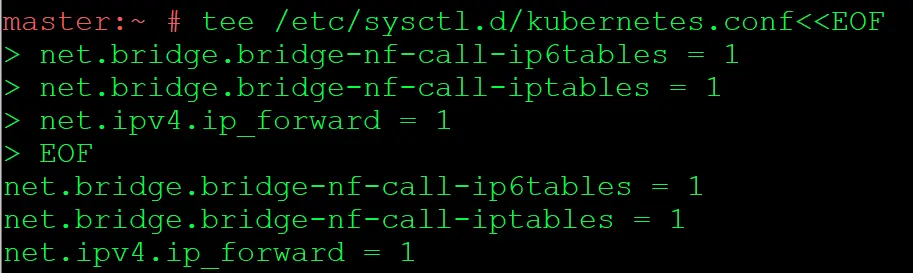
Note: To ensure that packets are properly processed by IP tables during filtering and port forwarding, set the value of net.bridge.bridge-nf-call-iptables to 1 in your sysctl configuration file
$ tee /etc/sysctl.d/kubernetes.conf<<EOF
net.bridge.bridge-nf-call-ip6tables = 1
net.bridge.bridge-nf-call-iptables = 1
net.ipv4.ip_forward = 1
EOF
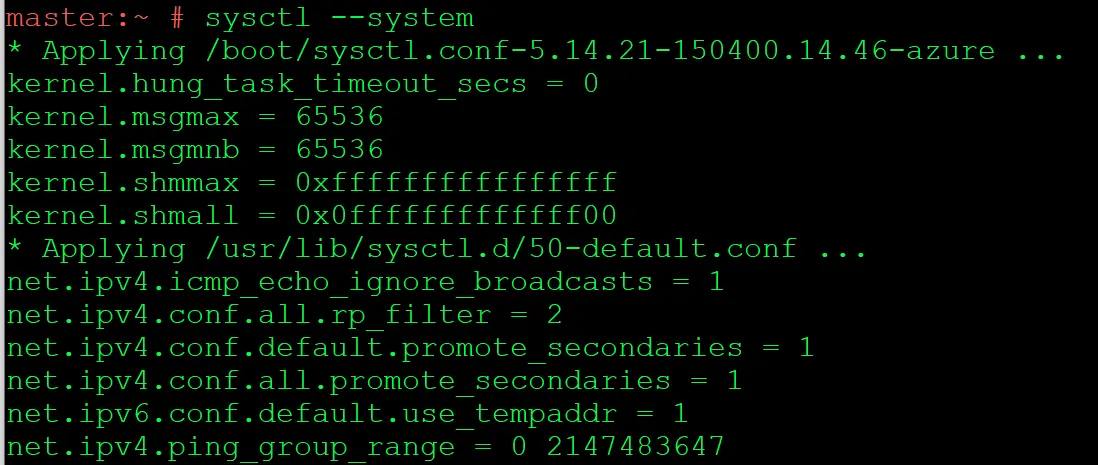
Step6: Reload configs
$ sysctl --system
Also read: our blog on Install Docker on Ubuntu.
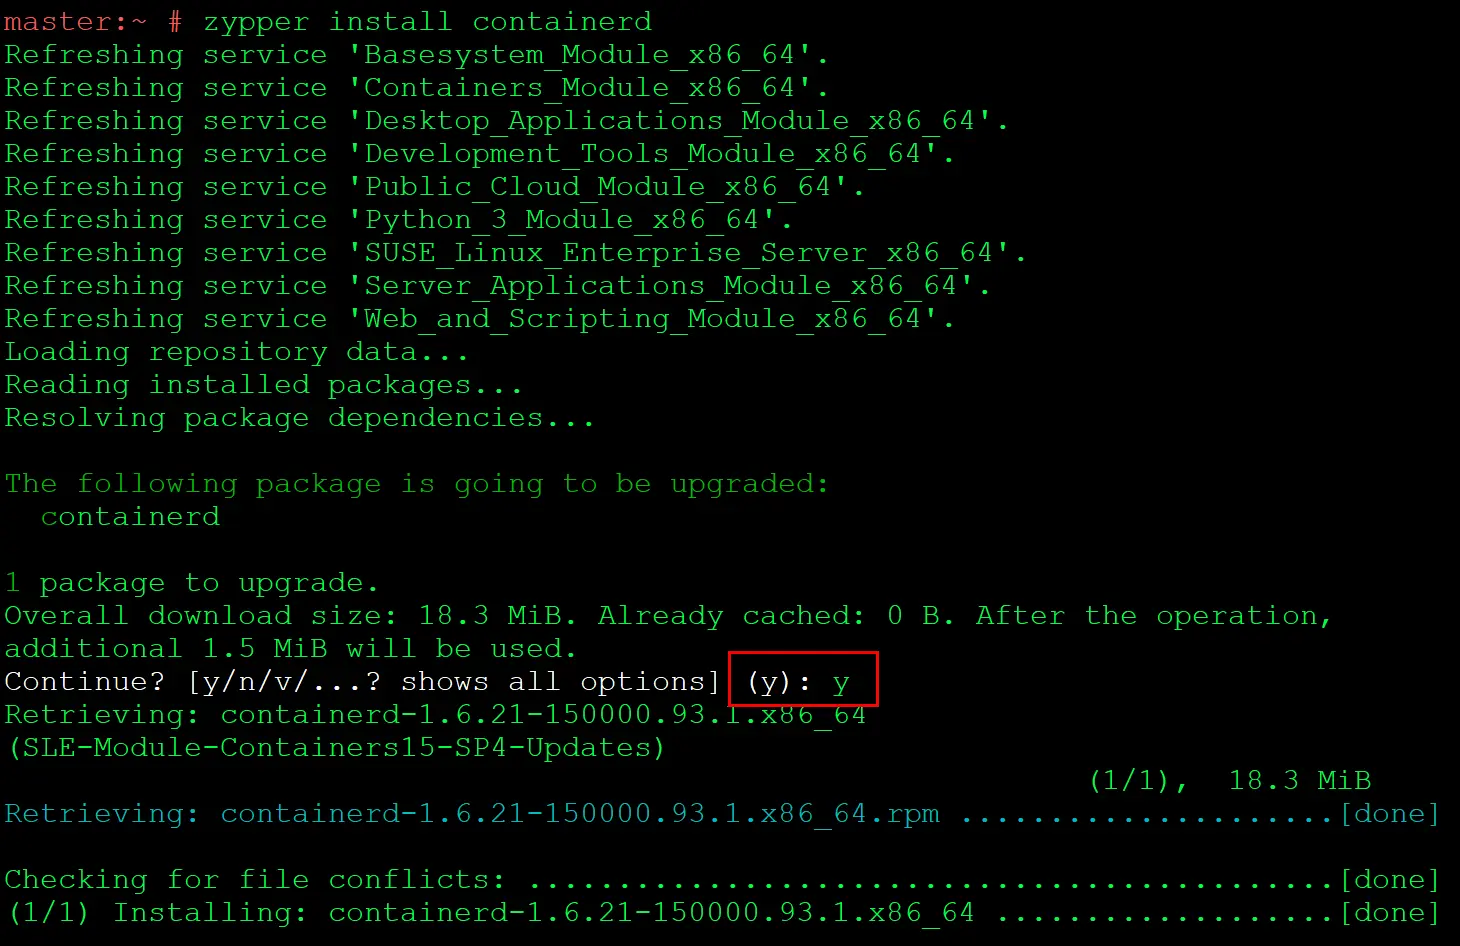
Step7: Install containerd
$ zypper refresh
$ zypper install containerd

Step8: Configure containerd and start service
$ mkdir -p /etc/containerd
$ containerd config default>/etc/containerd/config.toml
$ sed -e 's/SystemdCgroup = false/SystemdCgroup = true/g' -i /etc/containerd/config.toml

$ systemctl daemon-reload
$ systemctl enable containerd
$ systemctl start containerd
$ systemctl status containerd

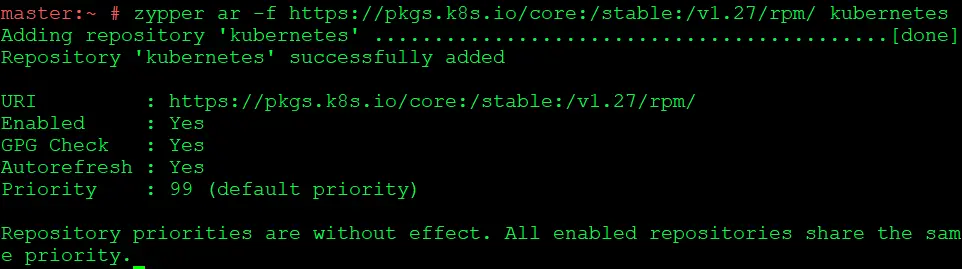
Step9:To install Kubernetes packages, add the Kubernetes repository.
$ zypper ar -f https://pkgs.k8s.io/core:/stable:/v1.27/rpm/ kubernetes
Step10: Import the Repository’s GPG Key.
$ rpm --import https://pkgs.k8s.io/core:/stable:/v1.27/rpm/repodata/repomd.xml.key

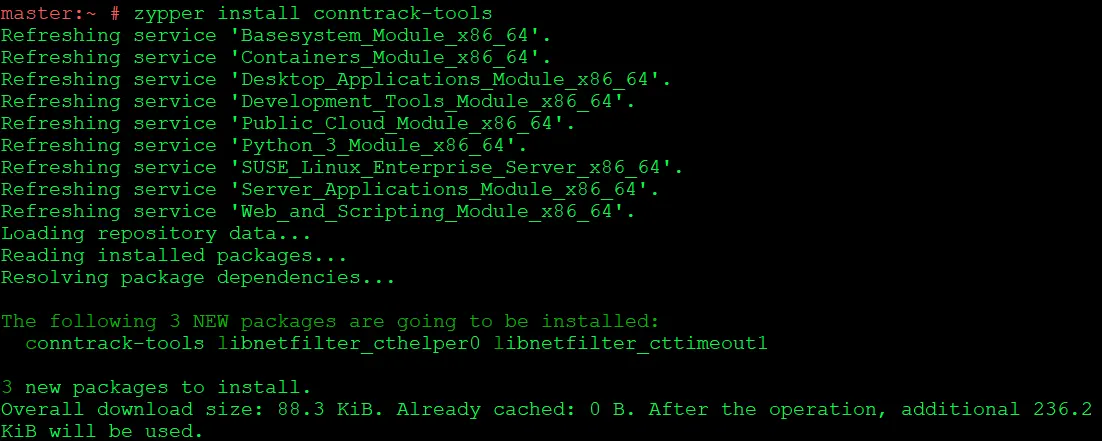
Step11: Install conntrack-tools
$ zypper install conntrack-tools
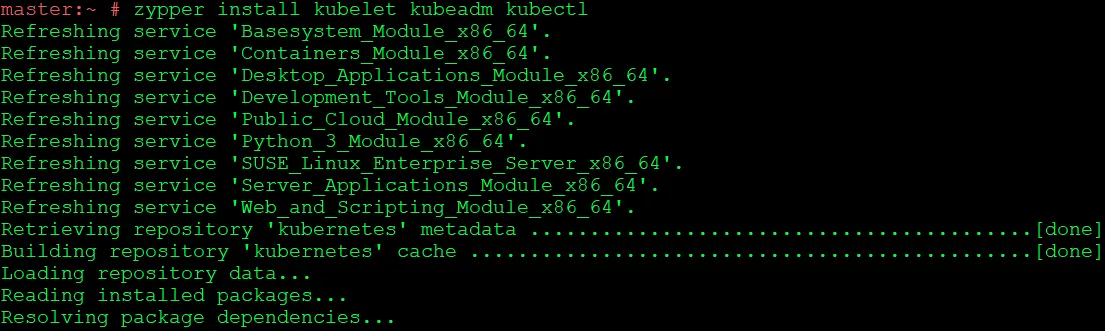
Step12: Refresh the repositories & install Kubernetes packages (kubelet, kubeadm, and kubectl)
$ zypper refresh
$ zypper install kubelet kubeadm kubectl
Step13: Lock those versions to prevent them from being automatically updated.
$ zypper addlock kubelet kubeadm kubectl

Step14: Enable Kubelet Service
$ systemctl enable kubelet.service

Create Your Own Kubernetes Cluster
After successfully installing Kubeadm, the next step is to create a Kubernetes cluster using the following steps:
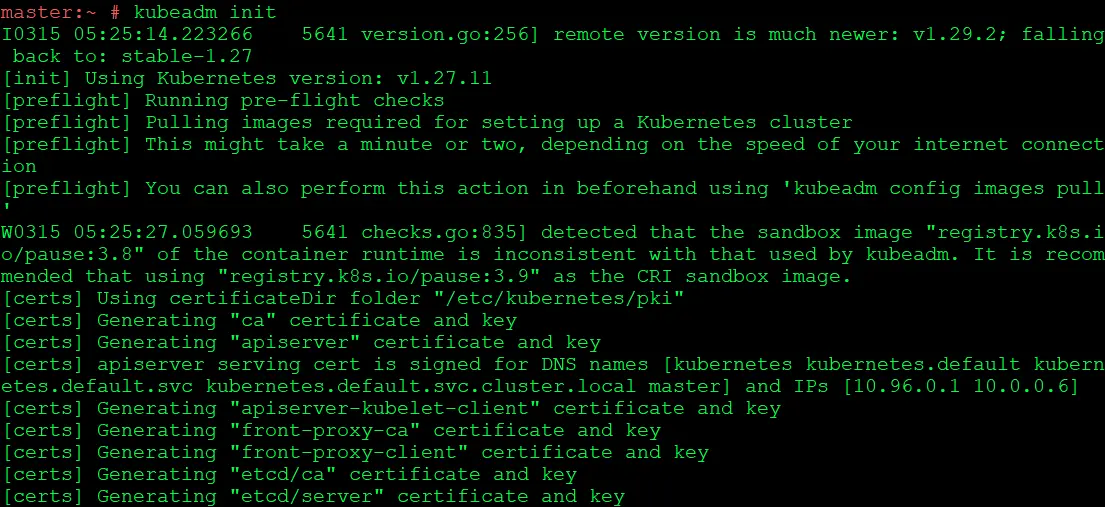
Step 1: Initialize Kubeadm on the master node. This command checks for all the required dependencies on the node. If the check passes, it proceeds to install the control plane components.
(Note: Run this command on the Master Node only.)
$ kubeadm init
If cluster initialization is successful, you will receive a cluster join command. Copy and save this command for future reference. Worker nodes will use this command to join the cluster

Step2: To start using the cluster set the environment variable
$ export KUBECONFIG=/etc/kubernetes/admin.conf
$ echo 'export KUBECONFIG=/etc/kubernetes/admin.conf' >> .bashrc
![]()
Connect Worker Nodes to the Kubernetes Cluster
Now that our Kubernetes master node is set up, we should join worker nodes to our cluster. Perform the following steps on all of the worker nodes:
Step1: SSH into the worker node using the appropriate username and password.
$ ssh <external ip of worker node>
Step2: Add the Worker Nodes to the Cluster with kubeadm join (Run the below command on every worker Node)
kubeadm join 10.2.0.4:6443 --token lq06q6.q7mzxzym90kdsbl0 \
        --discovery-token-ca-cert-hash sha256:8bd715e302b7f97bbee3085d13c8b0353e62a1e4ef9b03eeacb43a30ca539338

(Note: Do not use this same command; utilize the command that you received and saved while executing the kubeadm init command.)
If the kubeadm join command is forgotten, then you can generate a new token and use it for joining worker nodes to the cluster
$ kubeadm token create --print-join-command

Install Addons to Kubernetes Cluster
Kubernetes addons are essential components that extend the functionality of your cluster, providing features such as networking, monitoring, and more. These addons enhance the capabilities of your Kubernetes environment, making it more versatile and powerful.
Note: Run the below Commands on Master Node Only.
Step1: Check the status of nodes
$ kubectl get nodes

The nodes are in a NotReady state. To bring them into a Ready state, we need to install the Container Network Interface (CNI).
CNI (Container Network Interface) is a standard framework for managing container networking in platforms like Kubernetes. It facilitates communication between containers, nodes, and external resources, ensuring effective networking within distributed environments.
Note: For a deeper understanding of Network Policy, refer to our blog post on Kubernetes Network Policy.
Step2: Install Weave Net CNI
$ kubectl apply -f https://github.com/weaveworks/weave/releases/download/v2.8.1/weave-daemonset-k8s.yaml

Step:3 Cross-check the status of the nodes.
$ kubectl get nodes

Upon installing the WeaveNet CNI, the nodes transition to the Ready state.
Step:4 Verify the status of pods within the kube-system namespace.
$ kubectl get pods -n kube-system
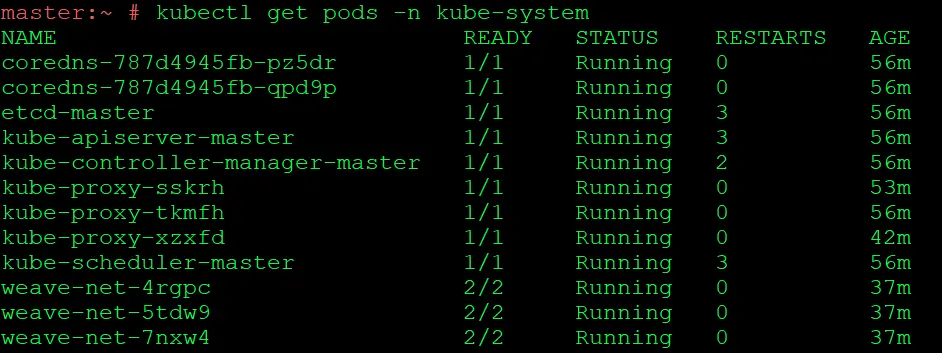
All pods should be in a running and ready state. If not, it’s crucial to thoroughly review whether all steps have been accurately executed, specifically on the designated node as indicated.
Conclusion
We have successfully set up a multi-node Kubernetes cluster on SUSE Linux. Kubernetes provides a powerful platform for managing containerized applications, and now you have the foundation to deploy, scale, and manage your applications with ease. Explore more advanced topics like RBAC, persistent storage, and service discovery as you continue your Kubernetes journey.
Frequently Asked Questions
What is a Kubernetes cluster?
A Kubernetes cluster is a collection of nodes that work together to manage containerized applications. It automates deployment, scaling, and management tasks, ensuring efficient application orchestration.
How do I install Kubernetes on SUSE Linux?
You can install Kubernetes on SUSE Linux by leveraging tools like kubeadm, kubespray, or Rancher.
What are the key components of a Kubernetes cluster on SUSE Linux?
A Kubernetes cluster on SUSE Linux consists of master and worker nodes. The master node manages the cluster, while worker nodes host the applications.
What is the recommended networking solution for a Kubernetes cluster on SUSE Linux?
Solutions like Flannel, Calico, or WeaveNet are commonly used for networking in Kubernetes clusters on SUSE Linux.
How can I ensure high availability in my Kubernetes cluster?
Achieve high availability by distributing master nodes across multiple availability zones and using a load balancer. Worker nodes can be scaled for redundancy.
How do I upgrade my Kubernetes cluster to a newer version?
Upgrading Kubernetes involves upgrading the control plane components first and then the worker nodes.
Related Post
- Kubernetes for Beginners
- Kubernetes Architecture | An Introduction to Kubernetes Components
- Install Docker on Windows, Ubuntu, and Mac: A Complete Step-by-Step Guide
- How To Setup A Three Node Kubernetes Cluster For CKA: Step By Step
- Visit our YouTube channel on “Docker & Kubernetes”
- Certified Kubernetes Administrator (CKA) Certification Exam: Everything You Must Know
- Certified Kubernetes Administrator (CKA) Certification: Step By Step Activity Guides/Hands-On Lab Exercise
Next Task For You
Discover the Power of Kubernetes, Docker & DevOps – Join Our Free Masterclass. Unlock the secrets of Kubernetes, Docker, and DevOps in our exclusive, no-cost masterclass. Take the first step towards building highly sought-after skills and securing lucrative job opportunities. Click on the below image to Register Our FREE Masterclass Now!


![AWS DevOps [DOP-C02] Professional Step By Step Activity Guides (Hands-On Labs)](https://k21academy.com/wp-content/uploads/2023/02/DOP-C02-1.png)