

![]()
This blog post covers a brief overview of the topics covered and some common questions asked on Day 4 Live Interactive training on Docker and Kubernetes Certification i.e. CKA / CKAD .
This will help you to learn Docker & Kubernetes and prepare you for these certifications and get a better-paid job in the field of Microservices, Containers and Kubernetes.
In the Day 1, Day 2 & Day 3 CKA/CKAD Live session we covered an overview of Monolithic V/S Microservice, Introduction to Container, Docker Installation, Docker Architecture and Working with Containers, Docker Storage & Networking. And in Day 4 we covered Dockerfile, Multistage Dockerfile, Docker Compose & Docker Image Scanning. We also performed labs.
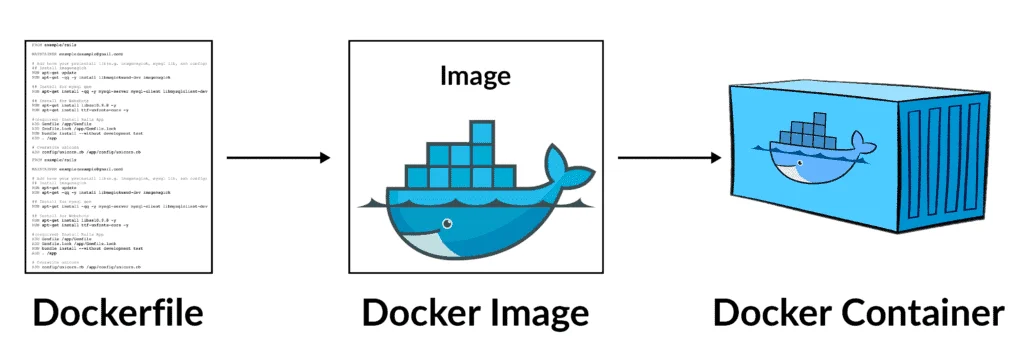
Dockerfile
A Dockerfile is a document file that contains collections of commands that will be executed in the docker environment for building a new docker image. This file is written in YAML Language. These images consist of read-only layers each of which represents a Dockerfile instruction. It is a more systematic, flexible and efficient way to build a Docker image.
Q/A’s asked in sessions are:
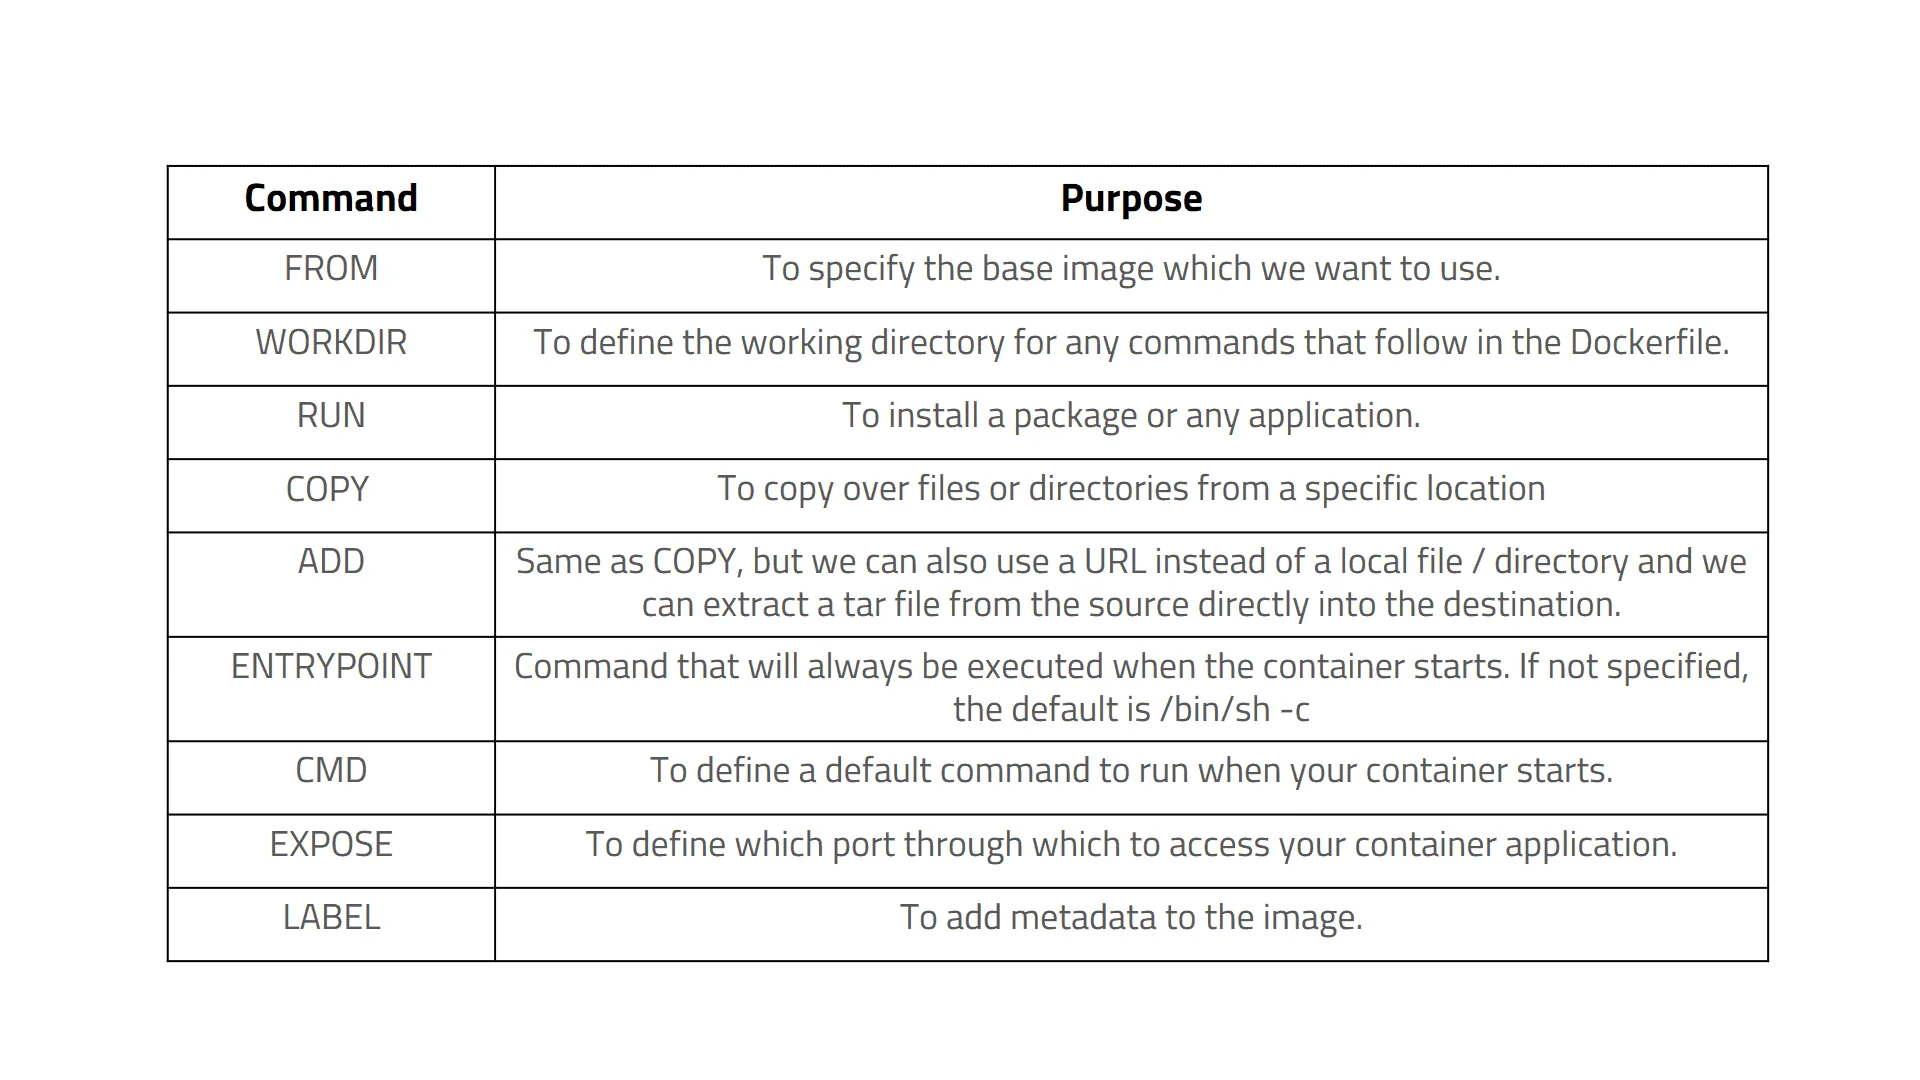
Q) What is commonly used Dockerfile statements?
Ans:
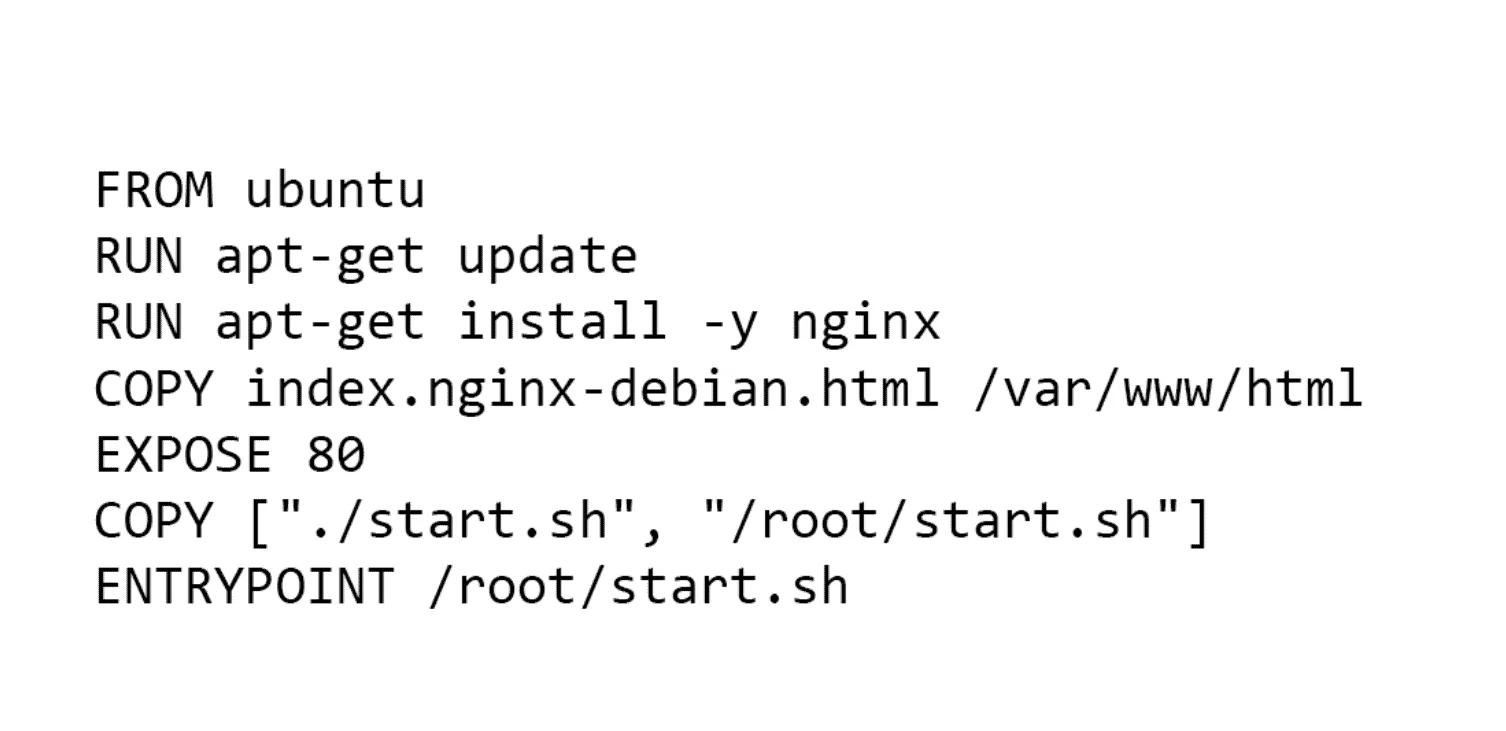
Q) What is Example of a DockerFile & explain about each layer?
Ans:
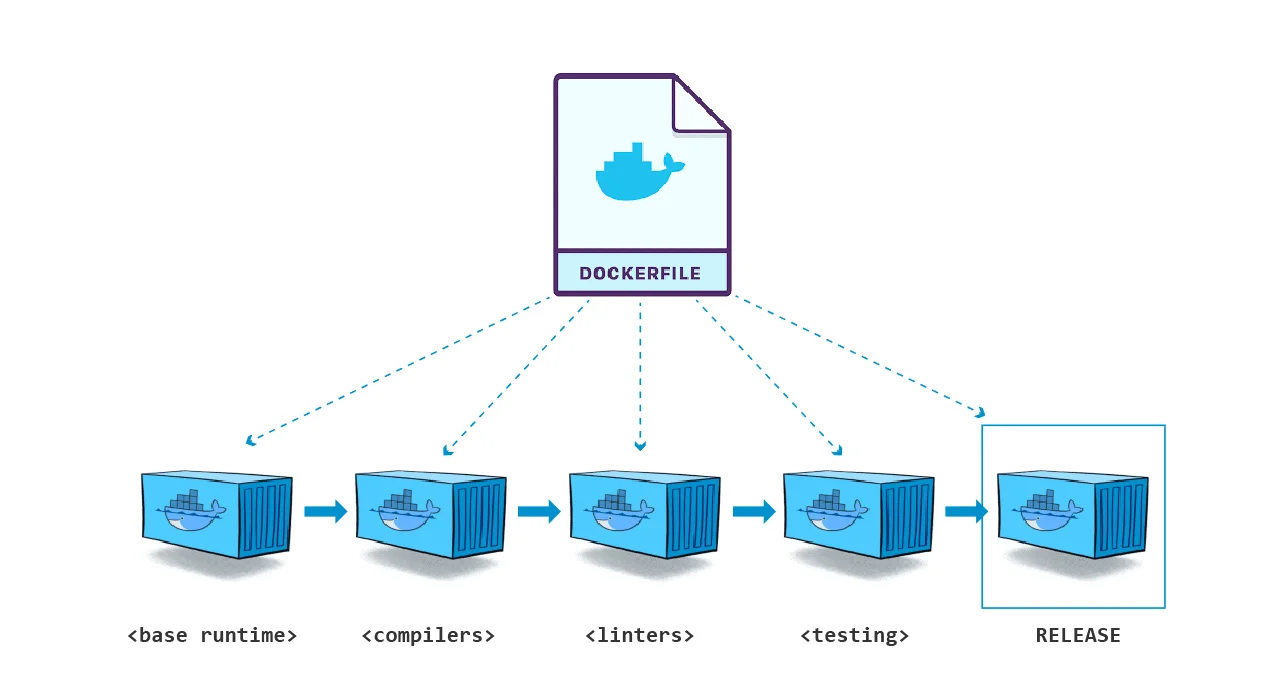
Q) From a single Dockerfile can we create multiple images?
Ans: yes, we can create multiple images from a single Docker file. Multi-Stage Dockerfile allows a single Dockerfile to contain multiple images.
To know More about images
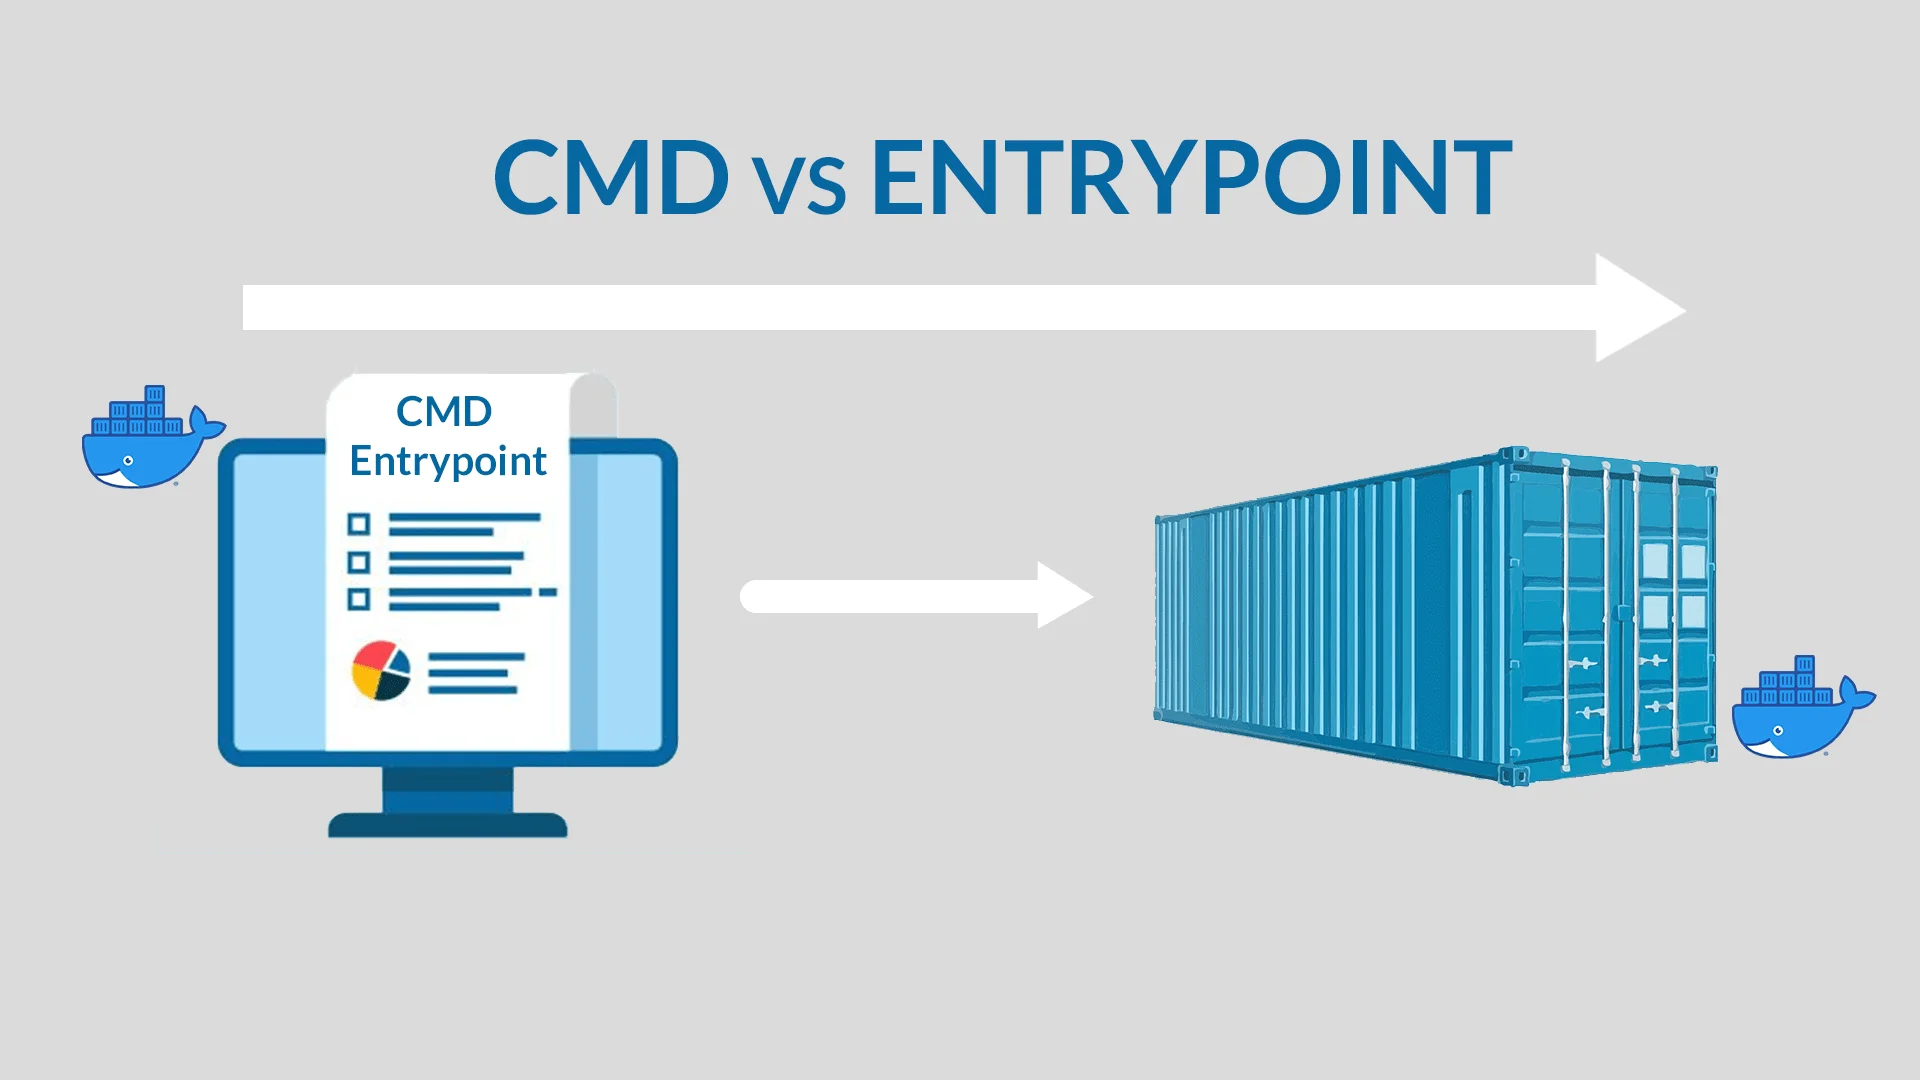
Q) What is the difference between CMD and ENTRYPOINT in Dockerfile?
Ans: CMD is an instruction that is used if you need a default command which users can easily override and on the other hand ENTRYPOINT is used to configure a container that runs as an executable.
Q) How can I write a comment in Dockerfile?
Ans: You can use a ‘#’ symbol at the beginning of each comment line. In docker, you can use only single comments. Hence, to write multiple line comments you need to use ‘#’ at the beginning of every line.
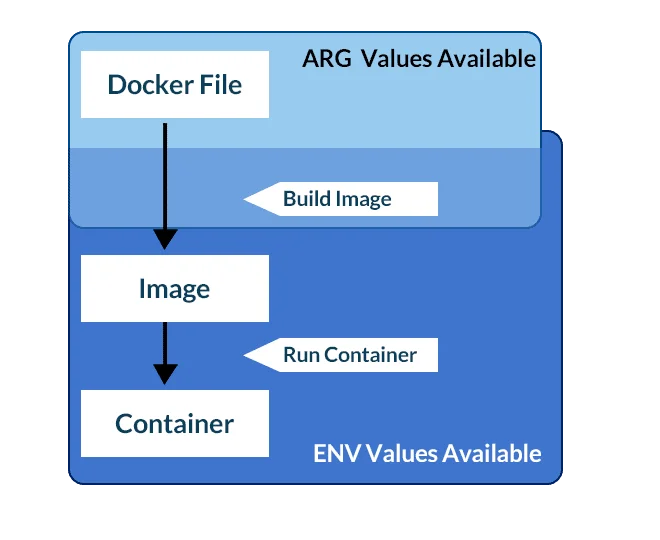
Q)What is the difference between ARG and ENV in Dockerfile?
Ans: ARG and ENV are used to set environment variables and both are used for the same purpose. But with ARG only environment variables will be available at the image build process. On other hand, if you set it with ENV variable will be available for image build and it will retain when the container is running.
Q) Difference between the COPY and ADD commands in a Dockerfile
Ans: COPY takes in a src and destruction. It only lets you copy in a local or directory from your host (the machine-building the Docker image) into the Docker image itself.
$ COPY <src> <dest>
ADD lets you do that too, but it also supports 2 other sources. First, you can use a URL instead of a local file/directory. Secondly, you can extract tar from the source directory into the destination.
$ ADD <src> <dest>
Q) When to use ADD or COPY ?
Ans: According to the Dockerfile best practices guide, we should always prefer COPY over ADD unless we specifically need one of the two additional features of ADD. As noted above, using ADD command automatically expands tar files and certain compressed formats, which can lead to unexpected files being written to the file system in our images.
Q) What is Build Cache in Docker?
Ans: When we build an Image, Docker will process each line in Dockerfile. It will execute the commands on each line in the order that is mentioned in the file. But at each line, before running any command, Docker will check if there is already an existing image in its cache that can be reused rather than creating a new image.
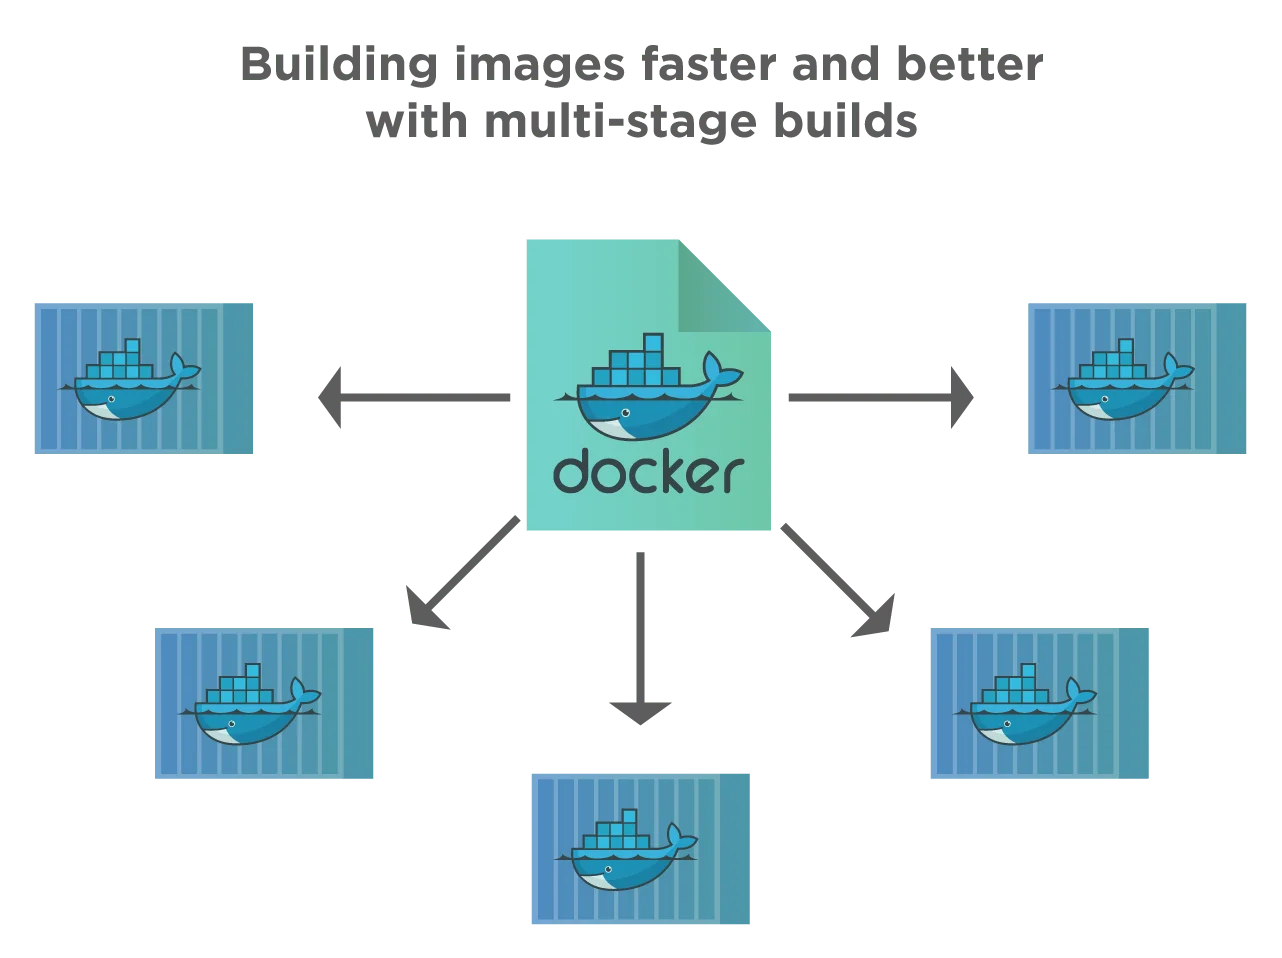
Multi-Stage Dockerfile
Multi-stage builds in Docker are the ones in which we use multiple “FROM” statements in the Dockerfile. Each FROM instruction in the Dockerfile uses a different base and begins a new stage of the build. In multi-stage builds, we can selectively copy artifacts from one stage to another, thus skipping everything that we do not need in the final image.
A very good example would be how a 294 MB Golang 1.13 official image (123 MB even with Alpine) can be just as big as the go executable of your application. As Golang is compiled and gives out an executable binary, the first stage can be compiling it and the second stage can be an alpine image (5 MB) just to run that executable. So, if you go app binary is 10 MB your image can be 15 Mb (10 MB binary + 5 MB alpine) rather than the heavy 294 MB official go image or 123 MB alpine go image.
Q/A’s asked in sessions are:
Q) What are the issues with a single-stage build scenario in Docker?
Ans: We are going to see an example Node Js app which is a currency converter API built with Express. Currently, the problems with the Dockerfile and build are as follows: Nodemon is installed on production. Current docker image does not have dev dependencies (runs npm install –production) The image size can be made smaller (even though its using alpine) Following are the current Dockerfile for local development:
Dockerfile
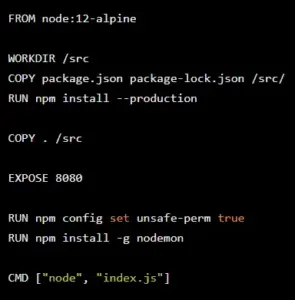
As we can see no demon is installed even on production which is unnecessary on production. Another issue is there are no dev dependencies so tests can’t be run inside docker.
Current image Size:
Let’s build & look at how big is this image we got from running
$ docker build . -t currency-api-original
$ docker images | grep currency-api-original

So currently it is 165 MB, hopefully, we can decrease its size too in this process. The remedy to this situation is by using multi-stage builds, which we are going to discuss next.
Q) What are best practices to build Dockerfile. Explain it with example.
Ans: Let us consider the following Dockerfile.
Multistage Dockerfile:
FROM golang : 1 . 7 . 3
WORKDIR /go/src/github.com/alexellis/href-counter/
RUN go get -d -v golang.org/x/net/html
COPY app.go .
RUN CGO ENABLED=0 GOOS=linux go build -a -installsuffix cgo -o app .

FROM alpine : latest
RUN apk - -no-ache  add  ca-certificates
WORKDIR /root/
COPY - -from=0  /g/src/github.com/alexellis/href-counter/app .
CMD ["./app"]
The above file is an example of a multi-stage build. We can see here we have two FROM statements/instructions that execute two containers, “golang” and “alpine“. Thus we only need a single Dockerfile and just run “docker build“.
$ docker build -t alexellis2/href-counter:latest .\
Here we need not create any intermediate images and also extract any artifacts to the local machine. The result is a tiny production image with a significant reduction in complexity
Q) How does the above Dockerfile work here?
Ans: In the above Dockerfile, the second “FROM” instruction starts a new build stage with “alpine: latest” as its base. The statement “COPY –from=0” will copy the built artifact from the earlier stage into the new stage. Note that we have not included Go SDK or any other intermediate artifacts in the final image.
Q) How to name build stages?
Ans: The stages are not named in multi-stage builds by default. We usually refer to them by their integer number starting with 0 (zero) for the first ‘FROM’ instruction and so on. However, we can name each stage by adding “AS<NAME>” to the FROM instruction. Then we can use this stage name in the COPY instruction. This way, COPY doesn’t break even if we decide to reorder the instructions in the Dockerfile at a later point.
As an example, in the following code, we name this stage as “golang_builder”.
FROM golang:1.7.3 AS golang_builder WORKDIR /go/src/github.com/alexellis/href-counter/
RUN go get -d -v golang.org/x/net/html
COPY app.go . RUN CGO_ENABLED=0 GOOS=linux go build -a -installsuffix cgo -o app .

FROM alpine:latest RUN apk --no-cache add ca-certificates WORKDIR /root/
COPY --from=golang_builder /go/src/github.com/alexellis/href-counter/app . CMD ["./app"]
So as shown in the above example, we can conveniently name various stages in multi-stage builds and later use these stage names instead of stage numbers.
Q) How do we stop a specific build stage?
Ans: When a Dockerfile has so many stages or statements, we may not necessarily have to build an entire Dockerfile with all stages. We can also specify the target build stage and stop other stages. It is as shown in the following command. Here, the above command uses the previous Dockerfile we have shown and stops at the stage named golang_builder.
$ docker build --target golang_builder -t alexellis2/href-counter:latest .
Q) What are use cases where this stop build might be very powerful
Ans: Here are a few scenarios where this stop build might be very powerful :
- To debug a specific build stage. For this, we stop the build at a particular stage.
- We can use it at a debug stage with all debugging symbols or tools enabled and a lean production stage.
- We can also use it in a testing stage in which the app populates with test data and building for production using different stages using real data.
Q) How to use a previous stage as a new stage in multi-stage Docker builds?
Ans: Another feature of multi-stage builds is we can pick up where a previous stage left off. It is done by referring to the previous stage when using the “FROM” directive. Consider the following multi-stage build Dockerfile:
FROM alpine:latest as builder
RUN apk --no-cache add build-base

FROM builder as build1
COPY source1.cpp source.cpp
RUN g++ -o /binary source.cpp

FROM builder as build2
COPY source2.cpp source.cpp
RUN g++ -o /binary source.cpp
In the above Dockerfile, we have a builder stage which is the first stage. In subsequent FROM directives, we pick up from this stage to go further with COPY and RUN.
Q) What are the benefits of multi-stage builds in Docker?
Ans: Some of the benefits of having multi-stage builds in Docker are as follows:
- Multi-stage builds are ideal for deploying production-ready applications.
- Multi-stage builds work with only one Dockerfile.
- It allows us to build smaller images, and Dockerfile separates them into various build stages.
- We have a uniform syntax to learn.
- Muti-stage builds work on local machines as well as on the CI (Continuous Integration) server.
Q) When not to use Multi-stage builds?
Ans: While multi-stage builds undoubtedly provide us consistency across build and execution environments, there are some aspects we should consider and decide “not to” use multi-stage builds. We summarize some of these aspects below.
- Suppose we want to keep our Dockerfile simple and easy to read. In that case, we may not use multi-stage builds, especially in a development environment wherein developers are not used to such complexities. It is because multi-stage builds in Docker increase the physical size and logical organization of Dockerfile.
- The advantages of multi-stage builds are minimal when the number of containers is few. The multi-stage builds make a difference only when there are many containers like in CI/CD.
Docker Compose
Docker Compose is a tool for defining and running multi-container Docker applications. With Compose, you use a Compose file to configure your application’s services. Then, using a single command, you create and start all the services from your configuration. Using Compose is basically a three-step process.
- Define your app’s environment with a Dockerfile so it can be reproduced anywhere.
- Define the services that make up your app in docker-compose.yml so they can be run together in an isolated environment.
- Lastly, run docker-compose up and Compose will start and run your entire app.
You must have Docker Engine installed on your system. If you don’t have already installed, Visit our Docker installation section of this tutorial.
Q/A’s asked in sessions are:
Q) How do we install Docker Compose?
Ans: First of all we need to grab the software. We can do this on Linux using Curl.
sudo curl -L "https://github.com/docker/compose/releases/download/1.23.2/docker-compose-$(uname -s)-$(uname -m)" -o /usr/local/bin/docker-compose
This downloaded the docker-compose tool to /usr/local/bin. Once downloaded, you must make the file executable. This can be done with:
sudo chmod +x /usr/local/bin/docker-compose
Finally, we can test that everything is working as it should by running:
$ docker-compose --version
docker-compose version 1.23.2, build 1110ad01
Looks good! Now we can move on to some examples of how docker compose can be used.
Q) How to create docker-compose.yml, and explain the steps?
Ans: Let’s create our docker-compose.yml
version: "3.9" # optional since v1.27.0
services:
  db:
    container_name: postgres-comose
    image: postgres
    ports:
      - 5432:5432
    networks:
      - compose-network
    environment:
      - POSTGRES_DB=docker-demo
      - POSTGRES_PASSWORD=mysecretpassword
  cache:
    container_name: redis-compose
    image: redis
    ports:
      - 6379:6379
    networks:
      - compose-network
  app:
    container_name: golang-compose
    # image: app-golang:1.0
    build:
      context: .
      dockerfile: Dockerfile
    ports:
      - 8080:8080
    restart: unless-stopped
    networks:
      - compose-network
    depends_on:
      - db
      - cache
    environment:
      - REDIS_HOST=redis-compose
      - DB_HOST=postgres-compose
      - MYNAME=REPOERNA
networks:
  compose-network:
    name: new-example-network
*Note: in the app service environment, we use REDIS_HOST and DB_HOST using Redis and Postgres container name
Okay, I will explain what we write. At the root of the file, we have:
- version define Compose release. Each release has different features and parameters that we can use. You can read the compatibility matrix of each version here. If you omit the versionby default, it will use version 1.
- services defined all services in our system. In our example, before we use Postgres, Redis, and golang app, those 3 services will be defined here.
- network define network will be used, if you haven’t created the network, it will be automatically created, and you can create more than one network here.
Inside services, there is the service name; we have DB, cache, and app. On every service, we will define a parameter that will be used on each service. these parameters are:
- container_name: defines name services container.
- image: define an image that will be used for creating the container.
- port: define port binding to exposed the port inside a container with the environment outside.
- networks: define a network that will be used by services.
- depends_on: define other services that needed by app services.
- environment: define environment variable inside the container.
In app service, instead of using an image, we will use build to build the image, below build there is context that define the location of Dockerfile that will be used to build the image and Dockerfile to define Dockerfile filename.
Docker Compose CLI Reference
Below mentioned docker-compose command will provide you way to manage Docker containers with docker-compose
build – Build images for services for which build is defined.
$ docker-compose build ## Build all services
$ docker-compose build web ## Build single service
up – Create docker containers with available services in docker-compose.yml file of current directory. Use -d switch to launch containers in daemon mode.
$ docker-compose up -d ## Create all containers
$ docker-compose up -d web ## Create single container
down – Stops and deletes all containers, network and associated images for the services defined in a config file
$ docker-compose down ## Restart all containers
$ docker-compose down web ## Restart single container
ps – Lists all containers created for the services defined in a config file with there status, port bindings and command.
$ docker-compose ps
exec – Executes a command to the running container. For example list files in container associated with web service.
$ docker-compose exec web ls -l
start – Starts stopped containers of the services defined in config file
$ docker-compose start ## Start all containers
$ docker-compose start web ## Start single container
stop – Stop running containers for the services defined in config file
$ docker-compose stop ## Stop all containers
$ docker-compose stop web ## Stop single container
restart – Restart containers of the services defined in config file
$ docker-compose restart ## Restart all containers
$ docker-compose restart web ## Restart single container
pause – Pause running containers for the services defined in config file.
$ docker-compose pause ## Pause all containers
$ docker-compose pause web ## Pause single container
unpause – Start paused containers for the services defined in config file.
$ docker-compose pause ## Start all paused containers
$ docker-compose pause web ## Start single paused container
rm – This will remove stopped containers for the services defined in config file.
$ docker-compose rm ## Start all paused containers
$ docker-compose pause web ## Start single paused container
Docker Image Scanning
Docker Scan runs on Snyk engine, providing users with visibility into the security posture of their local Dockerfiles and local images. Users trigger vulnerability scans through the CLI, and use the CLI to view the scan results. The scan results contain a list of Common Vulnerabilities and Exposures (CVEs), the sources, such as OS packages and libraries, versions in which they were introduced, and a recommended fixed version (if available) to remediate the CVEs discovered.
Q/A’s asked in sessions are:
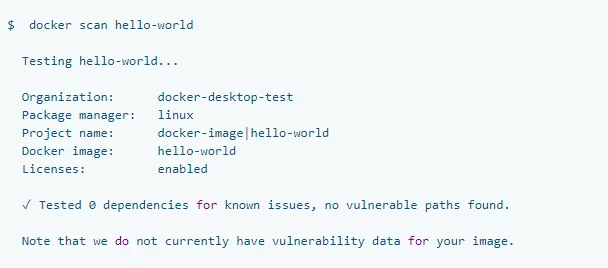
Q) How to scan images
Ans: The docker scan command allows you to scan existing Docker images using the image name or ID. For example, run the following command to scan the hello-world image:
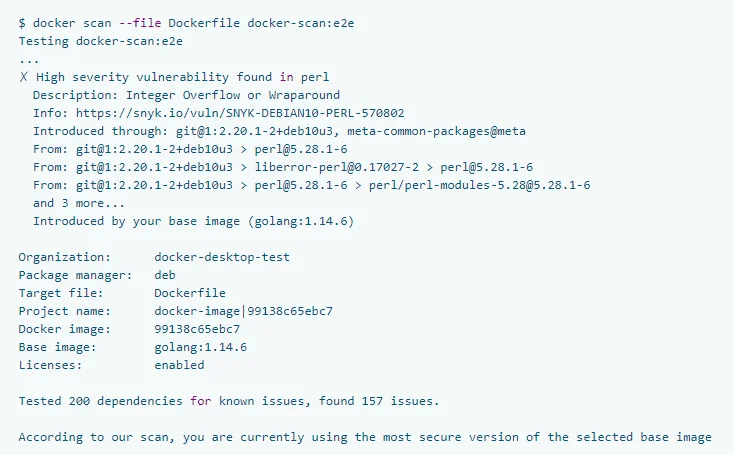
Q) How to get a detailed scan report
Ans: You can get a detailed scan report about a Docker image by providing the Dockerfile used to create the image. The syntax is docker scan –file PATH_TO_DOCKERFILE DOCKER_IMAGE. For example, if you apply the option to the docker-scan test image, it displays the following result:
Quiz Time
With CKA/CKAD training program, we are going to cover 100+ sample exam questions to help you prepare for CKA/CKAD certification.
Check out one of the questions and see if you can solve this.
Ques) Which of the following is a text document that contains all the commands a user could call on the command line to build an image?
A. Docker compose
B. Docker registry
C. Docker Hub
D. Docker file
Comment your answer in the comment box.
Related Post
- Certified Kubernetes Administrator (CKA): Step-by-Step Activity Guide (Hands-on Lab)
- Monolithic vs Microservices – Difference, Advantages & Disadvantages
- Docker Images: A Complete Guide For Beginners
- Docker Architecture: A Complete Docker Introduction
- Docker Network: An Introduction to Docker Networking
Next Task For You
Discover the Power of Kubernetes, Docker & DevOps – Join Our Free Masterclass. Unlock the secrets of Kubernetes, Docker, and DevOps in our exclusive, no-cost masterclass. Take the first step towards building highly sought-after skills and securing lucrative job opportunities. Click on the below image to Register Our FREE Masterclass Now!


![AWS DevOps [DOP-C02] Professional Step By Step Activity Guides (Hands-On Labs)](https://k21academy.com/wp-content/uploads/2023/02/DOP-C02-1.png)