

![]()
The most obvious reason for a Kubernetes cluster upgrade is the software aging. We must upgrade the cluster on a regular basis to stay up with the newest security features and bug patches, as well as to take advantage of new features that are published on a regular basis. This is particularly crucial if we have installed a very old version or if we want to automate the procedure so that we are constantly up to date with the newest supported version.
In this blog, we will cover How to Upgrade the Kubernetes Cluster. We have a set of Hands-on Labs that you must perform in order to learn Docker & Kubernetes and clear the CKA certification exam. Cluster Architecture, Installation & Configuration which includes Version Upgrade On a Kubernetes Cluster Using kubeadm, have a total weightage of 25% in the Exam.
In this blog post, we are going to cover the following topics:
The Upgrade Workflow
When you are upgrading the Kubernetes cluster created with kubeadm, the flow should be from version 1.25.x to version 1.26.x, and from version 1.26.x to 1.26.y (where y > x). Skipping MINOR versions when upgrading is unsupported.
The upgrade workflow at a high level is the following:
- Upgrade the primary control plane node.
- Upgrade additional control plane nodes.
- Upgrade worker nodes.
Prerequisites
1) Make sure you have a K8s cluster deployed already.
Learn How To Setup A Three Node Kubernetes Cluster For CKA
2) Make sure you read the release notes carefully.
3) Make sure to back up any important components.
Learn more about Etcd Backup And Restore In Kubernetes
Upgrade master node
Upgrading the control plane consist of the following steps:
- Upgrade kubeadm on the Control Plane node
- Drain the Control Plane node
- Plan the upgrade (kubeadm upgrade plan)
- Apply the upgrade (kubeadm upgrade apply)
- Upgrade kubelet & kubectl on the control Plane node
- Uncordon the Control Plane node
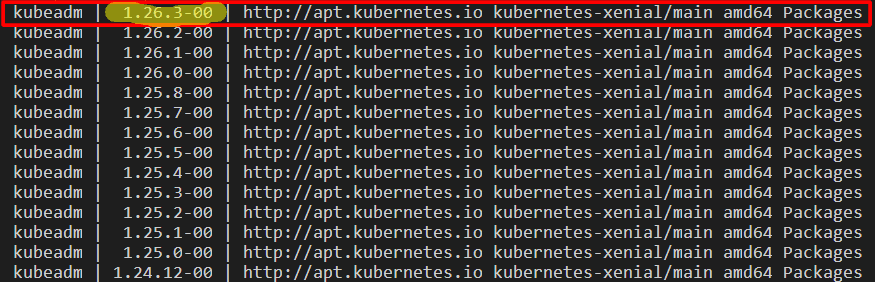
1) Determine which version to upgrade to
$ apt update
$ apt-cache madison kubeadm
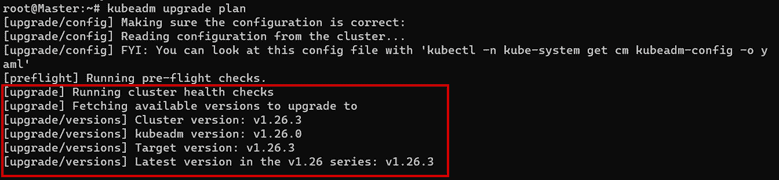
2) On the control plane node, run:
$ kubeadm upgrade plan
3) Upgrading kubeadm tool
$ apt-mark unhold kubeadm && \
apt-get update && apt-get install -y kubeadm=1.26.3-00 && \
apt-mark hold kubeadm
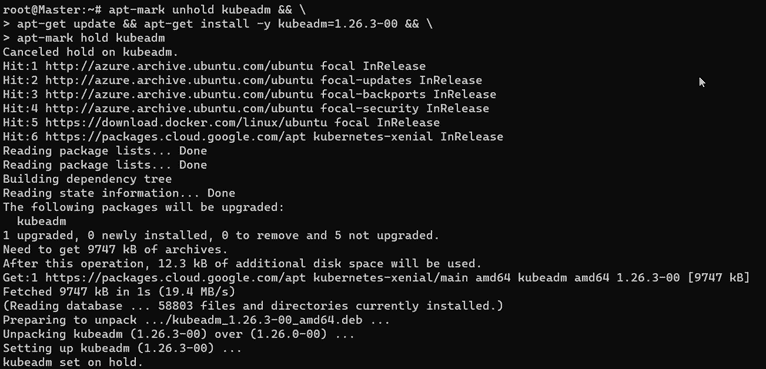
4) Verify that the download works and has the expected version:
$ kubeadm version

5) Drain the control plane node:
# replace <Node-Name> with the name of your control plane node
$ kubectl drain <Node-Name> --ignore-daemonsets --delete-local-data

6) On the control plane node, run:
$ kubeadm upgrade plan
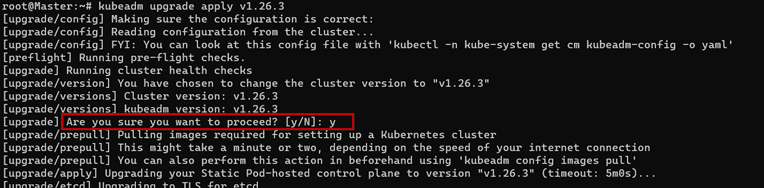
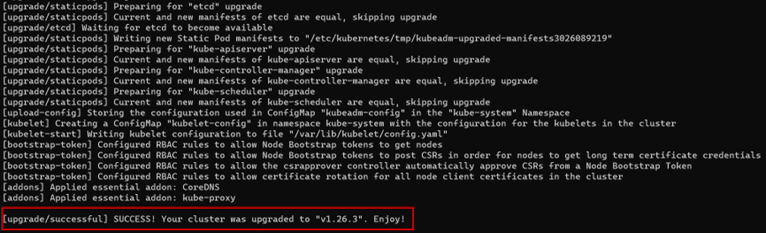
7) On the control plane node, run:
$ kubeadm upgrade apply v1.26.3
8) Uncordon the control plane node:
$ kubectl uncordon <node name>
$ kubectl uncordon master
9) Upgrade kubelet and kubectl
$ apt-mark unhold kubelet kubectl && \
apt-get update && apt-get install -y kubelet=1.26.3-00 kubectl=1.26.3-00 && \
apt-mark hold kubelet kubectl
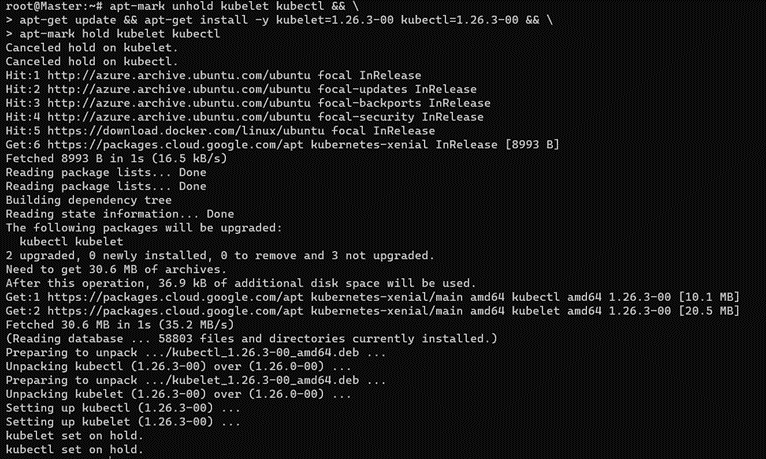
10) Restart the kubelet
$ systemctl daemon-reload
$ systemctl restart kubelet
11) Check Version
$ kubectl get nodes

Congratulations! Your master node is upgraded. Half the way is done.
Upgrade worker nodes
The upgrade procedure on worker nodes should be executed one node at a time or few nodes at a time, without compromising the minimum required capacity for running your workloads.
Note: Follow this section on each of your worker nodes you want to update.
Upgrading the worker nodes consist of the following steps:
- Drain the node
- Upgrade kubeadm on the node
- Upgrade the kubelet configuration (kubeadm upgrade node)
- Upgrade kubelet & kubectl
- Uncordon the node
1) Check the Version of the worker node From master machine
$ Kubectl get nodes

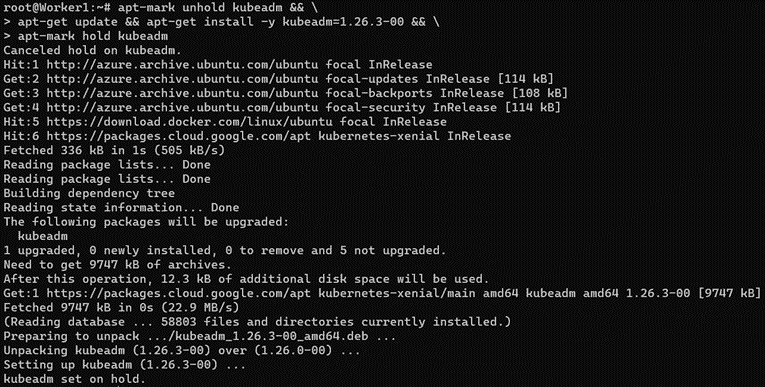
2) Upgrade kubeadm perform this on Worker Machine
$ apt-mark unhold kubeadm && \
apt-get update && apt-get install -y kubeadm=1.26.3-00 && \
apt-mark hold kubeadm
3) Drain the Worker Node (perform this on master Machine)
$ kubectl drain <node-to-drain> --ignore-daemonsets
$ kubectl drain worker-02 --ignore-daemonsets

4) Upgrade kubelet config on worker node (perform this on Worker Machine)
$ kubeadm upgrade node

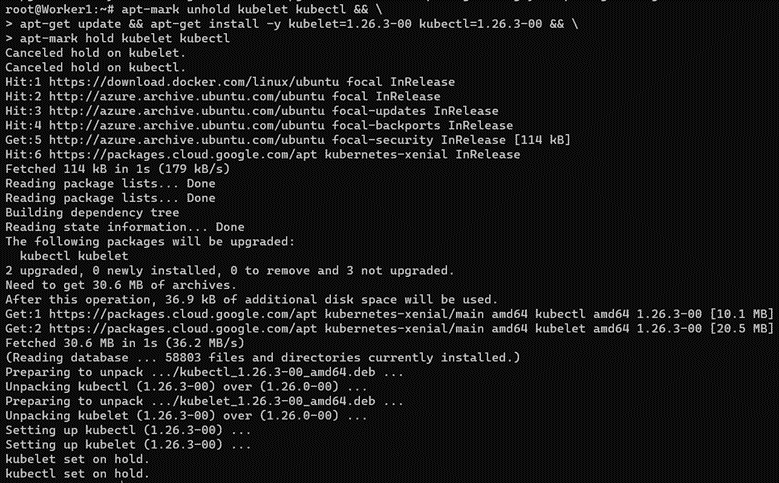
5) Upgrade kubelet and kubectl (perform this on Worker Machine)
$ apt-mark unhold kubelet kubectl && \
apt-get update && apt-get install -y kubelet=1.18.8-00 kubectl=1.18.8-00 && \
apt-mark hold kubelet kubectl
6) Restart the kubelet
$ systemctl daemon-reload
$ systemctl restart kubelet
7) Uncordon the node (perform this on master Machine)
$ kubectl uncordon worker-02
8) Verify the status of the cluster
$ kubectl get nodes

Hurrah! You are all done with the cluster upgrade.
Conclusion
Keeping up with new versions is a key element of your infrastructure security strategy since it allows apps to immediately benefit from new features.
Related/References
- Visit our YouTube channel “K21Academy”
- Certified Kubernetes Administrator (CKA) Certification Exam
- (CKA) Certification: Step By Step Activity Guides/Hands-On Lab Exercise & Learning Path
- Certified Kubernetes Application Developer (CKAD) Certification Exam
- (CKAD) Certification: Step By Step Activity Guides/Hands-On Lab Exercise & Learning Path
- Create AKS Cluster: A Complete Step-by-Step Guide
- Container (Docker) vs Virtual Machines (VM): What Is The Difference?
- How To Setup A Three Node Kubernetes Cluster For CKA: Step By Step
Join FREE Masterclass
Discover the Power of Kubernetes, Docker & DevOps – Join Our Free Masterclass. Unlock the secrets of Kubernetes, Docker, and DevOps in our exclusive, no-cost masterclass. Take the first step towards building highly sought-after skills and securing lucrative job opportunities. Click on the below image to Register Our FREE Masterclass Now!


![AWS DevOps [DOP-C02] Professional Step By Step Activity Guides (Hands-On Labs)](https://k21academy.com/wp-content/uploads/2023/02/DOP-C02-1.png)