

![]()
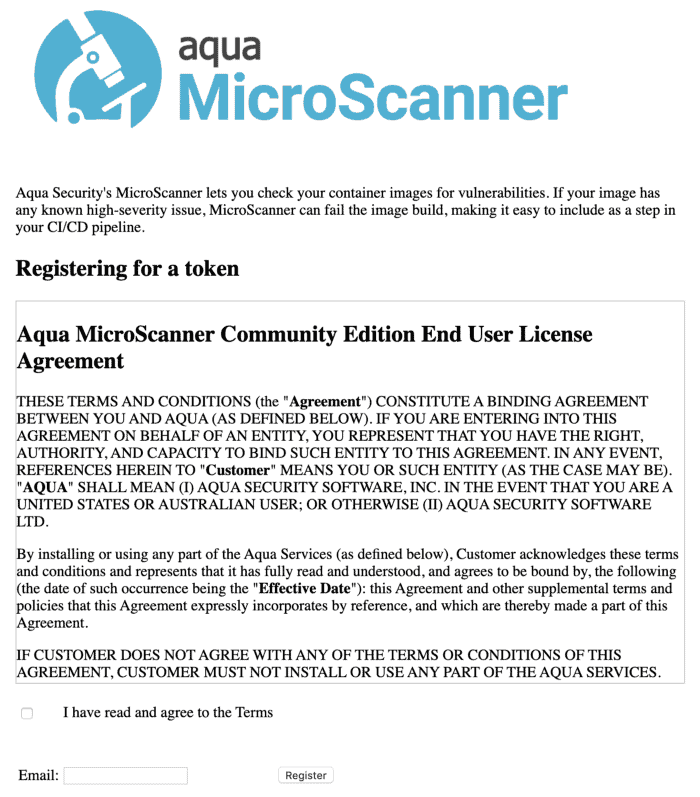
This blog talks about Aqua Security’s MicroScanner that lets you check your container images for vulnerabilities. If your image has any known high-severity issue, MicroScanner can fail the image build, making it easy to include as a step in your CI/CD pipeline.
The technologies we talk about in this blog are part of DevOps. If it’s something in which you have an interest or you want to learn it then you can visit our previous blog to know more about the [DOFD] DevOps Foundation Certification.

Aqua provides end-to-end security for applications running on Docker Enterprise Edition or Community Edition, protecting the DevOps pipeline and production workloads in runtime with full visibility and control.
With Aqua, you can protect your Docker applications running on either Linux (docker or containered runtimes) or Windows, with powerful image assurance, container immutability, and least-privilege enforcement, and container firewall.
Advantages of Aqua Container Scanner
- Integrate security controls into your DevOps pipeline.
- Protect Docker applications at runtime, in real-time.
- Apply enterprise-grade security to your Docker environment.
- Continuous Image Assurance.
- Runtime Security for Docker.
- Secrets Management.
- Docker CIS Benchmark Validation.
- Container Firewall for Docker.
- Granular Security Events Auditing.
How To Register For The Aqua Container Security Token
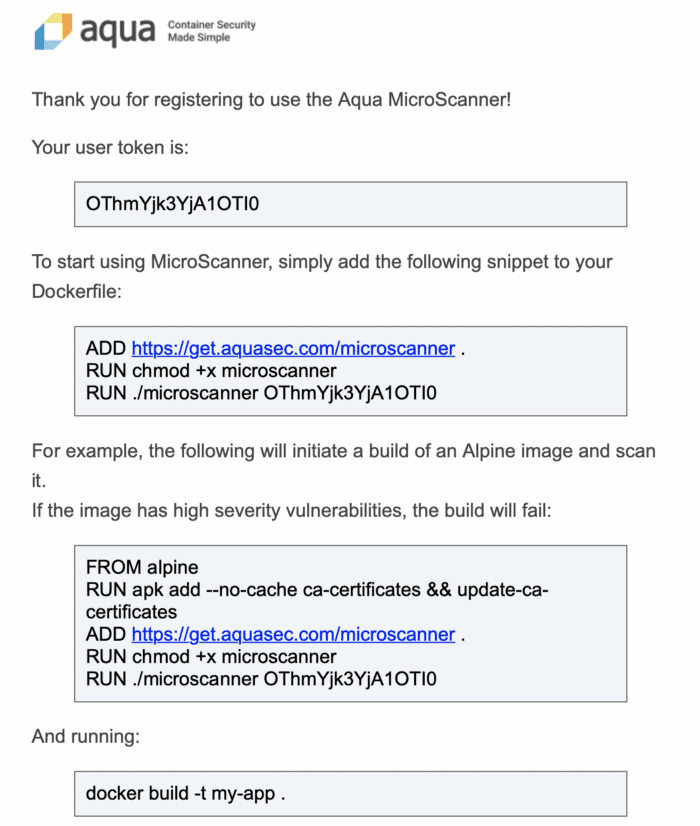
Login to the URL and then fill up the details on the page and then we will be getting an email and when we click on it we will get the full details like shown below
Adding Microscanner To Your Dockerfile
Step 1: To use MicroScanner you’ll first need to register for a token.
$ docker run --rm -it aquasec/microscanner --register <email address>
Step 2: Adding microscanner to your Dockerfile
The following lines add microscanner to a Dockerfile, and execute it.
ADD https://get.aquasec.com/microscanner /
RUN chmod +x /microscanner
RUN /microscanner <TOKEN> [--continue-on-failure]
Step 3: You may also need to add ca-certificates to the image if they are not already built into the parent image, or added in your Dockerfile, so that microscanner can make an HTTPS connection. For example (Debian):
RUN apt-get update && apt-get -y install ca-certificates
or (Alpine):
RUN apk add --no-cache ca-certificates && update-ca-certificates
Step 4: Example Dockerfile
FROM debian:jessie-slim
RUN apt-get update && apt-get -y install ca-certificates
ADD https://get.aquasec.com/microscanner /
RUN chmod +x /microscanner
ARG token
RUN /microscanner ${token}
RUN echo "No vulnerabilities!"
Pass the token obtained on registration in at build time.
$ docker build --build-arg=token=<TOKEN> --no-cache .RUN apk add --no-cache ca-certificates && update-ca-certificates && \
    wget -O /microscanner https://get.aquasec.com/microscanner && \
    chmod +x /microscanner && \
    /microscanner <token> && \
    rm -rf /microscanner
Also Check: DevOps vs CloudOps, Know their major differences!
Demo On The Aqua Container Scanning
Step 1: Once after we register and then get the token from the Aqua team, we need to include that in our Dockerfile.
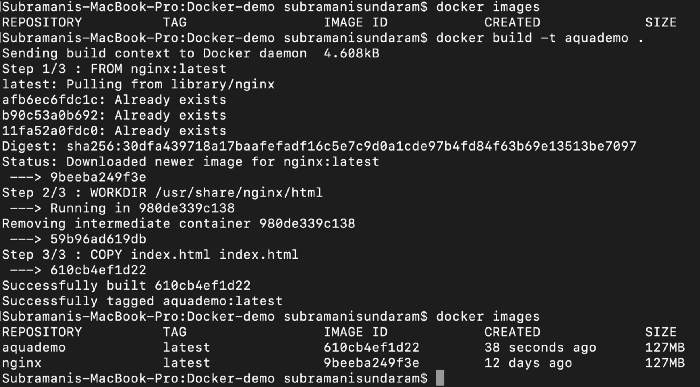
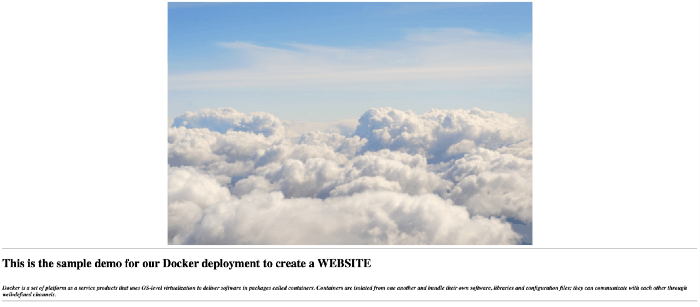
Step 2: Below is the sample Dockerfile before the addition of the Aqua token.

Step 3: When we build this image we will get the image created such as below, we use this command to do it.
docker build -t <imagename> <location of the Dockerfile>
Step 4: To run the docker image to see the output we need to port map it as the internal port of the image is tagged to the port 80 and the outer port we need to map it to the port which is available as 8090 or 8080 depending upon the free port available on the machine.


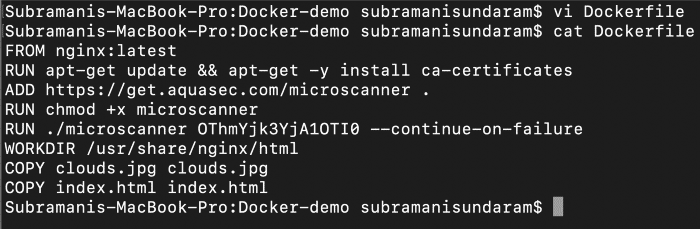
Step 5: Now we can include the Aqua container scanner API key from the email which we received above.
Step 6: When we build this image we will get the image created such as below, we use this command to do it.
docker build -t <imagename> <location of the Dockerfile>
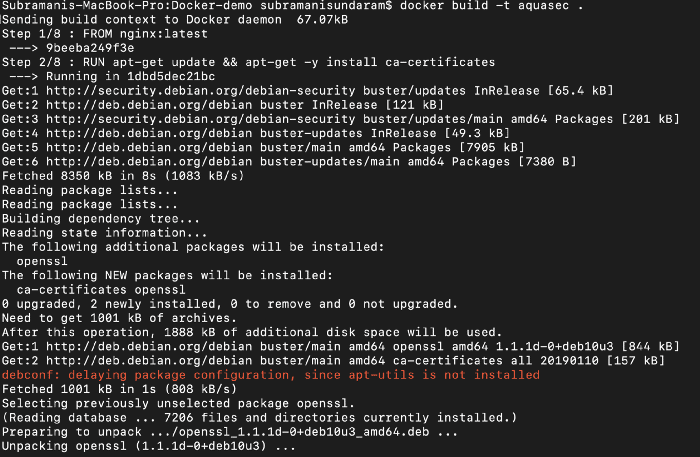
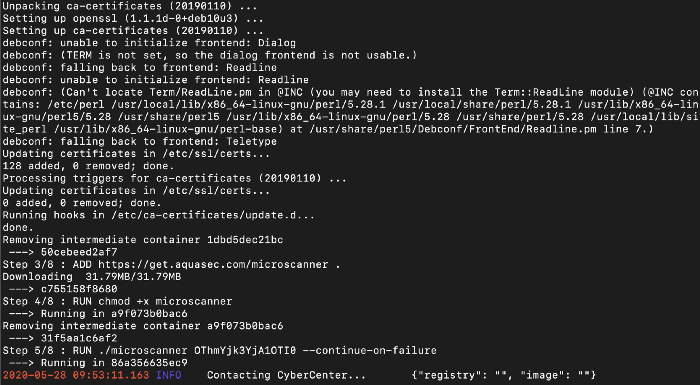
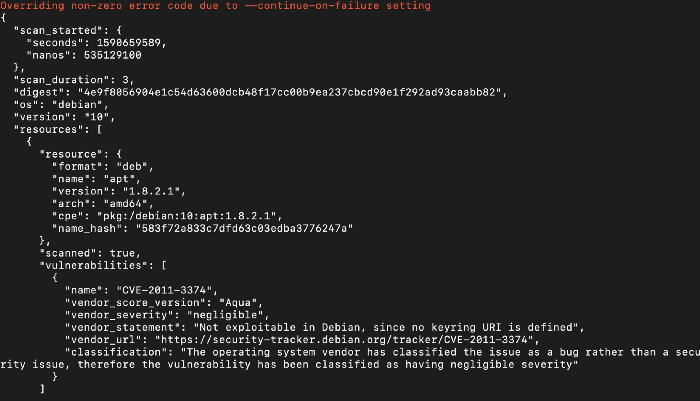
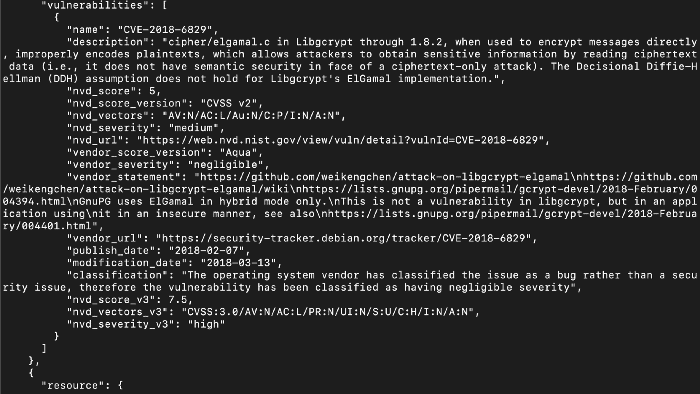
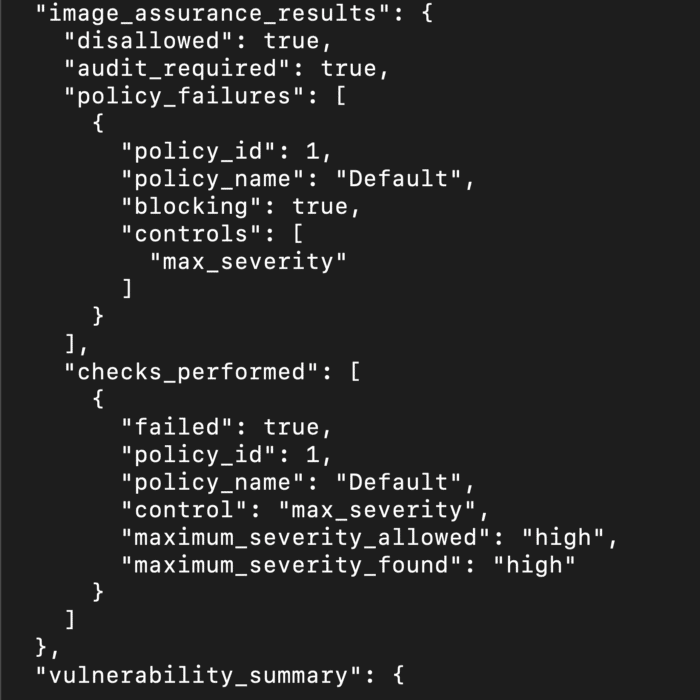
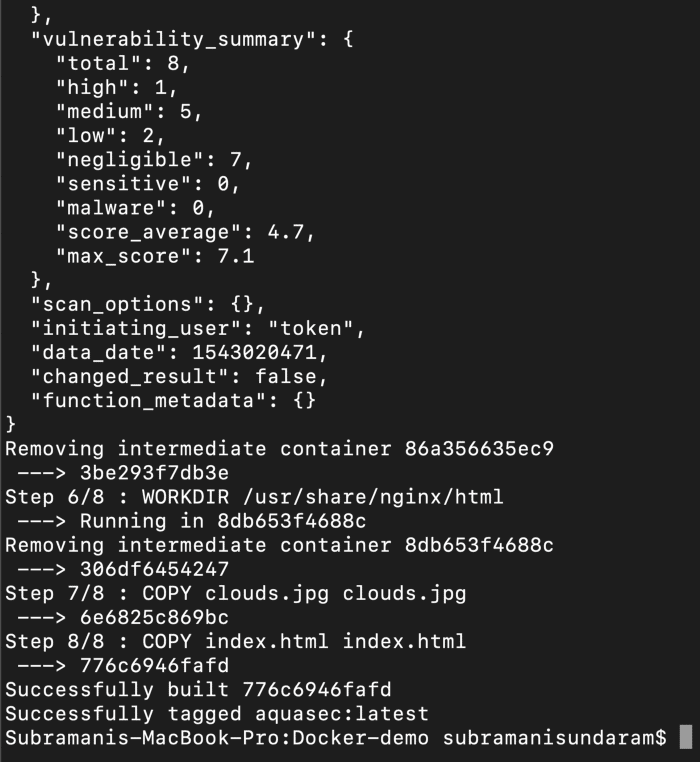
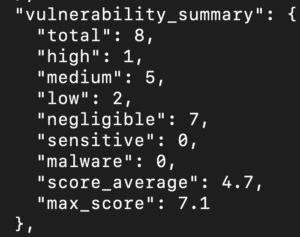
Step 7: If we see the above the docker image while building it scans the complete image and then if tell us how many vulnerabilities are there and we can even define a condition that if there are any high vulnerability we can avoid checking in the image into the registry.
Step 8: To run the docker image to see the output we need to port map it as the internal port of the image is tagged to the port 80 and the outer port we need to map it to the port which is available as 8090 or 8080 depending upon the free port available on the machine.

If we see the above, we are getting the same output as the before one, but this time the image that you are using is the SCANNED one, and if we find any faults we can remove it before even it comes to our section. That’s the advantage of this container security.
Conclusion
Aqua is a powerful tool for securing containerized applications, offering comprehensive features and seamless integration. Whether you’re a small startup or a large enterprise, Aqua can help you achieve robust container security.
FAQs
What makes Aqua different from other container security tools?
Aqua offers a comprehensive security solution with advanced features such as machine learning, behavioral analysis, and real-time threat intelligence.
How does Aqua handle zero-day vulnerabilities?
Aqua's threat intelligence and machine learning capabilities enable it to detect and respond to zero-day vulnerabilities effectively.
Can Aqua be used in a multi-cloud environment?
Yes, Aqua supports integration with major cloud providers, ensuring consistent security across multi-cloud environments.
What is the cost of using Aqua?
The cost of using Aqua varies depending on the size and complexity of your environment. Contact Aqua for detailed pricing information.
How do I get started with Aqua?
Getting started with Aqua is easy. Visit their website, sign up for a free trial, and follow the installation and configuration guides to begin securing your containerized applications.
Related/References
- [DOFD] DevOps Foundation Certification Exam: Everything You Need To Know
- [AZ-400] Microsoft Azure DevOps Certification Exam: Everything You Need To Know
- [AZ-400] Roles and Responsibilities As An Azure DevOps Engineer
- [AZ-400] Microsoft Azure DevOps Certification Exam: Everything You Need To Know
- Certified Kubernetes Administrator (CKA) Certification Exam: Everything You Must Know
- Check out the official DevOps Institute page for [DOFD] DevOps Foundation here.
Next Task For You
Begin your journey towards becoming a DevOps Expert and earn a lot more by landing a high-paying job.
Join FREE CLASS to learn more about the DevOps Roles and Responsibilities, Job opportunities related to DevOps in the market, and what to study Including Hands-On labs and projects you must perform to get your Dream job.
Click on the below image to Register for Our FREE Class on Mastering DevOps on Cloud: How to Build In-Demand Skills and Land High-Paying Jobs


![AWS DevOps [DOP-C02] Professional Step By Step Activity Guides (Hands-On Labs)](https://k21academy.com/wp-content/uploads/2023/02/DOP-C02-1.png)