![]()
In this blog, I have covered steps to Schedule And Automate SQL Server DB Replication between different servers [SQL Server 2017 or Windows Server 2016]. We cover this in detail in our Azure Data Database Administrator [DP-300] Training program.
To understand more about the certification read our blog Microsoft Azure Database Administrator Associate.
Topics We’ll Cover:
- Introduction
- Create SQL Server On Azure
- Prepare The Production SQL Server
- Creating Backup On SQL Server Production
- Restoring The Backup On SQL Server Test
Introduction
SQL Server DB replication is a technology that is used to copy or distribute, data and database objects from one database to another. Also, it synchronizing between databases to maintain consistency and integrity of the data. In most cases, replication is a process of reproducing the data at the desired targets. SQL Server replication is used for copying and synchronizing data continuously or it can also be scheduled to run at predetermined intervals. There are several different replication techniques that support a variety of data synchronization approaches; one-way; one-to-many; many-to-one; and bi-directional, and keep several datasets in sync with each other.
Create SQL Server On Azure
1.) The first thing required to perform create an Azure SQL Server is to get a Trial Account of Microsoft Azure. (You get 200 USD FREE Credit from Microsoft to practice).
You can Check out our blog to know more about how to create a free Azure account.
2.) After creating an azure account, open a browser and log in to the Azure portal using your Azure credentials: https://portal.azure.com.
3.) Go to your Azure subscription, create a resource group first, which will be the container of the SQL Servers.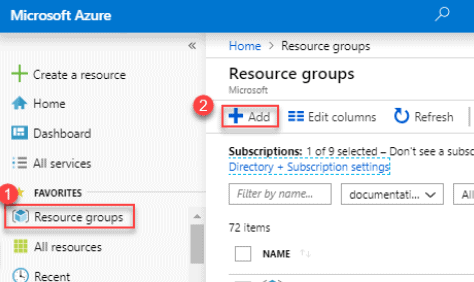
4.) Then, go to the marketplace and search “SQL server”, choose the SQL Server 2017 on Windows Server 2016 as shown in the screenshot.
5.) In the dropdown manual, choose the Standard Edition to have all the standard features. Then, click “Start with a pre-set configuration” to save time. Then, click “Create VM”.
6.) In the Project Details section, select your Azure subscription and then select Create new to create a new resource group. Type SQLVM-RG for the name.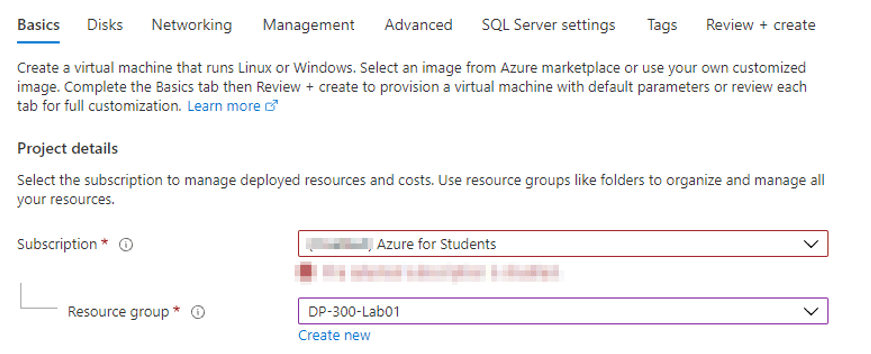
7.)Under Instance details:
a.) Type SQLVM for the Virtual machine name.
b.) Choose a location for your Region.
c.) For the purpose of this quickstart, leave Availability options set to No infrastructure redundancy required. To find out more information about availability options, see Availability.
d.) In the Image list, select Free SQL Server License: SQLServer2017 Developer on Windows Server 2016.
Choose to Change size for the size of the virtual machine and select the A2 Basic offering. Be sure to clean up your resources once you’re done with them to prevent any unexpected charges.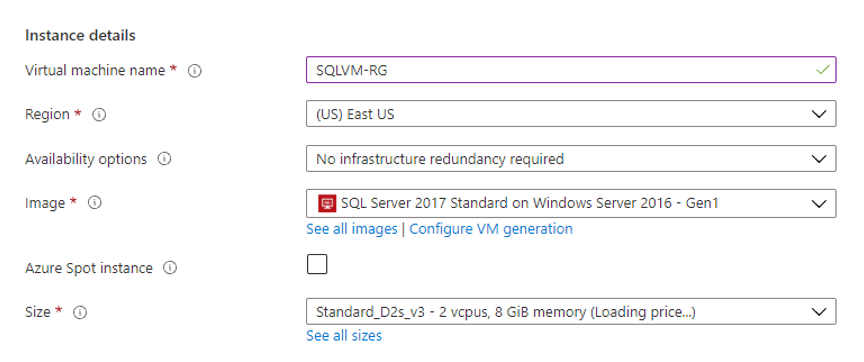
8.) Under Administrator account, provide a username, such as azure user, and a password. The password must be at least 12 characters long and meet the defined complexity requirements.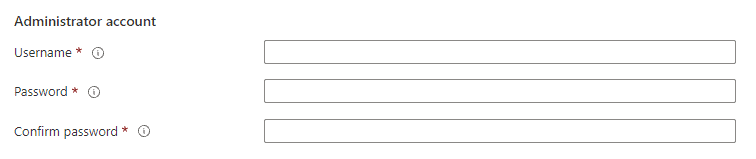 9.) Under Inbound port rules, choose to Allow selected ports and then select RDP (3389) from the drop-down.
 10.) Change any other settings if needed, and then select Review + create.
Prepare the Production SQL Server
After the first SQL Server has been deployed, go to the resource group and find the Windows VM for SQL-Server-Prod. We can access the machine remotely by having the port number and public IP address.
1.) Download a Sample DB
Let’s install a sample database from Microsoft. On the production machine, download the database backup: https://github.com/Microsoft/sql-server-samples/releases/download/adventureworks/AdventureWorks2017.bak
In SSMS, login to the DB instance using the default Windows admin account.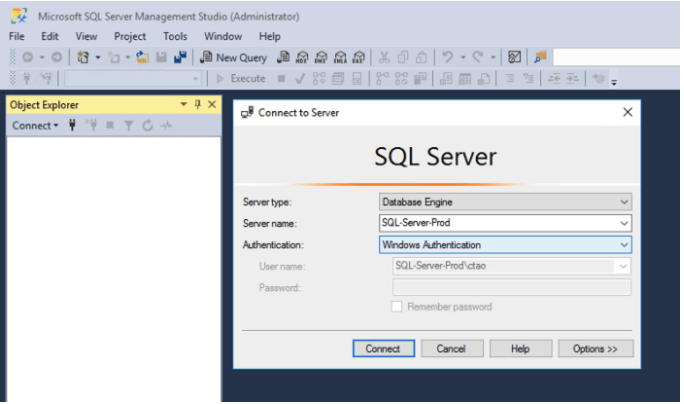
2.) Restore the Sample DB
1.) Right-click “Databases” and select “Restore Database”.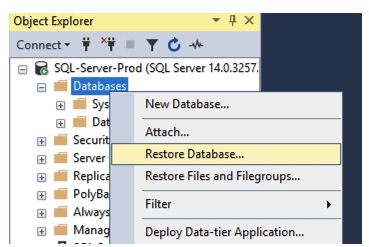
2.)In the popup window, click the browse button on the right of the Device radio button -> Add -> Browse the bak file that you’ve just downloaded -> OK -> OK -> OK. It may take about 1 minute to restore the whole database.
3.) Prepare Backup Path
1.) Next, we need to create a folder that the backup files will be put into. Also, we need to share this folder in the network so that the Test machine can access the backup file and restore it.
I created the directory C:\backup\. Then, share the fold to the same admin account at the other machine.
Note that it is important to add MSSQLSERVER users to the sharing. Otherwise, SQL Server might not be able to write backup files into this folder after sharing. Just simply type the MSSQLSERVER username and click Add button, then make sure to grant Read/Write permission to it.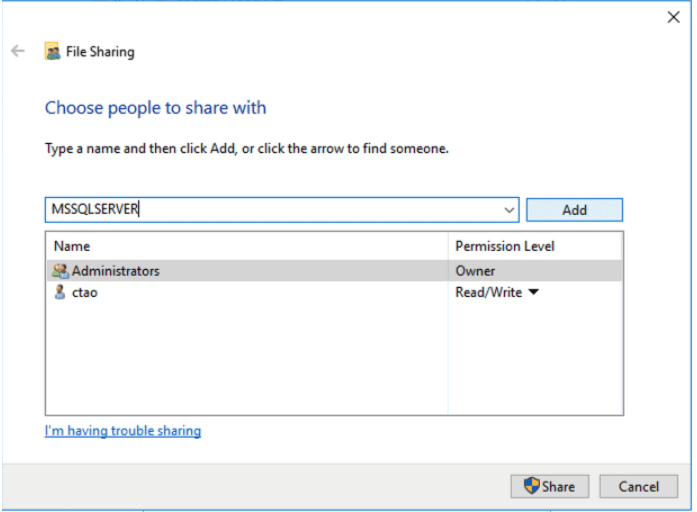
2.) On the Test machine, we will be able to access the backup directory now.
Creating Backup on SQL-Server-Production
1.) Since the SQL Server Agent is disabled by default, we need to remote control the Production machine again to enable it. Right-click on SQL-Server-Agent -> Start. Then, in the pop-up confirmation window click Yes.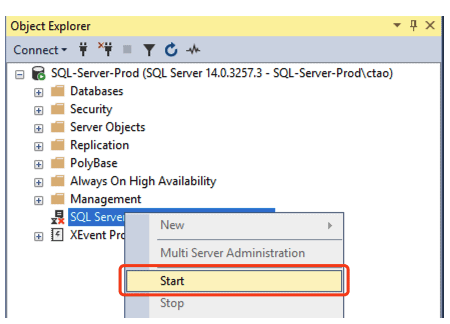
2.) Wait until SQL Server Agent is started, go back to the testing machine. You will need to reconnect the production SQL Server to see the SQL Agent enabled. Then Right-click Jobs -> New Job.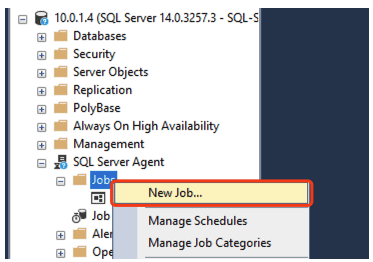
3.) In the New Job window, input a name and go to the Steps tab. In the Steps tab, click the New button.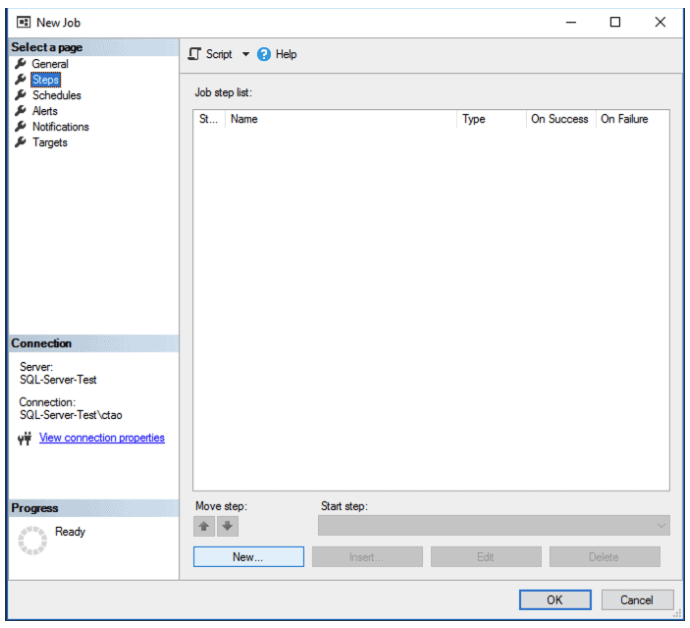
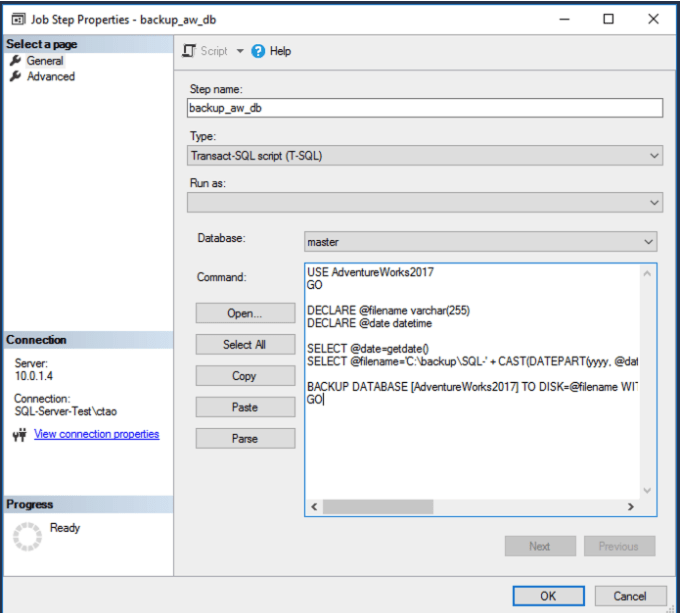
In the New Job Step window, input the step name and the script as follows:
USE AdventureWorks2017


GO


DECLARE @filename varchar(255)

DECLARE @date datetime

SELECT @date=getdate()

SELECT @filename='C:\backup\AdventureWorks2017-' +

CAST(DATEPART(yyyy, @date) as varchar) + '-' + CAST(DATEPART(mm, @date) as varchar) + '-' + CAST(DATEPART(dd, @date) as varchar) + '.bak'


BACKUP DATABASE AdventureWorks2017 TO DISK=@filename WITH INIT
GO
4.) Then click the Advanced tab, configure the success and failure behaviors. Here, you need to define how large is your database is.
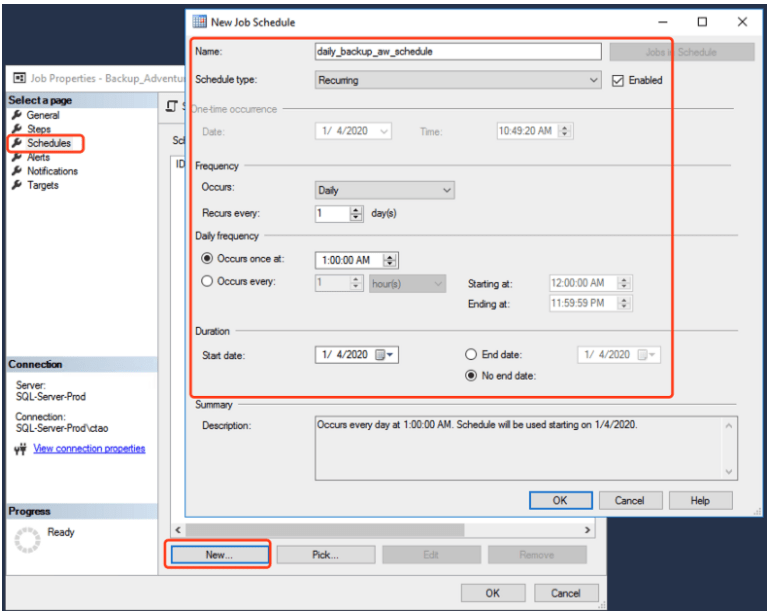
5.) Click OK to confirm apply the Job Step, then go to the Schedule tab and click the New button. You can schedule according to you Then, click the OK button to confirm the schedule.
Restoring the Backup on SQL-Server-Test
1.) First of all, let’s check the accessibility of the backup file from the test machine by access \\SQL-Server-Prod\backup\<backup-file>.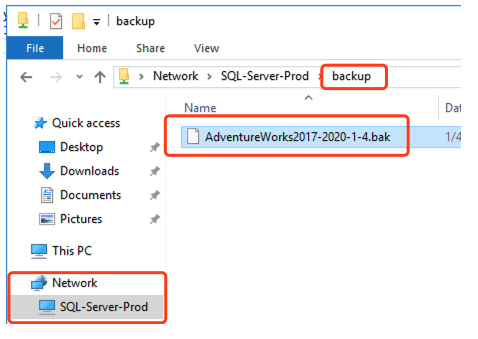
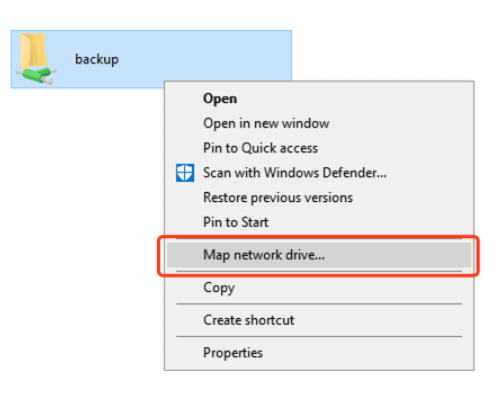
2.) Then mount the remote backup folder to a local drive. This is because usually, the SQL Server does not have permission to use network/remote resources, so the remote resource is not visible to it. Simply right-click on the backup folder and select “Map network drive.
3.) Let’s mount it to Z: drive on the test machine.
4.) Then, we need to let SQL Server identify the network drive using the xp_cmdshell command. By default, this command is not enabled, so we need to enable it. Open a new query sheet and run the following script to enable it.
USE AdventureWorks2017


GO


DECLARE @filename varchar(255)

DECLARE @date datetime

SELECT @date=getdate()

SELECT @filename='C:\backup\AdventureWorks2017-' +

CAST(DATEPART(yyyy, @date) as varchar) + '-' + CAST(DATEPART(mm, @date) as varchar) + '-' + CAST(DATEPART(dd, @date) as varchar) + '.bak'


BACKUP DATABASE AdventureWorks2017 TO DISK=@filename WITH INIT
GO
Then, define the network drive using xp_cmdshell. You can use any Windows user that can access this network drive. Note that you only need to run this command once, so the password will not be retained anywhere in plain format.
EXEC XP_CMDSHELL 'net use Z: \\SQL-Server-Prod\backup <password> /USER:<username>'
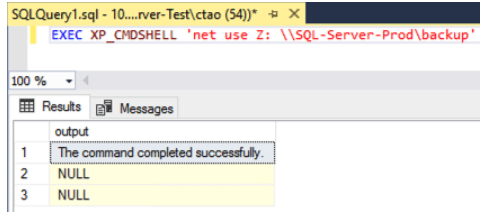 From the result panel, you should see the output saying it was successful.
Related/References
- Exam DP-300: Microsoft Azure Database Administrator Associate
- Microsoft Certified Azure Database Administrator Associate(Hands-On Labs)
- Azure SQL Deployment Options | SQL Managed Instance | SQL Database| SQL On VM
- Migrate SQL Server To Azure SQL Database
- Implement A High Availability And Disaster Recovery Environment
- Use External Table On Azure SQL Managed Instance To Read Data From Azure SQL Database
- Optimize Query Performance In SQL Server
- Create alerts for Azure SQL Managed Instance
Next Task For You
We will cover all the exam objectives related to how to perform migrations, Hands-On Labs, and practice tests in our Azure Database Administrator training program. If you want to begin your journey towards becoming a Microsoft Certified: Azure Database Administrator Associate by checking our FREE CLASS.

Leave a Reply