![]()
This blog gives a step-by-step walkthrough of the Azure Artifacts, an extension used by Azure cloud DevOps Engineers.
This blog talks about technologies that are part of the Azure DevOps environment. If it’s something in which you have an interest or you want to learn it then you can visit our previous blog to know more about the [AZ-400] Microsoft Azure DevOps certification.
What Are Azure Artifacts?
Azure Artifacts is an extension that makes it easy to discover, install, and publish NuGet, npm, and Maven packages in Azure DevOps. It’s deeply integrated with other hubs like Build so that package management can become a seamless part of your existing workflows.
Note: Read Our Blog on Azure Policy Compliance.
Advantages of Azure Artifacts
You have the below-mentioned advantages from Azure Artifacts
- You can share code efficiently. You can simply share code with small teams and large enterprises.
- You can handle all package types. Get universal artifact management for Maven, npm, NuGet, and Python.
- Add packages to any pipeline.
Case Study
In this Case Study, we are performing a task to copy application files and other artifacts that are required in order to install the app; such as PowerShell scripts, PowerShell-DSC modules, and more.
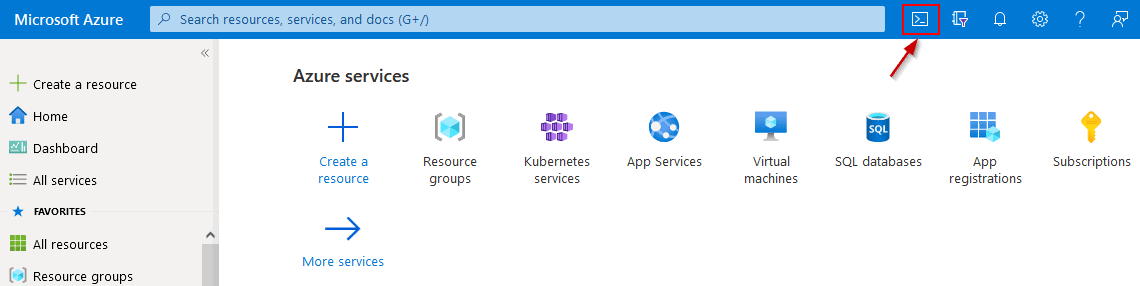
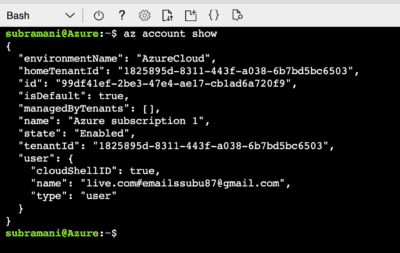
- Step 1: We need to first create a service principal for this operation, so either we can use our local PowerShell or the cloud shell. We are using Azure Shell, for this task. You can log in to Azure Portal and click on Azure Shell.

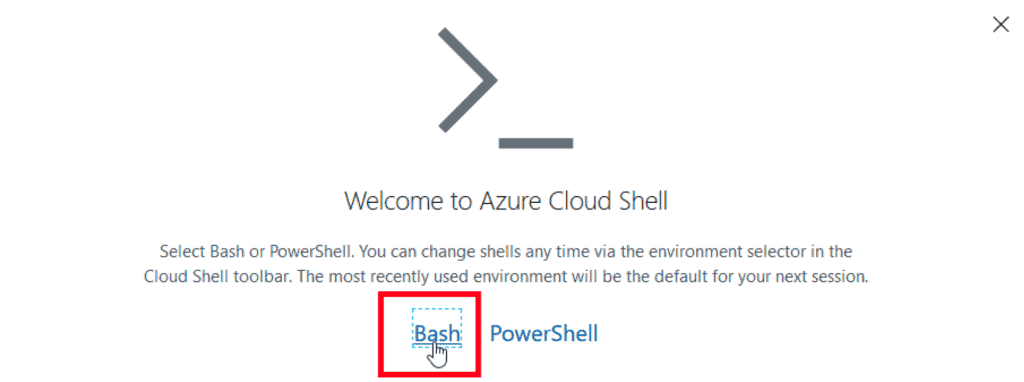
- Step 2: Now, choose the Bash option as we’ll run Bash commands in the Task.

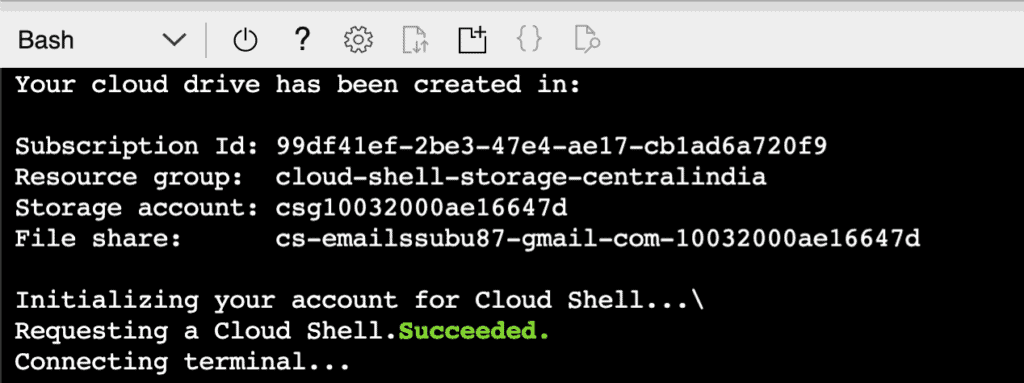
- Step 3: Now, to use Bash Shell on Azure CLI you have to create a storage account. So, here just click on create and the account will be created and after completion, the Bash Shell will automatically open.


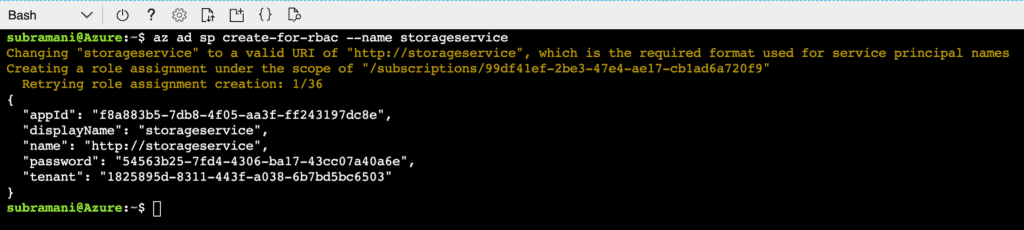
- Step 4: The task supports authentication based on Azure Active Directory (AAD). Authentication using a service principal and managed identity is available. For managed identities, only a system-wide managed identity is supported. You can run the below command to create an Azure AD service principal. Also, keep the Id and Password copied on a notepad as we will require them in the later tasks.

- Step 5: You can use the below command to see the Service Principal details that you have created in the last step.

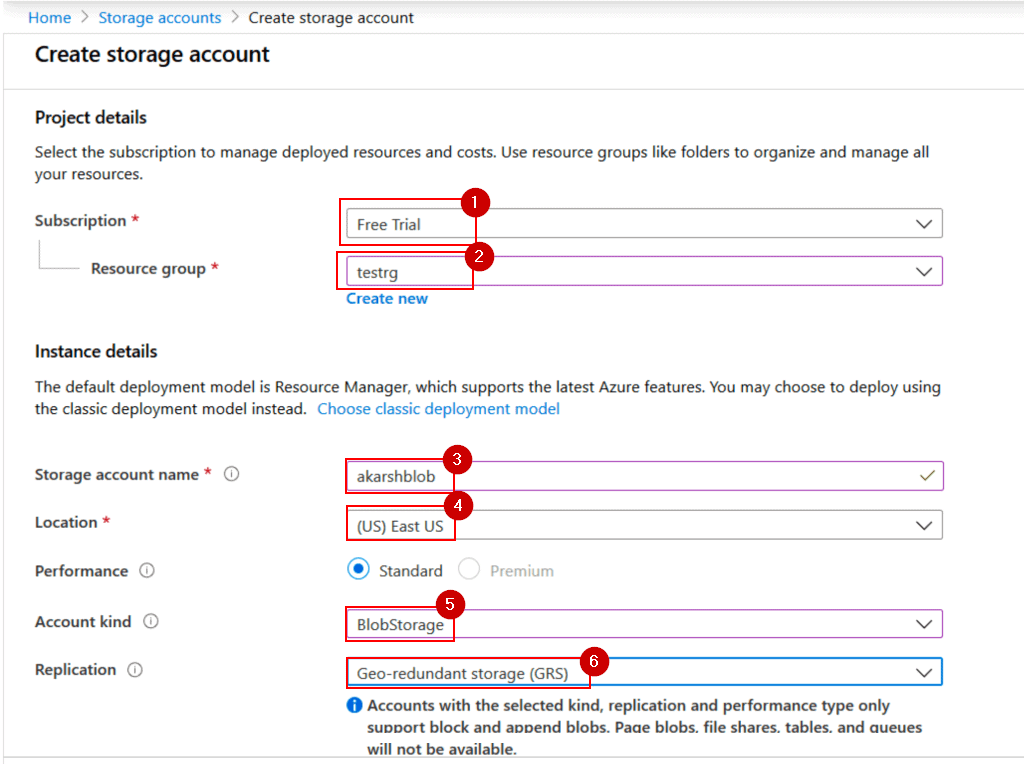
- Step 6: Now, we need to then create a storage account and then a blob container to store our artifacts coming out of the build. For creating an Azure Storage Account, follow the below-mentioned steps:
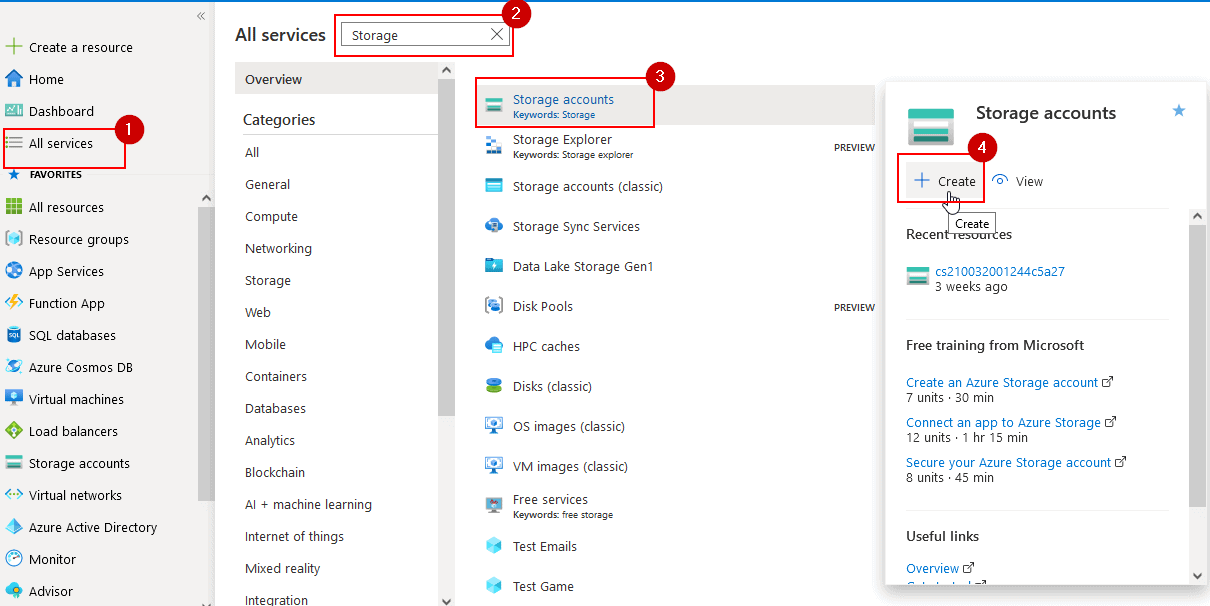
- Click on the All Services Tab and search for Storage Account
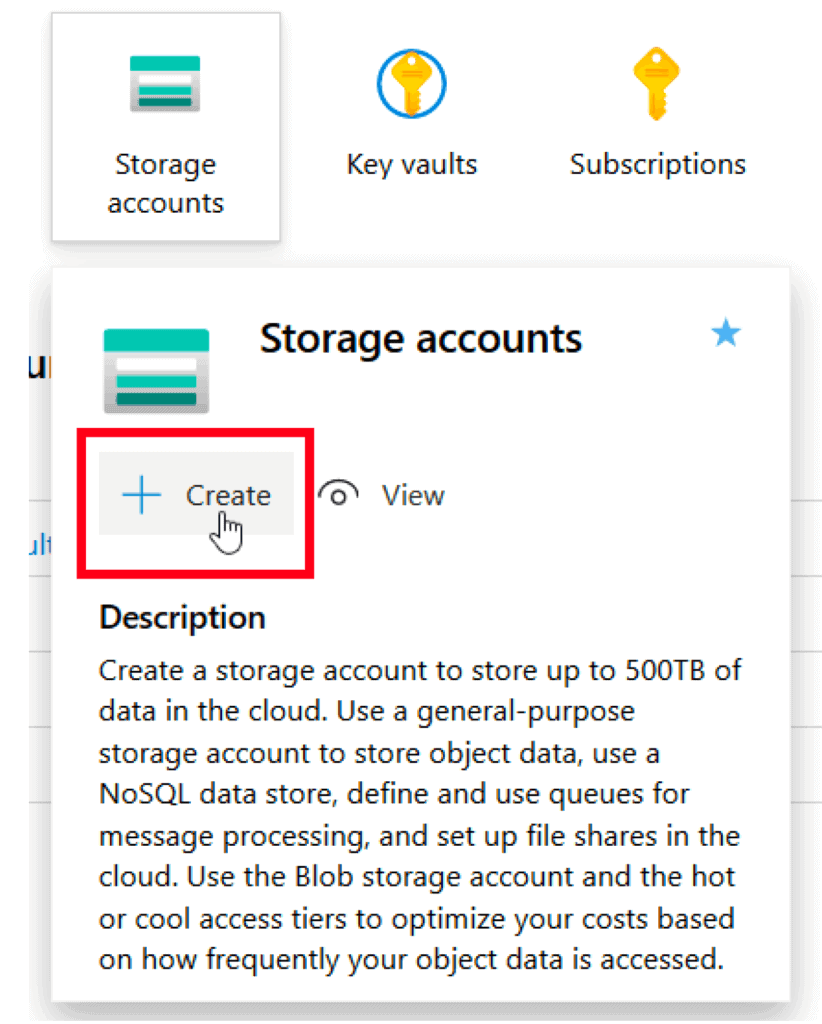
- Now, select the Storage Account and click on Create


Note: You Can Read Our Blog on Azure DevOps.
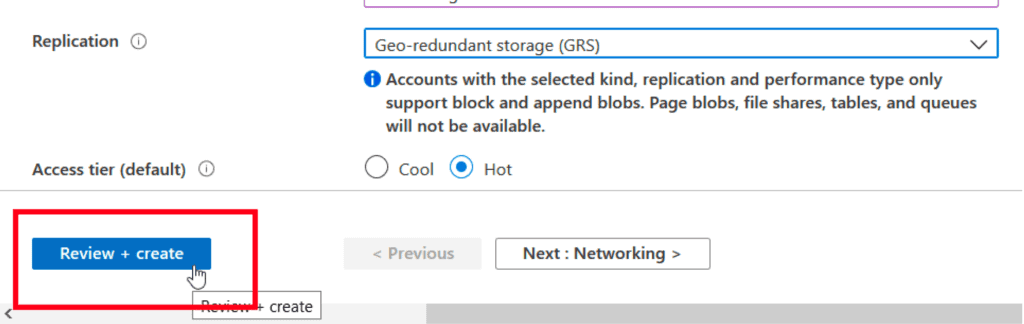
- Step 7: Enter all the relevant details just like we have entered on the Creating Storage Account dialog box and then click on Review+ Create.


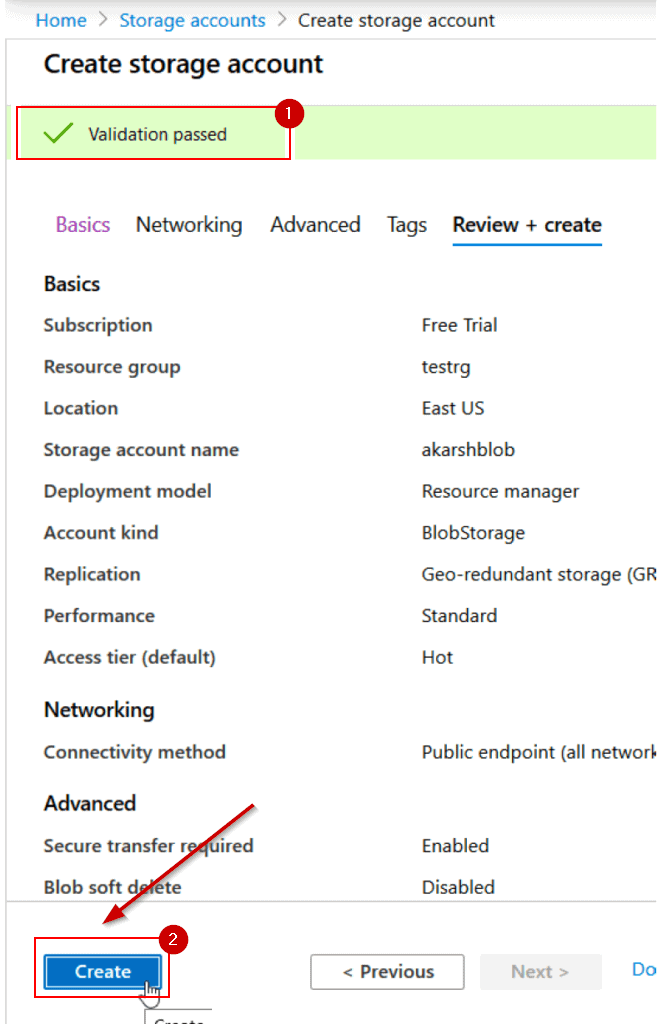
- Step 8: After the Validation is passed, click on Create.

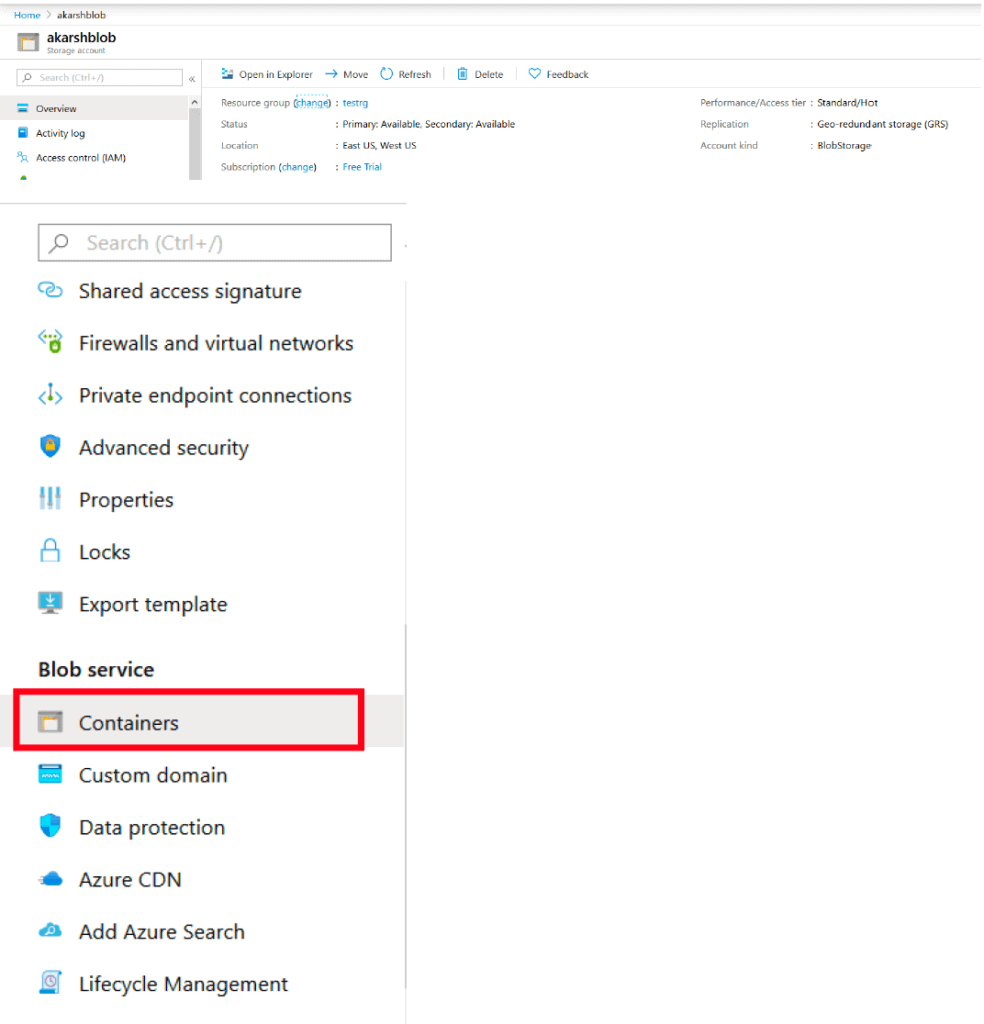
- Step 9: Once the storage account is created, then we need to create a container for our copying purposes. Now, go to the storage account created earlier and select Containers under the Blob Service Blade.

Also, Check Our previous blog post on DevSecOps.
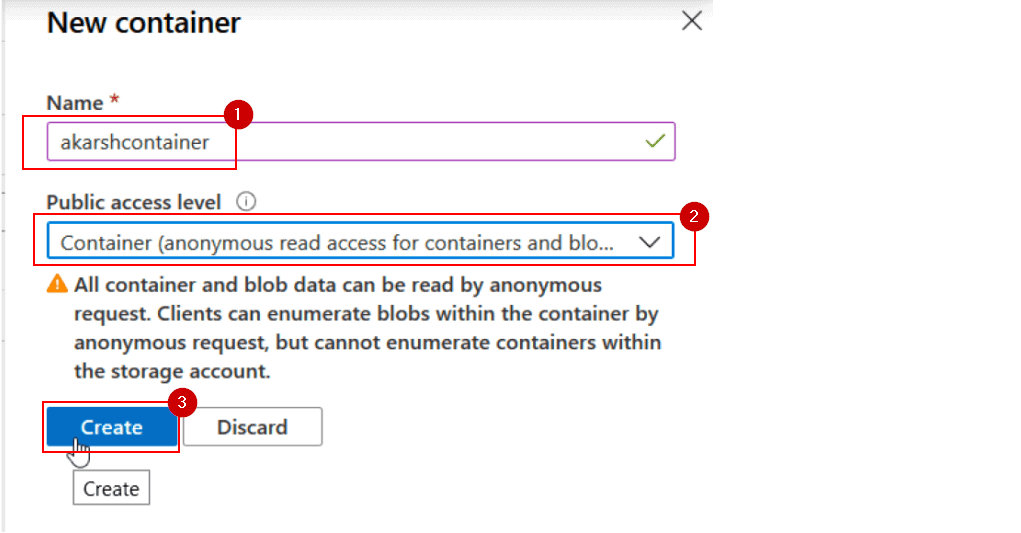
- Step 10: Enter the name and select the Public access level as we have selected below and click on create.

Now, we need to create a service connection between the container we created and the Azure DevOps Pipeline. So that container can be accessed via Azure DevOps Build Pipeline. For creating the Service connection, we will add a task in the Build Pipeline by editing it and then configure the service connection as part of the build pipeline.
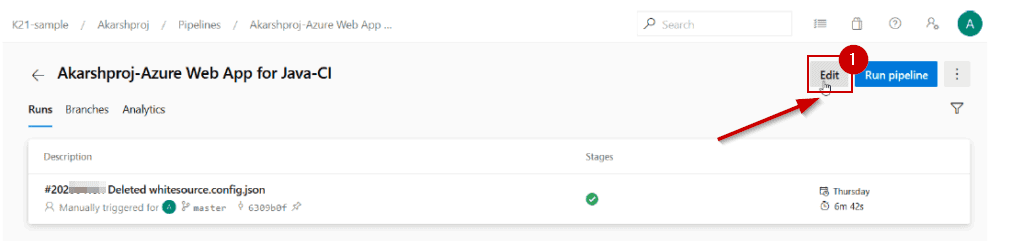
- Step 11: On the Azure DevOps Portal, select any Project, then go to the Build Pipeline and click on Edit.

- Step 12: Now click on the (+) button to add a new task in the Pipeline.

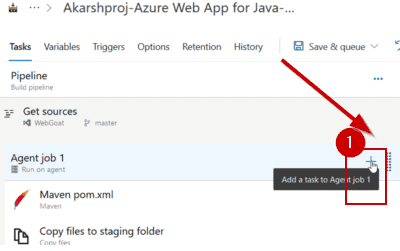
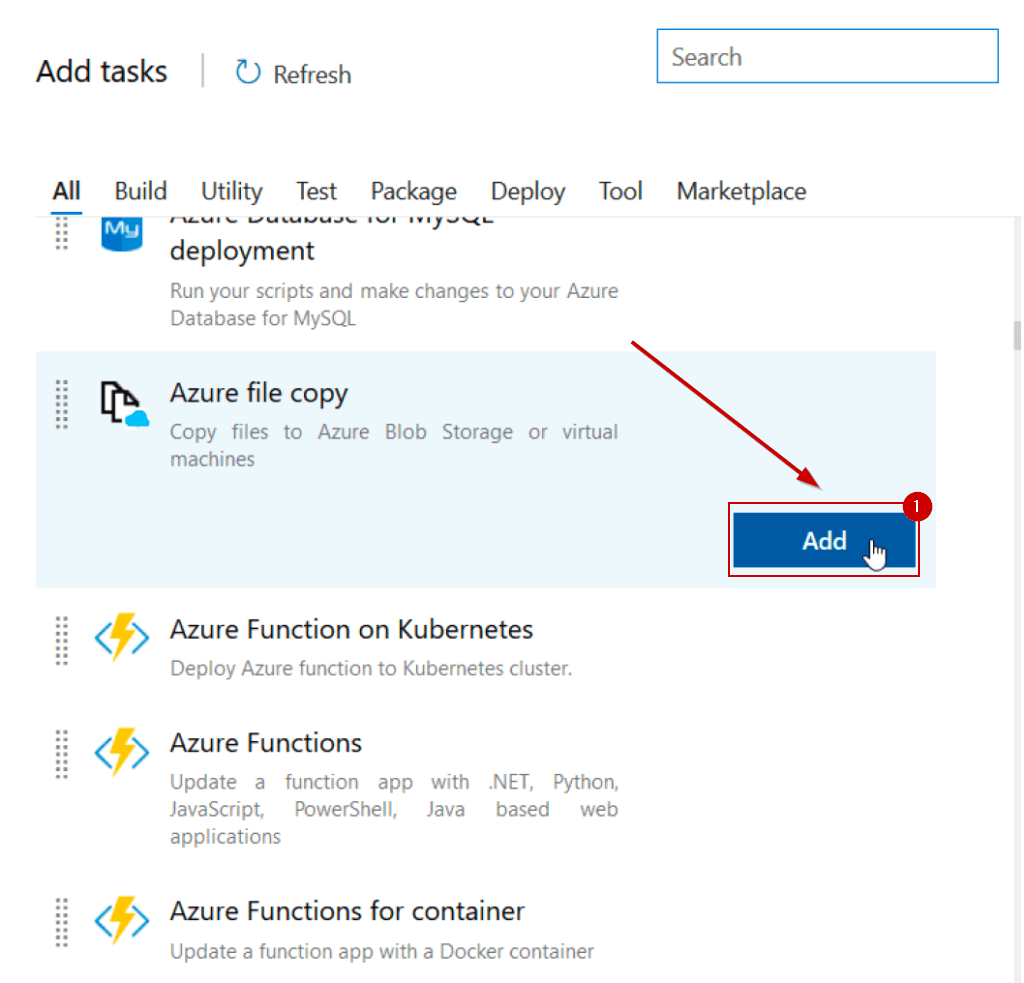
- Step 13: Now, scroll down in the list and add the Azure File Copy task, so that we can copy the artifact from the build pipeline to the Azure blob container.

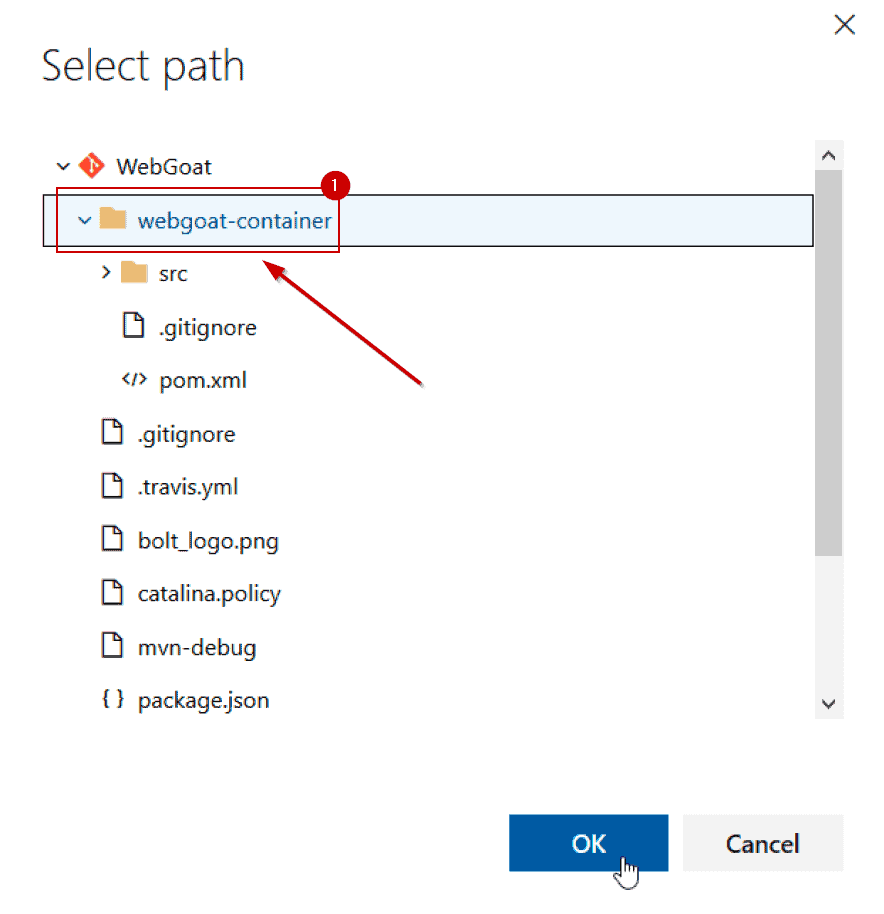
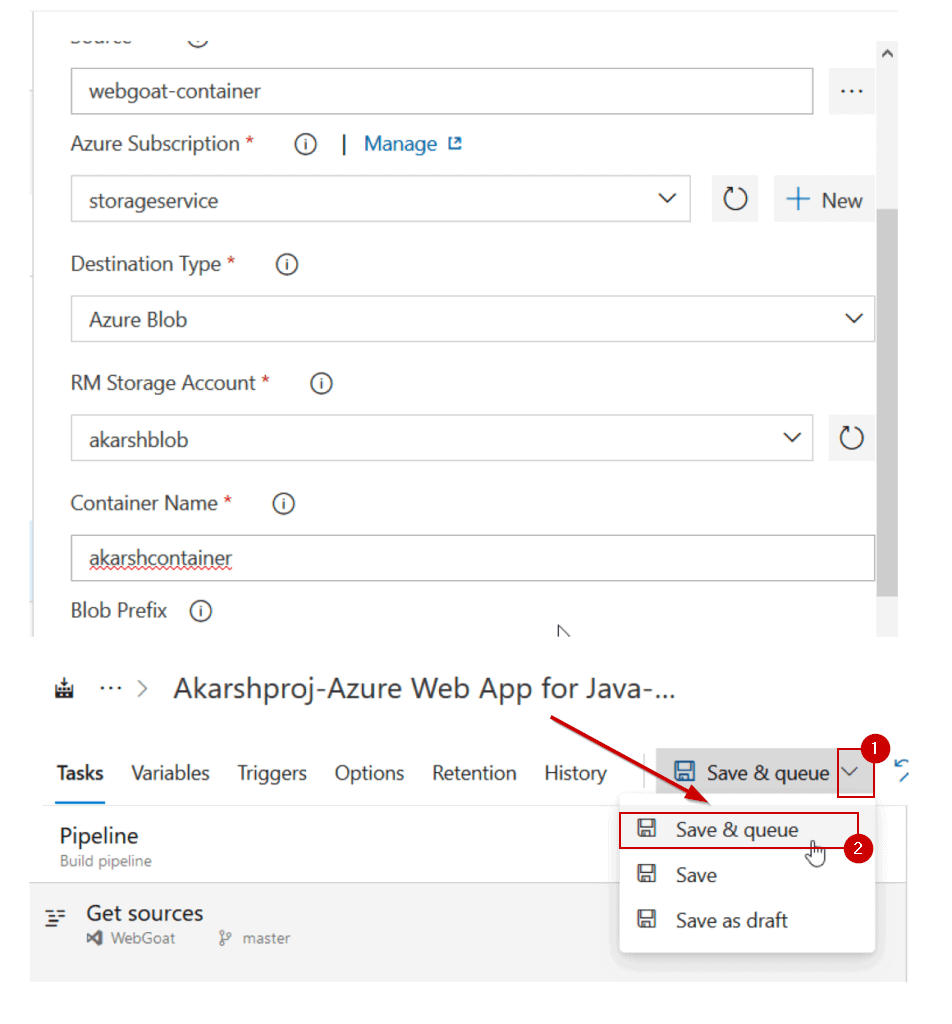
- Step 14: Now select the Azure Copy Task and click on the Browse Source and select the path (Repo Folder) which we needed to copy to the containers. In this case, we have webgoat container as the repo folder for the current project, so we’ll add this. It may differ for you.


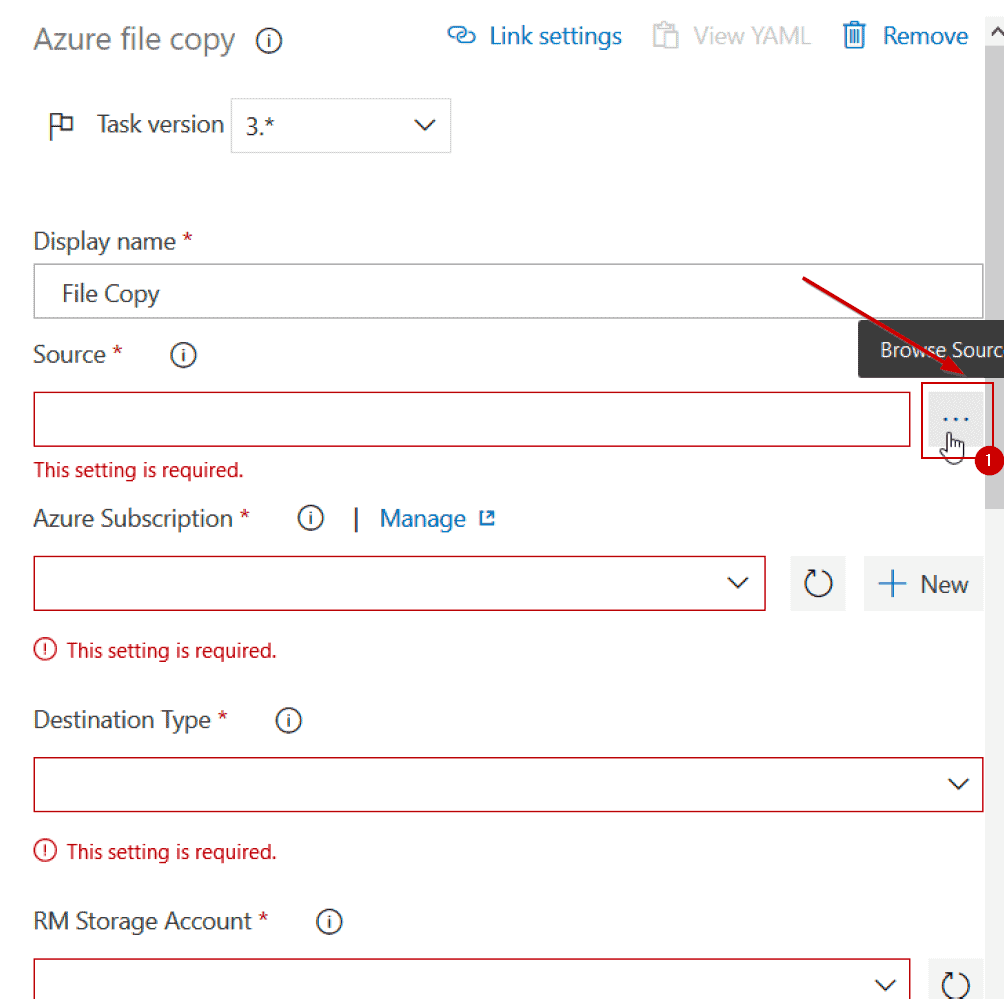
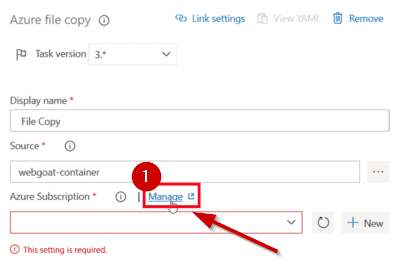
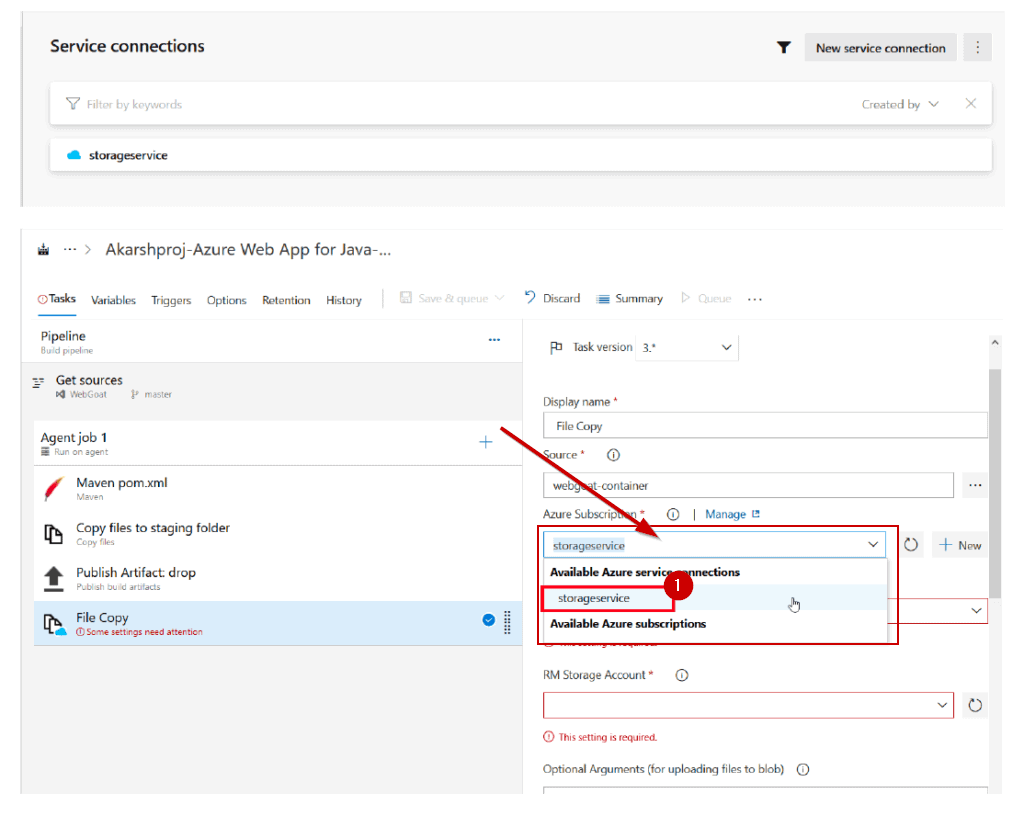
- Step 15: Now on Azure Subscription Section, click on Manage. As we don’t have any service connection configured so now we have to create a new service connection in the next step.

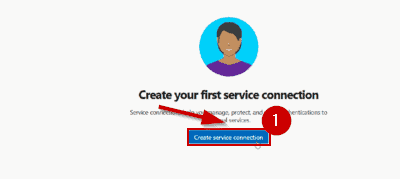
- Step 16: Now, click on Create Azure Service Connection to start the process of Creating a Service Connection.

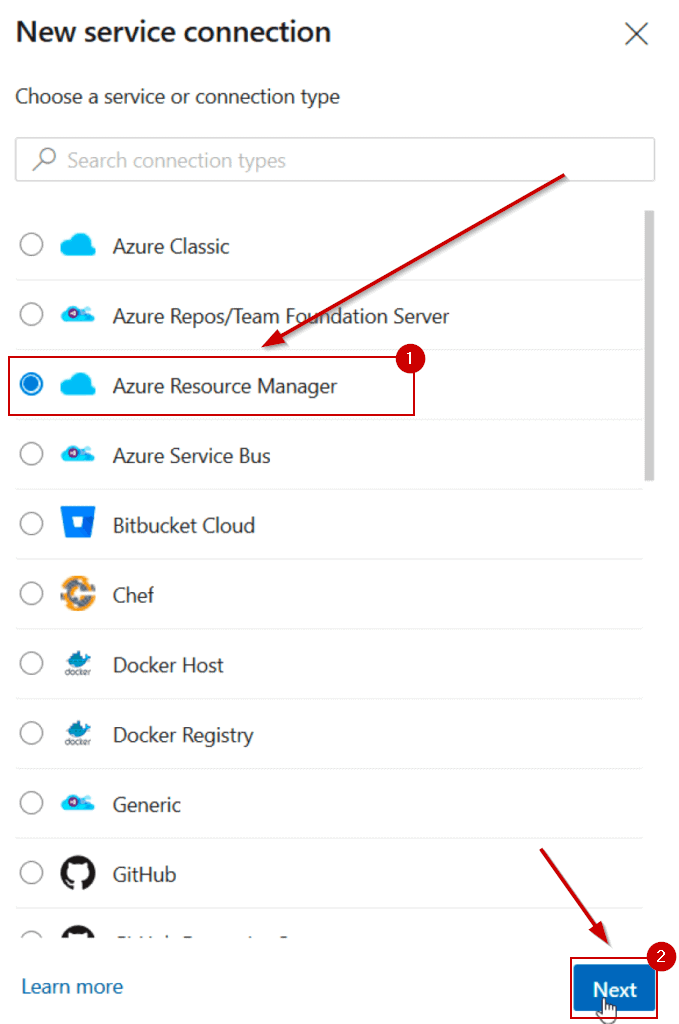
- Step 17: From the list, select Azure Resource Manager and then click on next. At the beginning of this Case Study Tasks, we created a Service Principal and that’s why we choose the Azure Resource Manager Connection type.

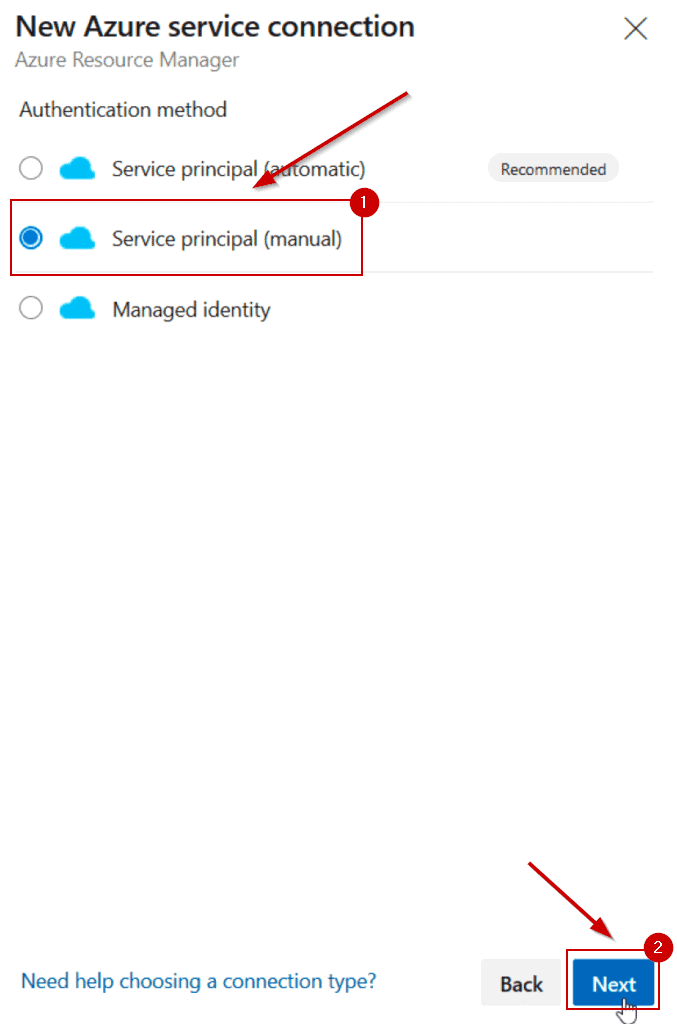
- Step 18: Now, select Manual as we don’t want the Pipeline to take the default AD service principal Id. Then click, Next.

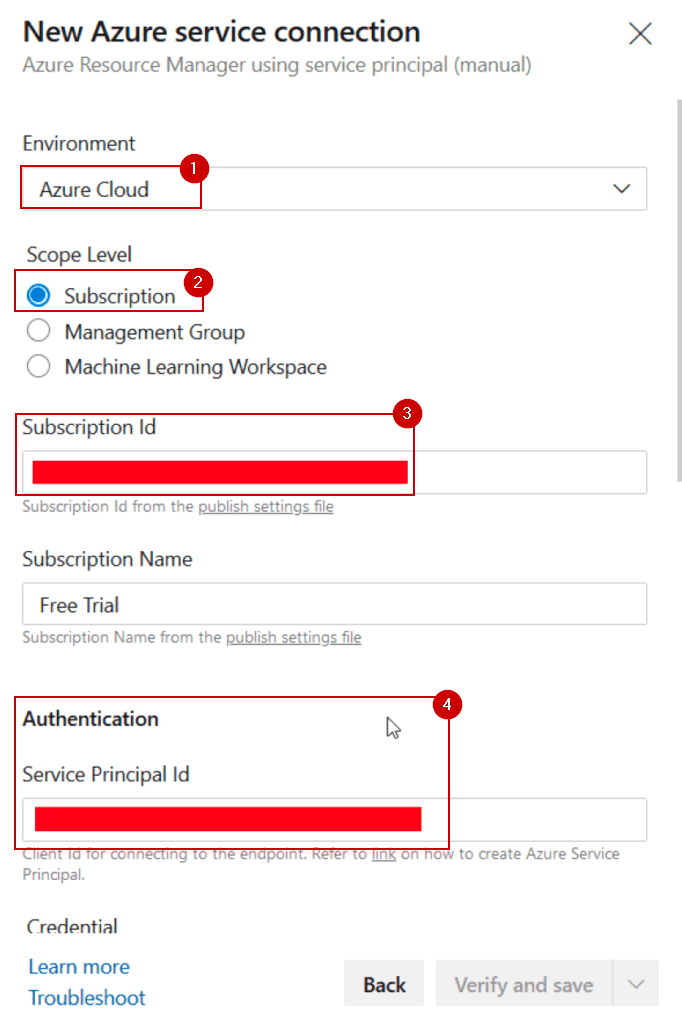
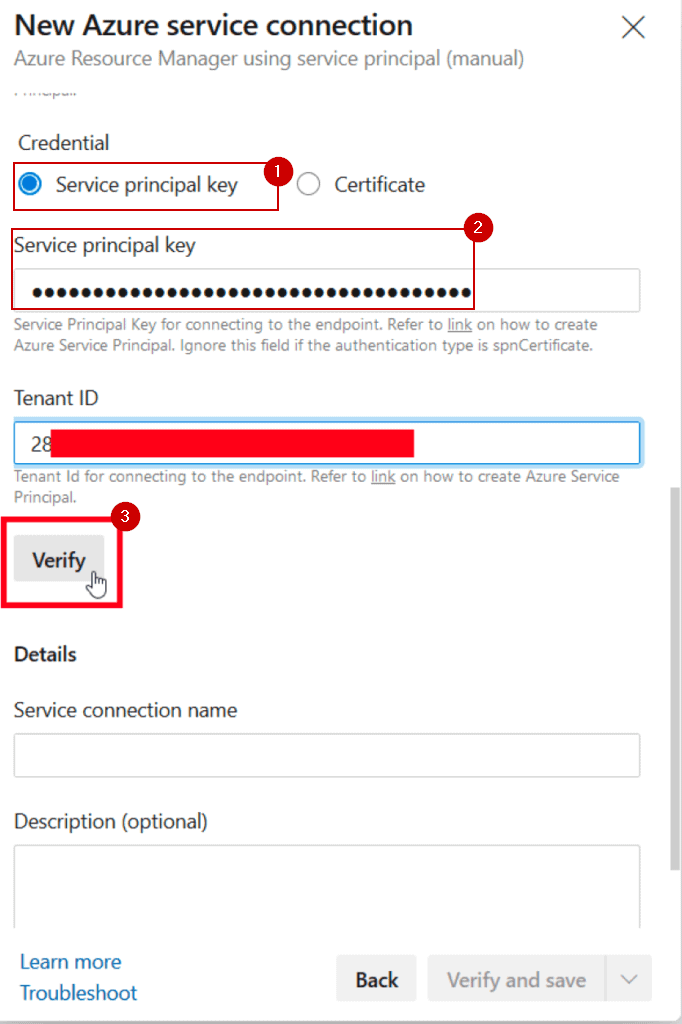
- Step 20: Now select the below-mentioned options and enter the required details. Service Principal Id is the same that we copied in the initial task of the Case Study and the Service Principal password is the Service Principal key that we will use. After this, click on Verify.

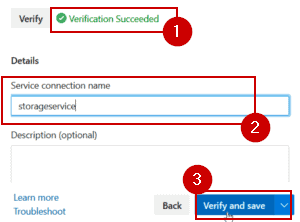
- Step 21: After the verification is successful, give a name to the Service connection and then click on Verify and save.

- Step 22: Once the connection is saved, use the same in the Azure Subscription Task, then Select Save & queue, to save all the changes.


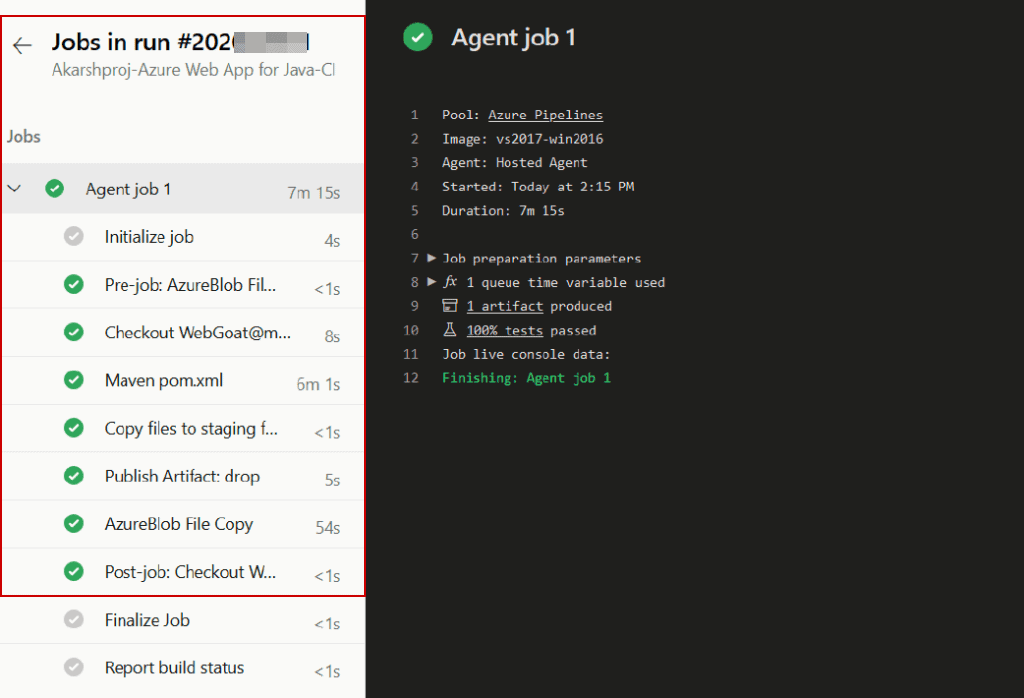
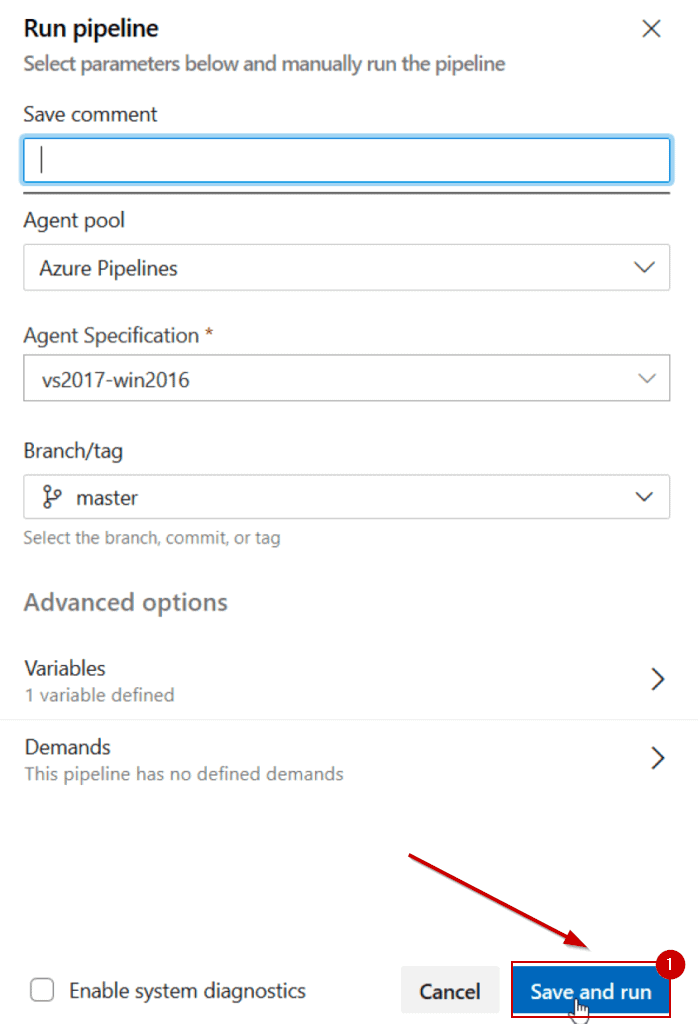
- Step 23: Now we need to save the project and run the pipeline so that once the pipeline is completed we will get the output on the blobs.

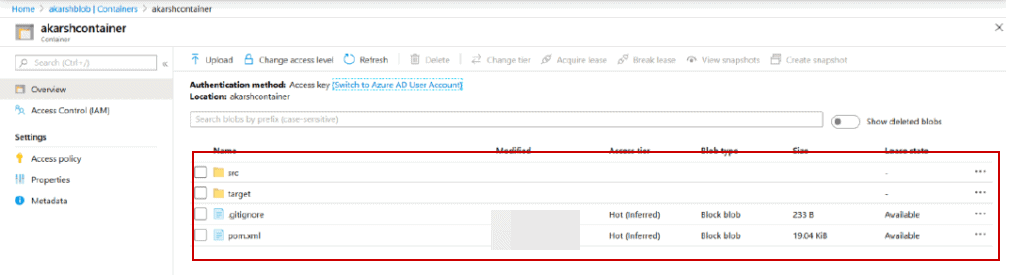
- Step 24: Now, after the build pipeline is completed, the output we can see in the blobs.

Note: You Can Check Our Blog on Azure Pipelines vs Jekins
Further Project Opportunities
Similarly, we can save the outputs on the below methods and we can follow the same service connections.
- Azure Blobs
- AWS S3 Buckets
- Google Drive
- Dropbox
- Nexus
- Jfrog
We need to follow the same methods so that based on the project needs we can determine which method we need to implement.
Read Out : Our Blog on Veracode.
Related/References
- [AZ-400] Azure DevOps Certification Path
- [AZ-400] Roles And Responsibilities As An Azure DevOps Engineer
- [AZ-400] Microsoft Azure DevOps Certification Exam: Everything You Need To Know
- [AZ-400] Microsoft Azure DevOps Training: Step By Step Activity Guides/Hands-On Lab Exercise
- [AZ-400] Azure DevOps Services for Beginners
- [AZ-400] Designing and Implementing Microsoft DevOps Solutions [Official Page]
- Azure DevOps Service Hooks | Subscription Of Service Hooks | Release Approvals
- SonarCloud Azure DevOps | Integrating SonarCloud In Azure
- Azure DevOps Environments | How To Setup DevOps Environment | Approval Checks | Azure DevOps Pipeline
Next Task For You
Begin your journey toward Mastering Azure Cloud and landing high-paying jobs. Just click on the register now button on the below image to register for a Free Class on Mastering Azure Cloud: How to Build In-Demand Skills and Land High-Paying Jobs. This class will help you understand better, so you can choose the right career path and get a higher paying job.


Leave a Reply