![]()
Microsoft has officially announced the public preview of custom role management in the Azure portal, making it easier for you to customize the permissions you grant your users or applications to access Azure resources.
I’m excited to share some details on a new experience to the Azure portal, which allows you to manage custom roles that can be used to grant permissions to Azure resources. This is an evolution of the current experience only available in the command-line, Azure PowerShell and Azure Resource Manager API.
What Are Custom Roles?
If the Azure built-in roles don’t meet the specific needs of your organization, you can create your own Azure custom roles. Just like built-in roles, you can assign custom roles to users, groups, and service principals at subscription and resource group scopes.
They are stored in an Azure Active Directory (Azure AD) directory and can be shared across subscriptions. Each directory can have up to 5000 custom roles.
Prerequisites
To create custom roles, you need:
- Permissions to create custom roles, such as Owner or User Access Administrator
How To Create Azure Custom Roles?
Step 1: Choose how to start
There are three ways that you can start to create a custom role. You can clone an existing role, start from scratch, or start with a JSON file. The easiest way is to find an existing role that has most of the permissions you need and then clone and modify it for your scenario.
-
Start from scratch
If you prefer, you can follow these steps to start a custom role from scratch.
- In the Azure portal, open a subscription or resource group where you want the custom role to be assignable and then open Access control (IAM).
- Click Add and then click Add custom role.
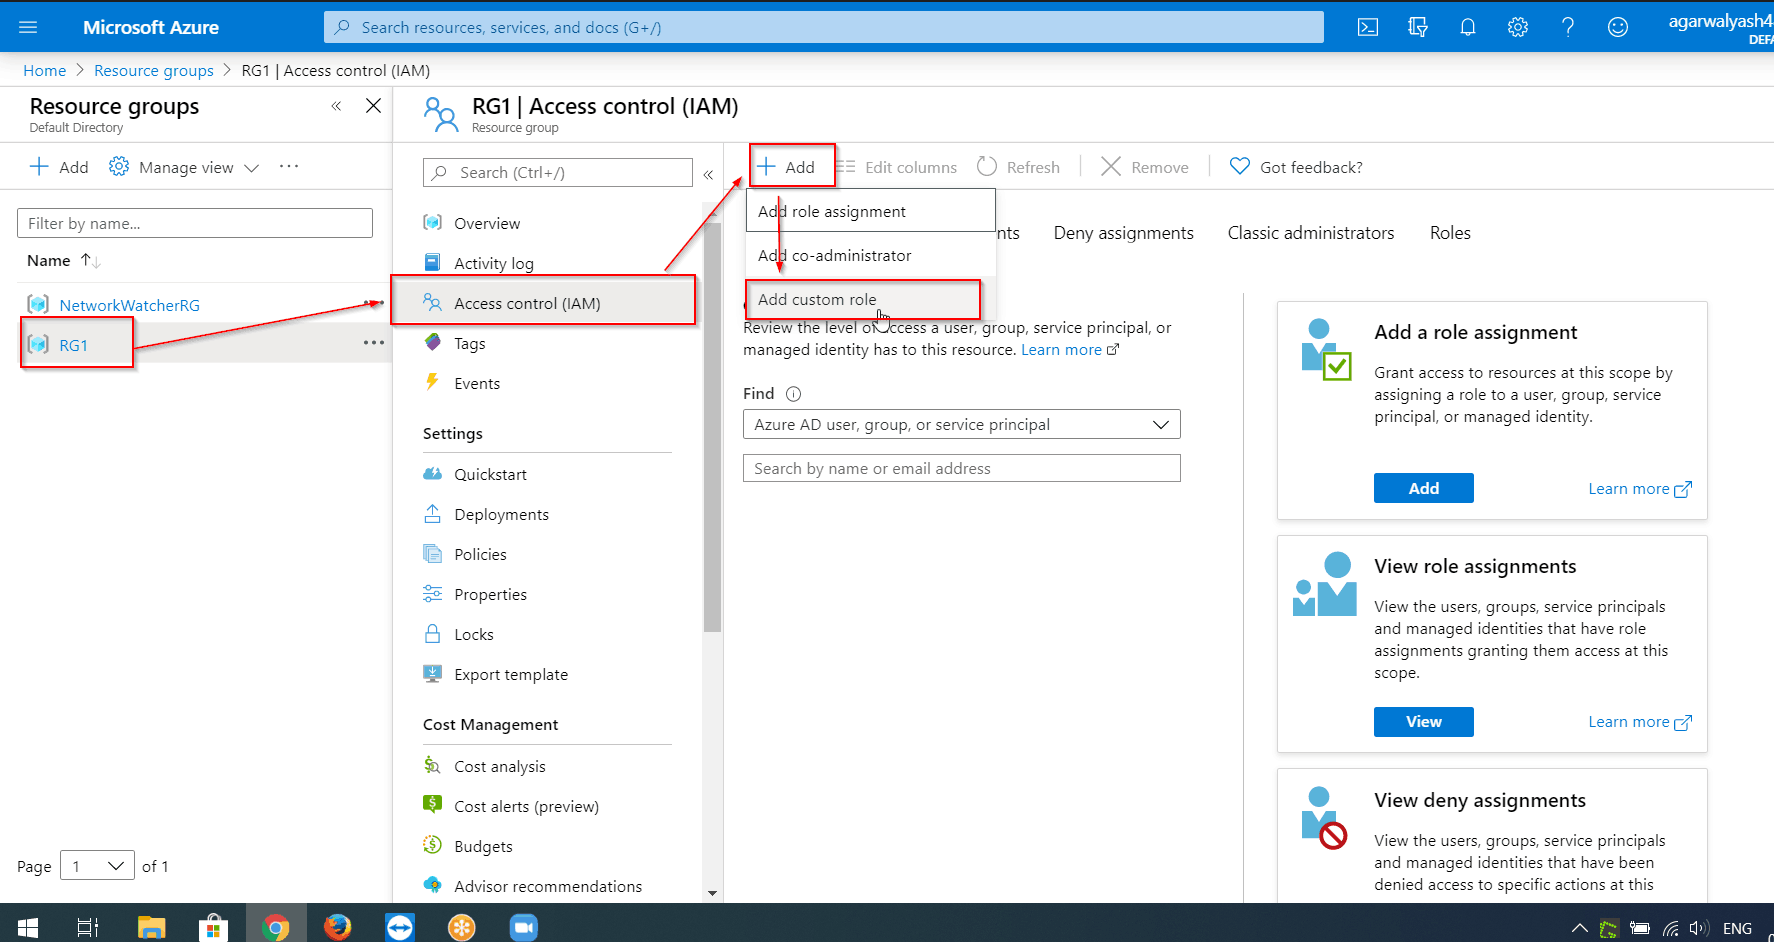
This opens the custom roles editor with the Start from scratch option selected.
Also Check: Azure ExpressRoute vs VPN: know their major differences!
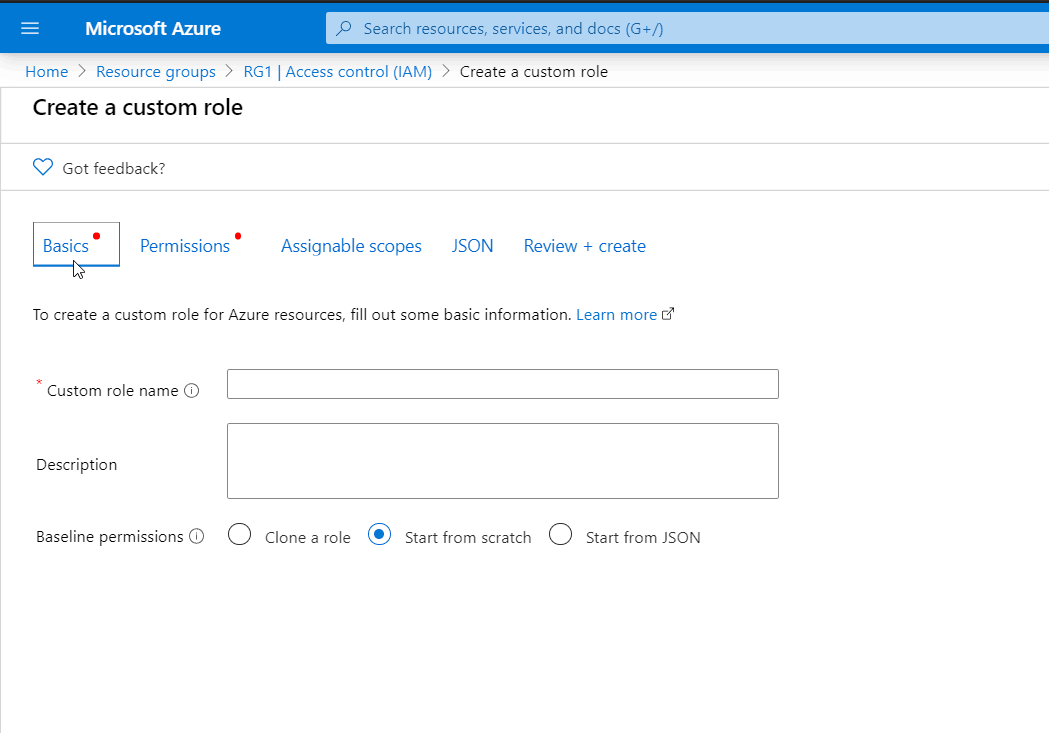
Step 2: Create Custom Roles (Basics)
On the Basics tab, you specify the name, description, and baseline permissions for your custom role.
- In the Custom role name box, specify a name for the custom role. The name must be unique for the Azure AD directory. The name can include letters, numbers, spaces, and special characters.
- In the Description box, specify an optional description for the custom role. This will become the tooltip for the custom role.
The Baseline permissions option should already be set based on the previous step, but you can change.
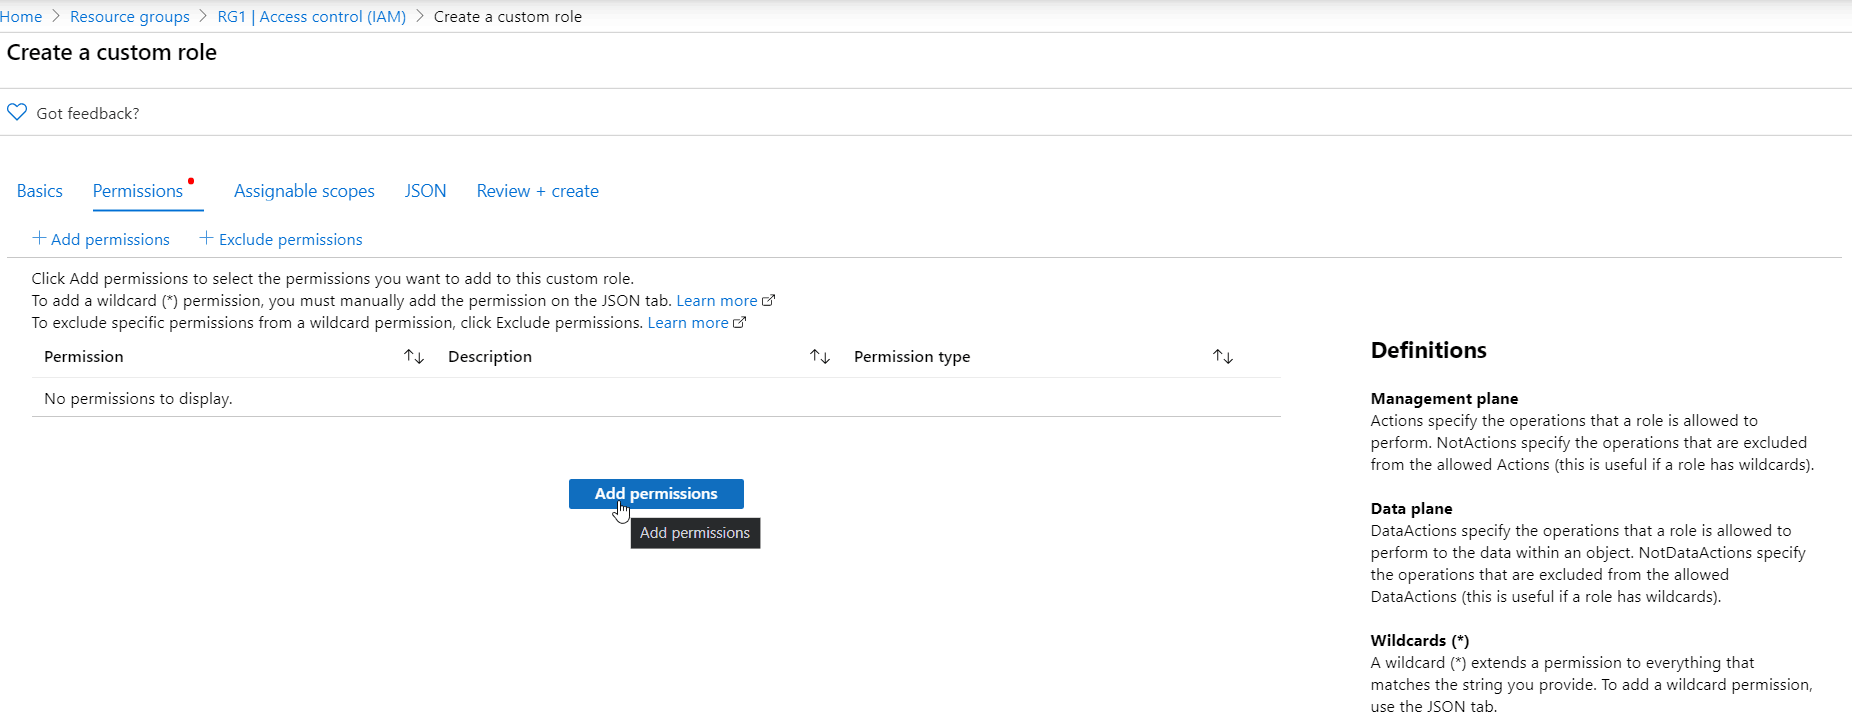
Step 3: Permissions
On the Permissions tab, you specify the permissions for your custom role.
Also Read: Our previous blog post on Azure Virtual Machine. Click here
Step 4: Assignable scopes
On the Assignable scopes tab, you specify where your custom role is available for assignment, such as subscription or resource group. Depending on how you chose to start, this tab might list the scope where you opened the Access control (IAM) page. Setting assignable scope to root scope (“/”) is not supported. Currently, you cannot add a management group as an assignable scope
- Click Add assignable scopes to open the Add assignable scopes pane
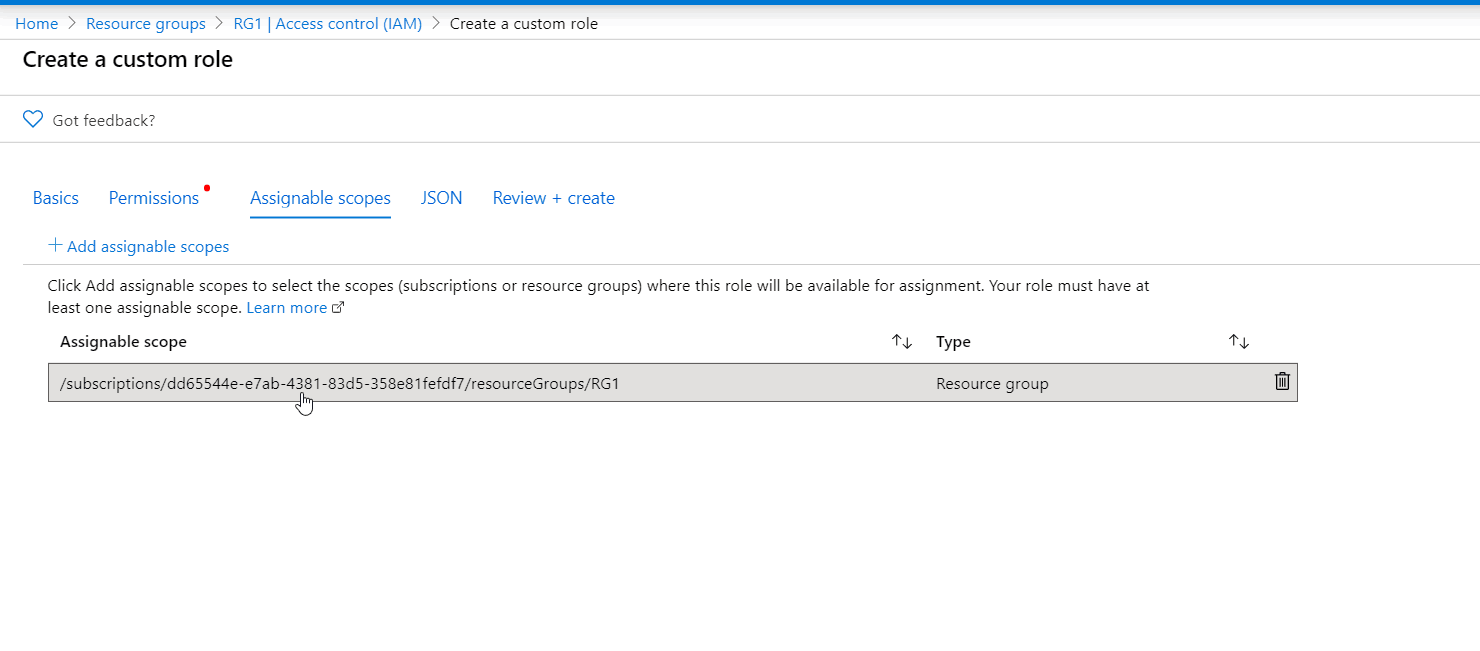
2. Click one or more scopes that you want to use, typically your subscription.
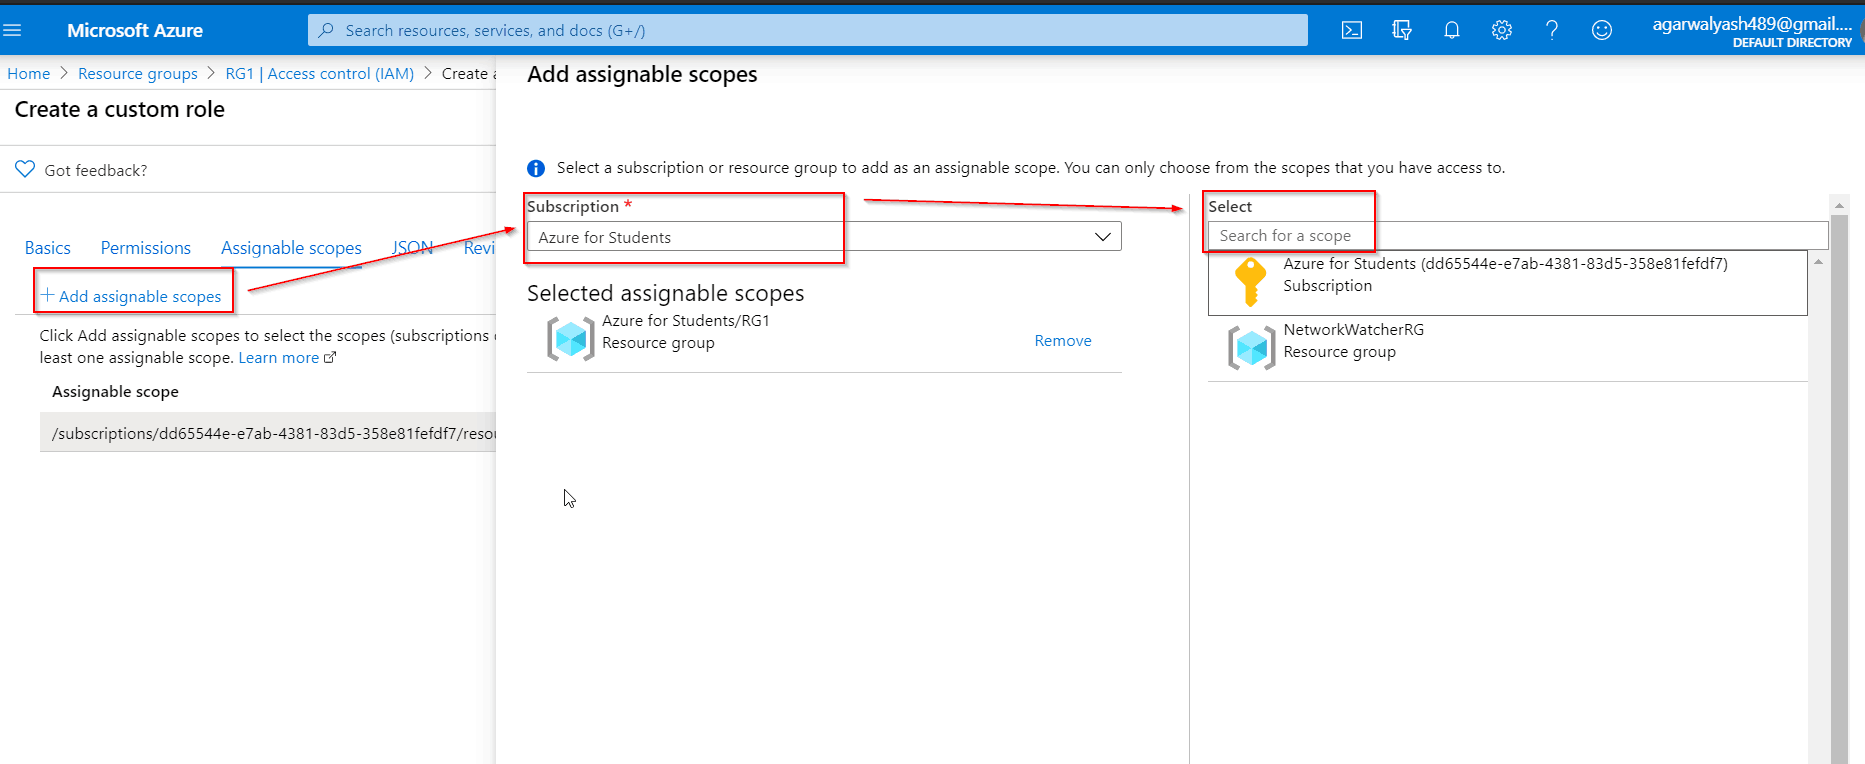
3. Click the Add button to add your assignable scope.
Also Check: What is Azure Kubernetes Service and how it works with CI/CD?
Step 5: JSON
On the JSON tab, you see your custom role formatted in JSON. If you want, you can directly edit the JSON.
- To edit the JSON, click Edit
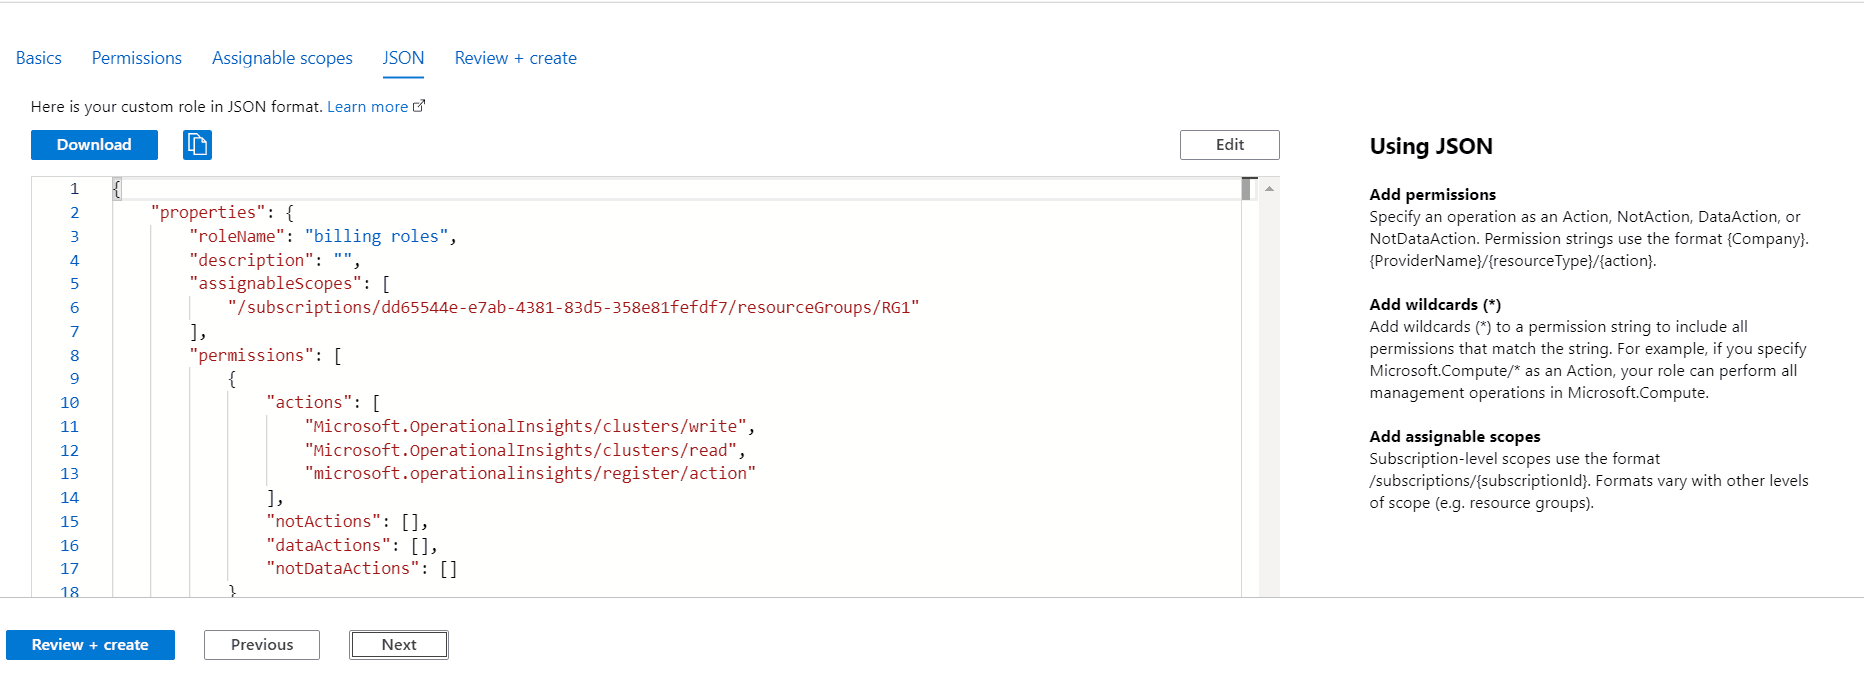
2. Make changes to the JSON.
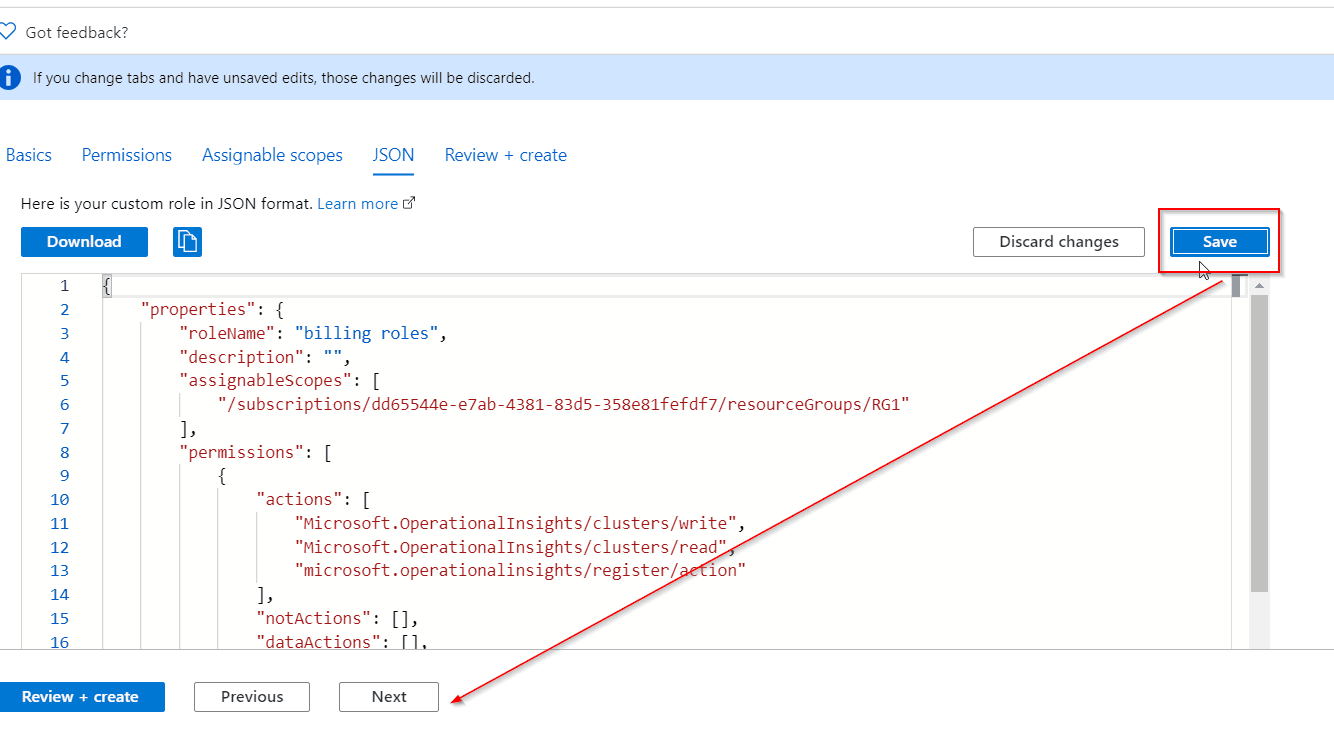
If the JSON is not formatted correctly, you will see a red jagged line and an indicator in the vertical gutter.
Check Out: How to Create Azure Blob Storage. Click here
3. When finished editing, click Save
Also Read: Our previous blog post on azure vnet. Click here
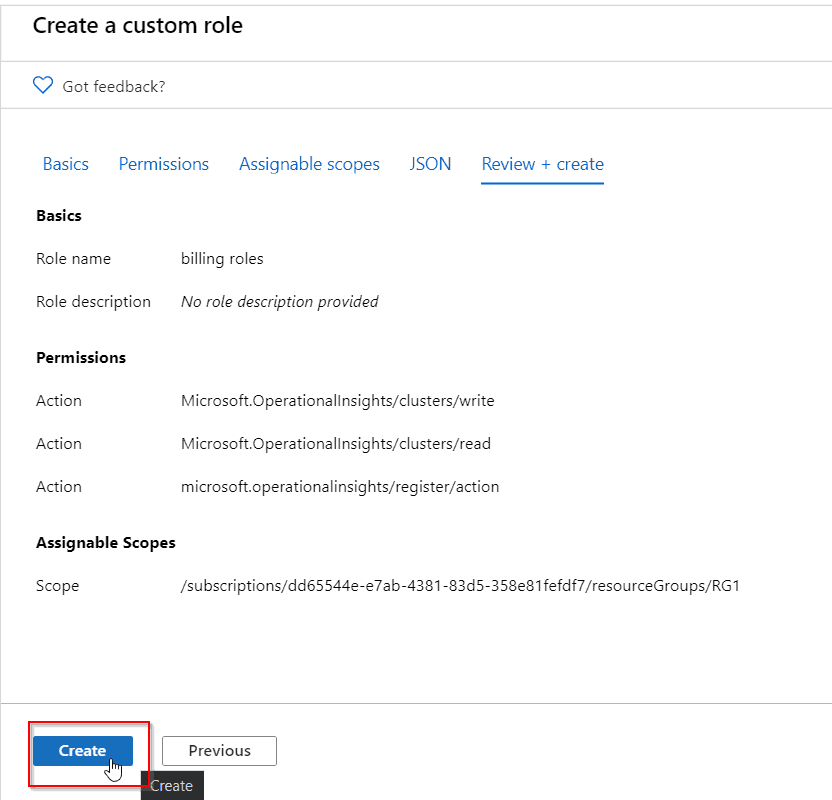
Step 6: Review + create
On the Review + create tab, you can review your custom role settings.
- Review your custom role settings.
Also Read: Our blog post on az 104. Click here
2. Click Create to create your custom role.
After a few moments, a message box appears indicating your custom role was successfully created.
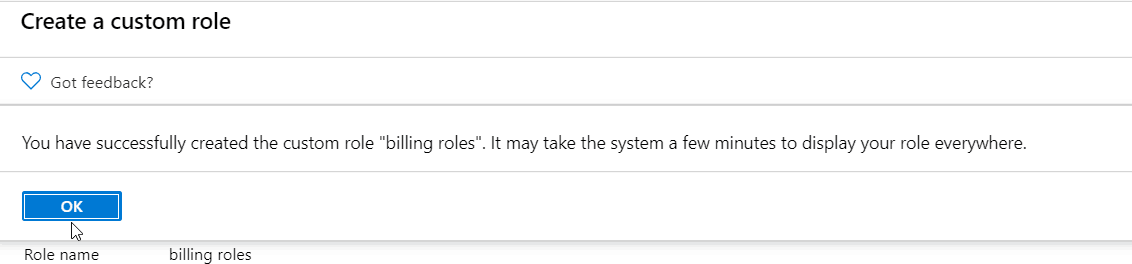
3. View your new custom role in the Roles list. If you don’t see your custom role, click Refresh.
It can take a few minutes for your custom role to appear everywhere.
Once you have your custom role, you have to test it to verify that it works as you expect. If you need to make adjustments later, you can update the custom role
So, that’s how you can create your own custom roles according to your requirement and assign it to the users, groups, and service principals at the management group, subscription, and resource.
Related/Reference
Next Task For You
Begin your journey toward Mastering Azure Cloud and landing high-paying jobs. Just click on the register now button on the below image to register for a Free Class on Mastering Azure Cloud: How to Build In-Demand Skills and Land High-Paying Jobs. This class will help you understand better, so you can choose the right career path and get a higher paying job.


Leave a Reply