![]()
This blog is the second part of the series “Using ICS to connect to Social Media (LinkedIn)“. Click here to check the first part of Blog that is Creating Connector from ICS to LinkedIn. In this blog, we will Create the orchestration, request and response mappings.
Once you create Connector from ICS to LinkedIn as shown in Part 1 here, now next step is to create the orchestration. Here are the steps for the same.
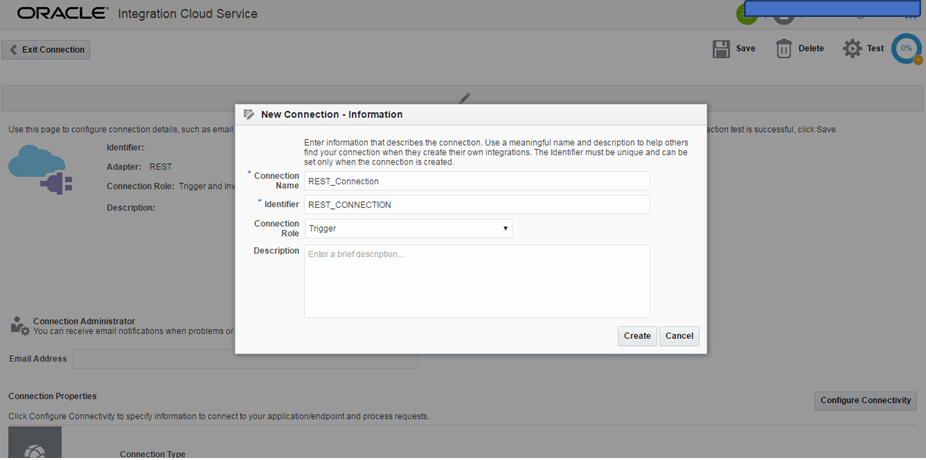
1) Now, we have got the connection to LinkedIn up and running, we need to configure a connector which can accept incoming REST requests from the company’s resource management system/SOAPUI. Go back to ‘Connectors’, and create a new REST connector. Name the connector and select the role as ‘Trigger’. Click ‘Create’. The specific details for this REST connection (like the format of request that it would expect) would be configured when we integrate with our main Integration. Click ‘Test’ on the right top side, completing the configuration of the REST connector.
 This completes the configuration of the LinkedIn connector.
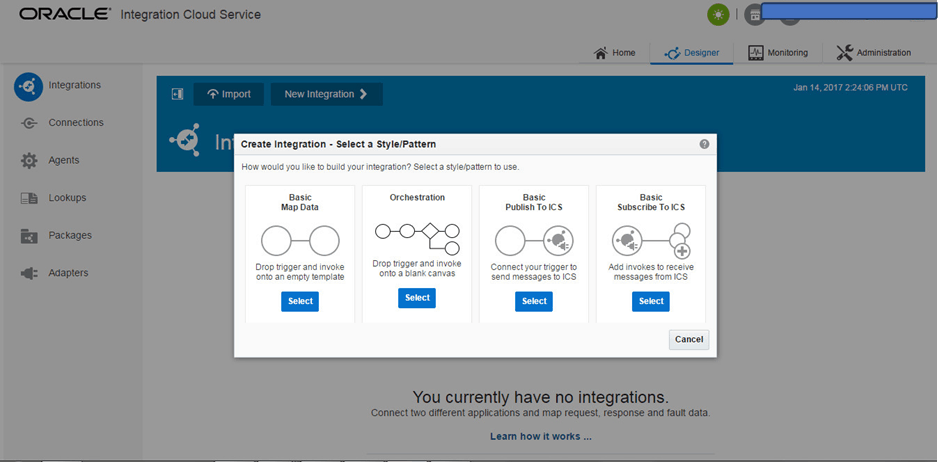
2) Go back to the homepage, and create a new integration. There are four options, for the purpose of this POC, we will select ‘Basic Data Map’.
Read More : About Oracle Integration Cloud New Homepage .
3) Now, you are presented with the below screen. On the right, you see all the connectors which are available for use in the integration (only connectors which have been tested successfully are available, any in-progress connectors are not displayed).
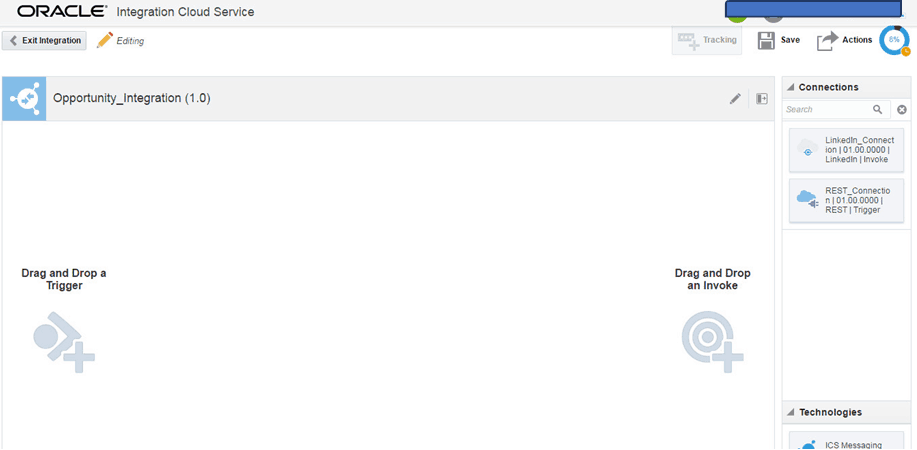
4) Drag and drop the ‘REST_Connector’ to the left-hand side of the integration, which should present this screen. Fill in all the options. Two fields to pay special attention are ‘Resource URI’, which should ideally be something in line with what this connector is supposed to do, in this case, post an opportunity; and the action this endpoint will perform. Click ‘Next’.
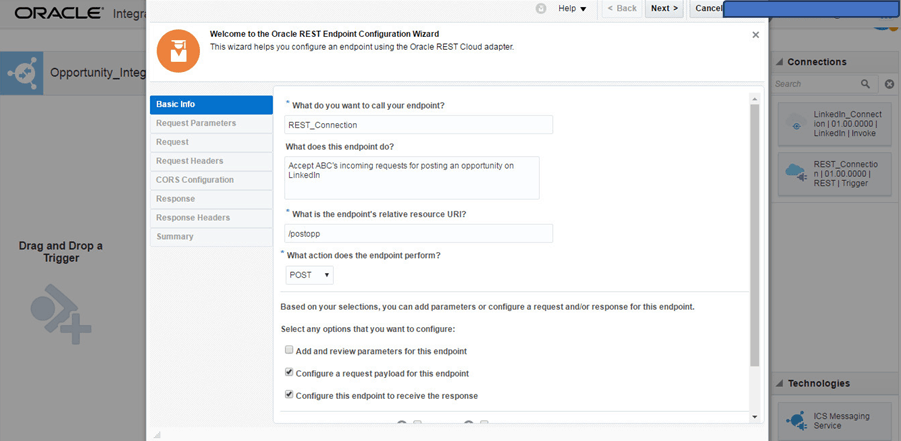
5) Now, we have to provide a sample JSON (JavaScript Object Notation) request, so that the REST connector knows the format in which to expect the incoming request. Click ‘inline’ next to ‘enter SAMPLE JSON’, and enter
{
“destination”: “LinkedIn”,
“message”: “We have a new opportunity https://www.accenture.com/cn-en/careers/jobdetails?id=00352101_en”
}
This is the message that would be sent to this connector from SOAPUI, transformed, and then posted on LinkedIn. Click ‘Next’.
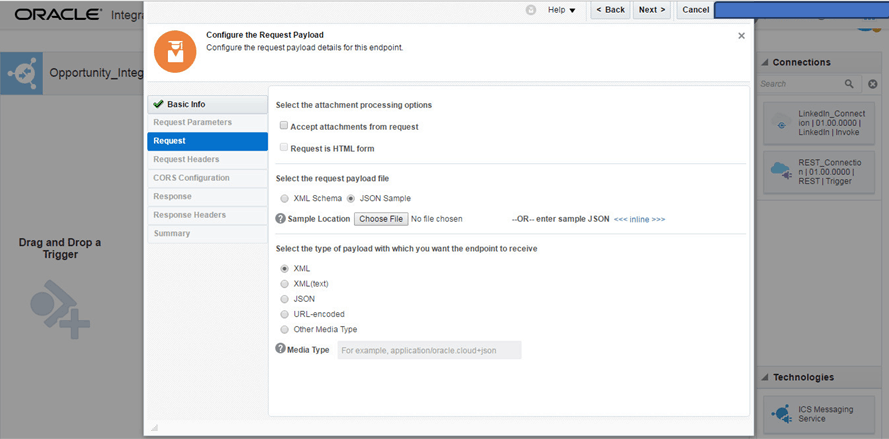
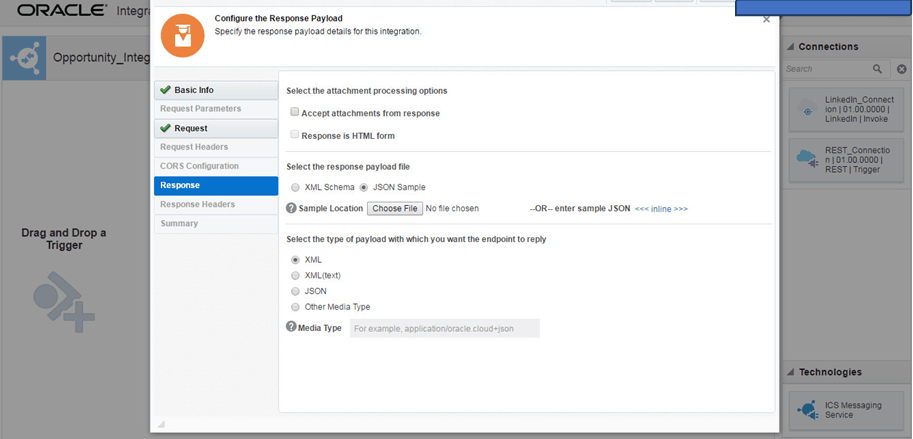
6) Now, we get to configure the response part. Provide the below JSON sample(same as the request part) and click ‘Next’.
{
“Acknowledgement”: “818843070175252482”,
“Details”: “Tue Jan 10 15:32:55 +0000 2017”
}
7) You are done with configuring the incoming REST request. On the next screen, click ‘Done’. Now, go back to the integration, and drag and drop the ‘LinkedIn Connection’ to the right side of the integration. Once you provide the name, you would get a list of operations that the connector can perform on the LinkedIn API for you.
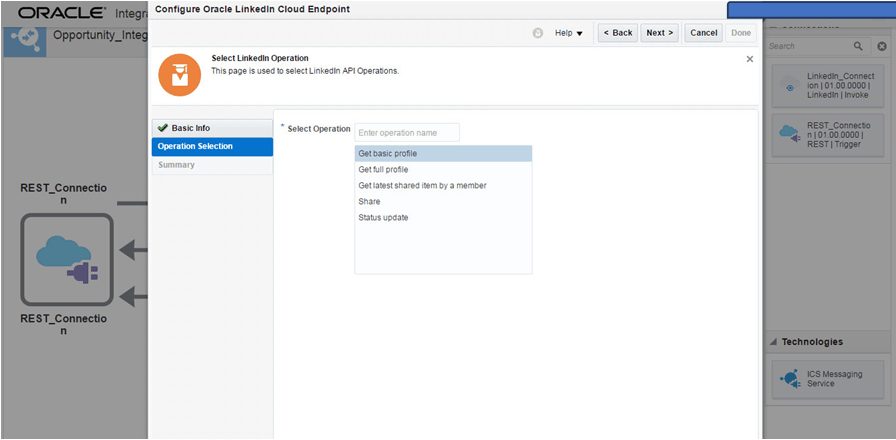
8) Select ‘Share’, and click ‘Next’, and then ‘Done’. This finished the configuration of the LinkedIn connection in your integration. You should have been brought back to the integration home screen now. All that remains is to create request and response mappings. Click on the first icon below ‘Click Below To Create Map’, and click ‘+’ which would help us create the request mappings.
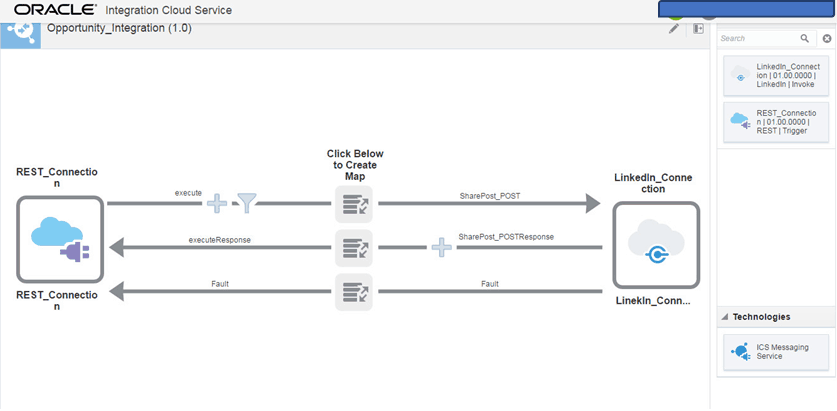
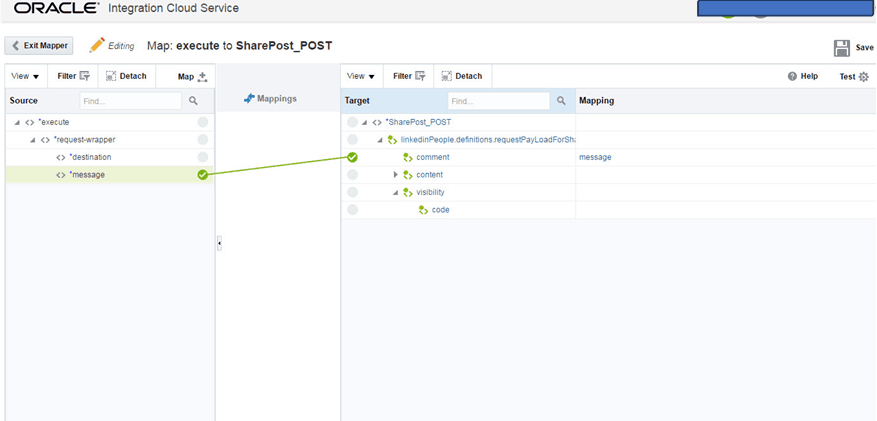
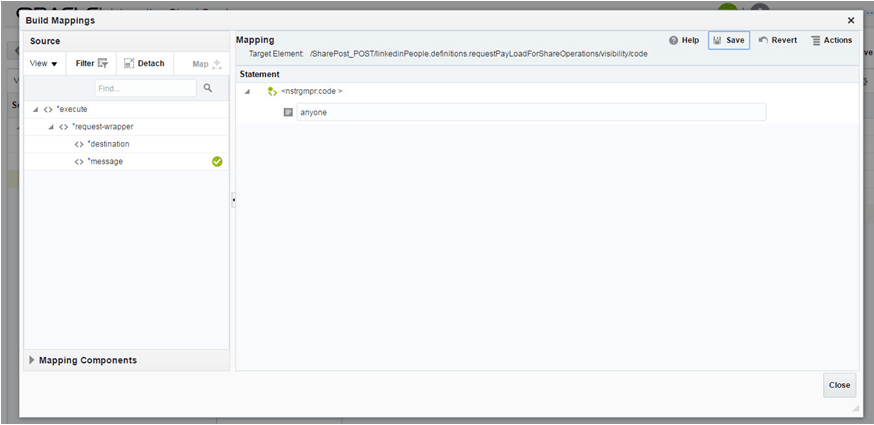
9) Now, you should see a screen like below. Drag and drop ‘message’ in the request to ‘comment’ in response. Also, there is something else we have to do, i.e. tell the adapter with whom our post should be shared. In our case, it would be set to ‘anyone’, however, you can also set it to ‘friends’ or ‘friends of friends’. Expand the ‘visibility’ attribute in response, and click on ‘code’.
10) Write ‘anyone’, click ‘Save’ and then ‘Close’. Then click ‘Save’ again and then ‘Exit Mapper’
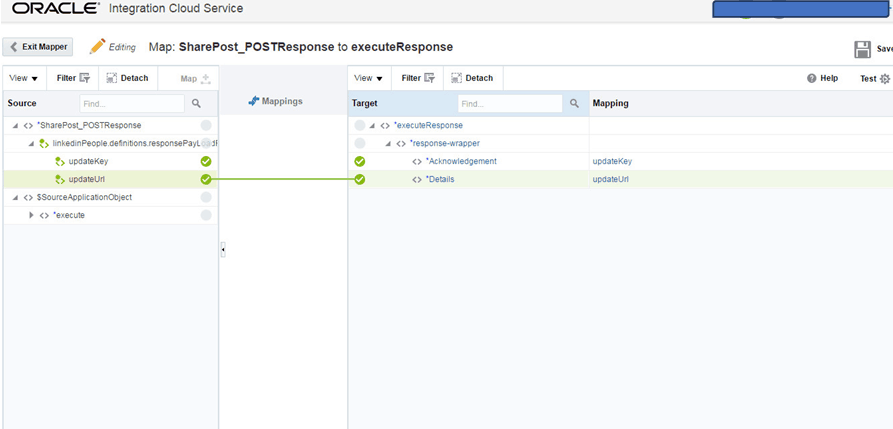
11) Now, click on the response mapping icon (just below the request mapping icon which you previously clicked). This should bring you to the below response mapping screen. Map ‘UpdateKey’ from left to ‘Acknowledgement’ at right, and ‘UpdateURL’ to ‘Details’. This mapping would enable the client (SOAPUI) to confirm that the message was posted. Click ‘Save’ and ‘Exit Mapper’
12) All the components of your integration have been configured now. The REST adapter, to accept the incoming request and provide acknowledgement to the client, the request and response mapping, for transformations, and the LinkedIn connector, to post the message and get an acknowledgement from LinkedIn. Just one more thing that needs to be configured, is tracking. On the integration home page, top right corner, click ‘Tracking’. Here you would see our request structure at the left and a few empty fields on the right. Drag and drop both our request fields, destination and message to two empty fields on the right. Tracking is mainly used for tracking a particular message, on the basis of data provided in that field. For example, here our primary field for tracking is ‘message’, that means later you can search for all messages containing ‘Architect’ or ‘Netherlands’, or anything else. After you are done, click ‘Save’, which would bring you to the integration homepage. Save and exit the integration.
This is all about the second part of this blog series. In the next part of this blog series, we will Create a mock client using SOAPUI and then will test the flow.
So, Stay tuned for our next blog post!
This post is from our Oracle Integration Cloud Services Training where we also cover about configuring Adaptors and connections, Configuring integrations, Data Mapping, Lookups, SaaS, On-premises integration agents, Security, Schedules, Versioning, Activating, Monitoring integrations and much more.
Related Links/References:
- [Part 1] Oracle Integration Cloud Service(ICS): Using ICS to connect to Social Media
- [Part 3]: Using Oracle ICS to connect to Social Media (LinkedIn)
- Oracle Integration Cloud (OIC) For Beginners Overview
- [Free Masterclass] Oracle Integration Cloud Services
- Oracle Integration Cloud (OIC) Instance Edition, Message Pricing, and License Types
- How to exporting Business Data and Visual Builder Cloud Service (VBCS)
- How Import Business Data in Visual Builder Cloud Service (VBCS)
Next Task For You
Do you want to learn more about Oracle and confuse where to start or which certification is right for you? Then, click on the register now button below to register for a Free Masterclass on Oracle [1Z0-1042] Certified Cloud Integration Expert, which will help you better understand and choose the right path and clear the certification exam.


Leave a Reply