![]()
This blog post will take you through the steps to deploy an application to a GKE Cluster.
Deploying an application to a GKE cluster involves containerizing your application, uploading the container image to a registry, creating a deployment configuration and Kubernetes service, deploying the application, and monitoring it to ensure that it is running correctly.
Google Kubernetes Engine is a tool developed by Google that helps manage a group of machines, known as a cluster. GKE has a number of applications, one of them being deploying an application, which we will cover here. In this blog post, we will go through the following topics:
Introduction to GKE Clusters
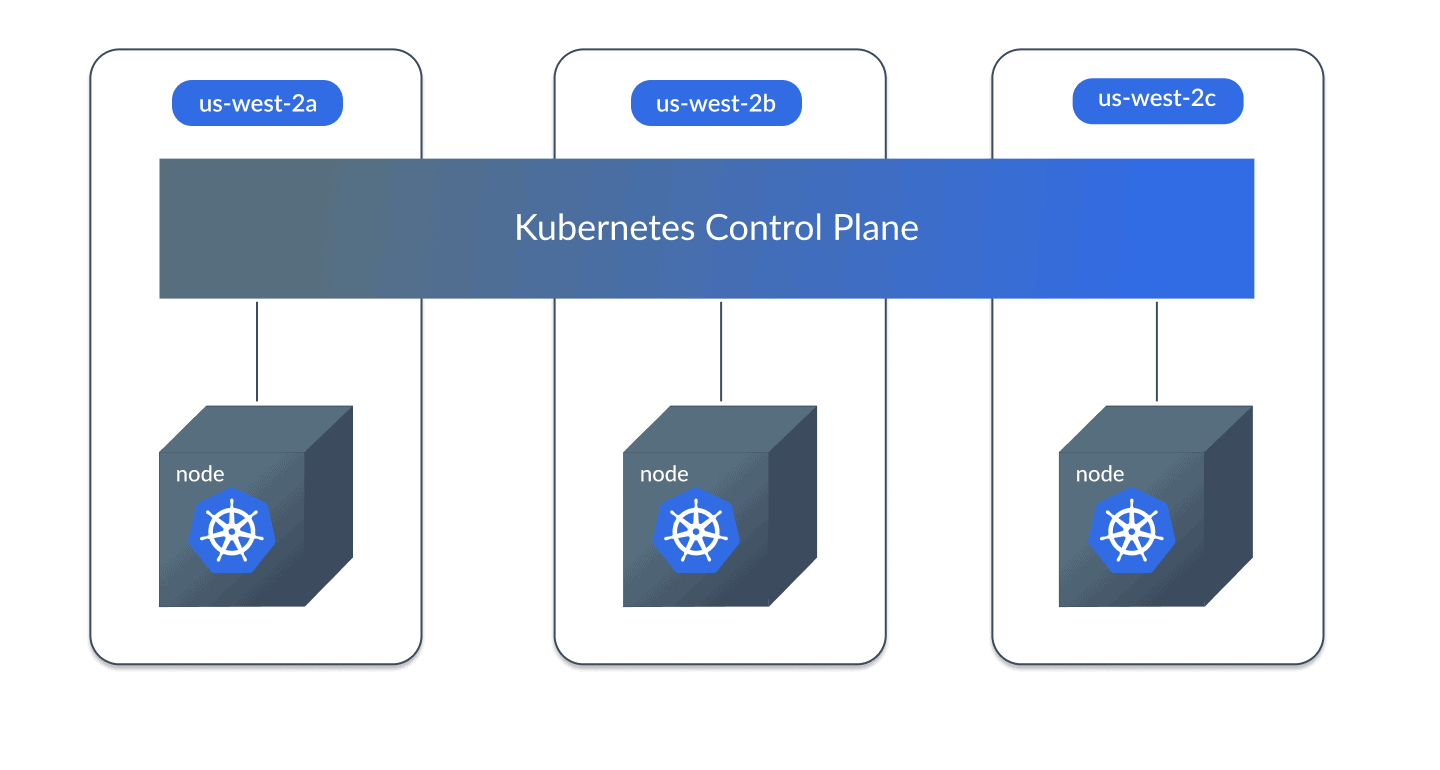
Clusters form the core of the Google Kubernetes Engine system. All objects that are part of Kubernetes run on top of clusters. This includes all the containerized applications, for which the cluster acts as a platform. A cluster consists of at least one Control plane or cluster master machine, and multiple worker machines called nodes. These worker machines are typically the Google Compute Engine VM instances, which are created by Google once a cluster is created. The type of the machine can be specified at the time of the creation of the cluster. Clusters under GKE can be either “standard mode” or “autopilot mode”, depending on the level of control that the user wants over the functioning.
To learn more about Google Kubernetes Engine and its architecture, read our blog on Google Kubernetes Engine.
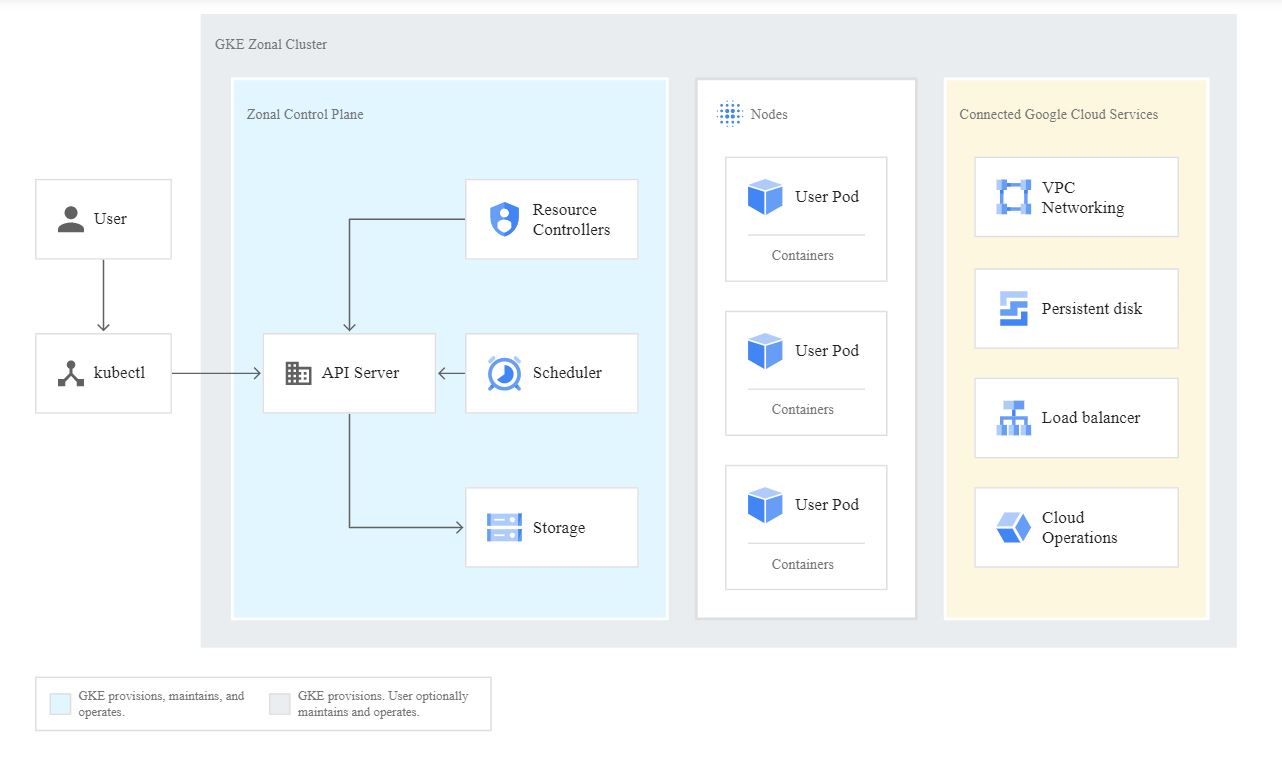
Nodes are virtual machine (VM) instances in Google’s Compute Engine, that run the Kubernetes processes necessary to make them part of the cluster. These Control planes Node machines are responsible for running the Kubernetes cluster orchestration system.
Pods and Deployment
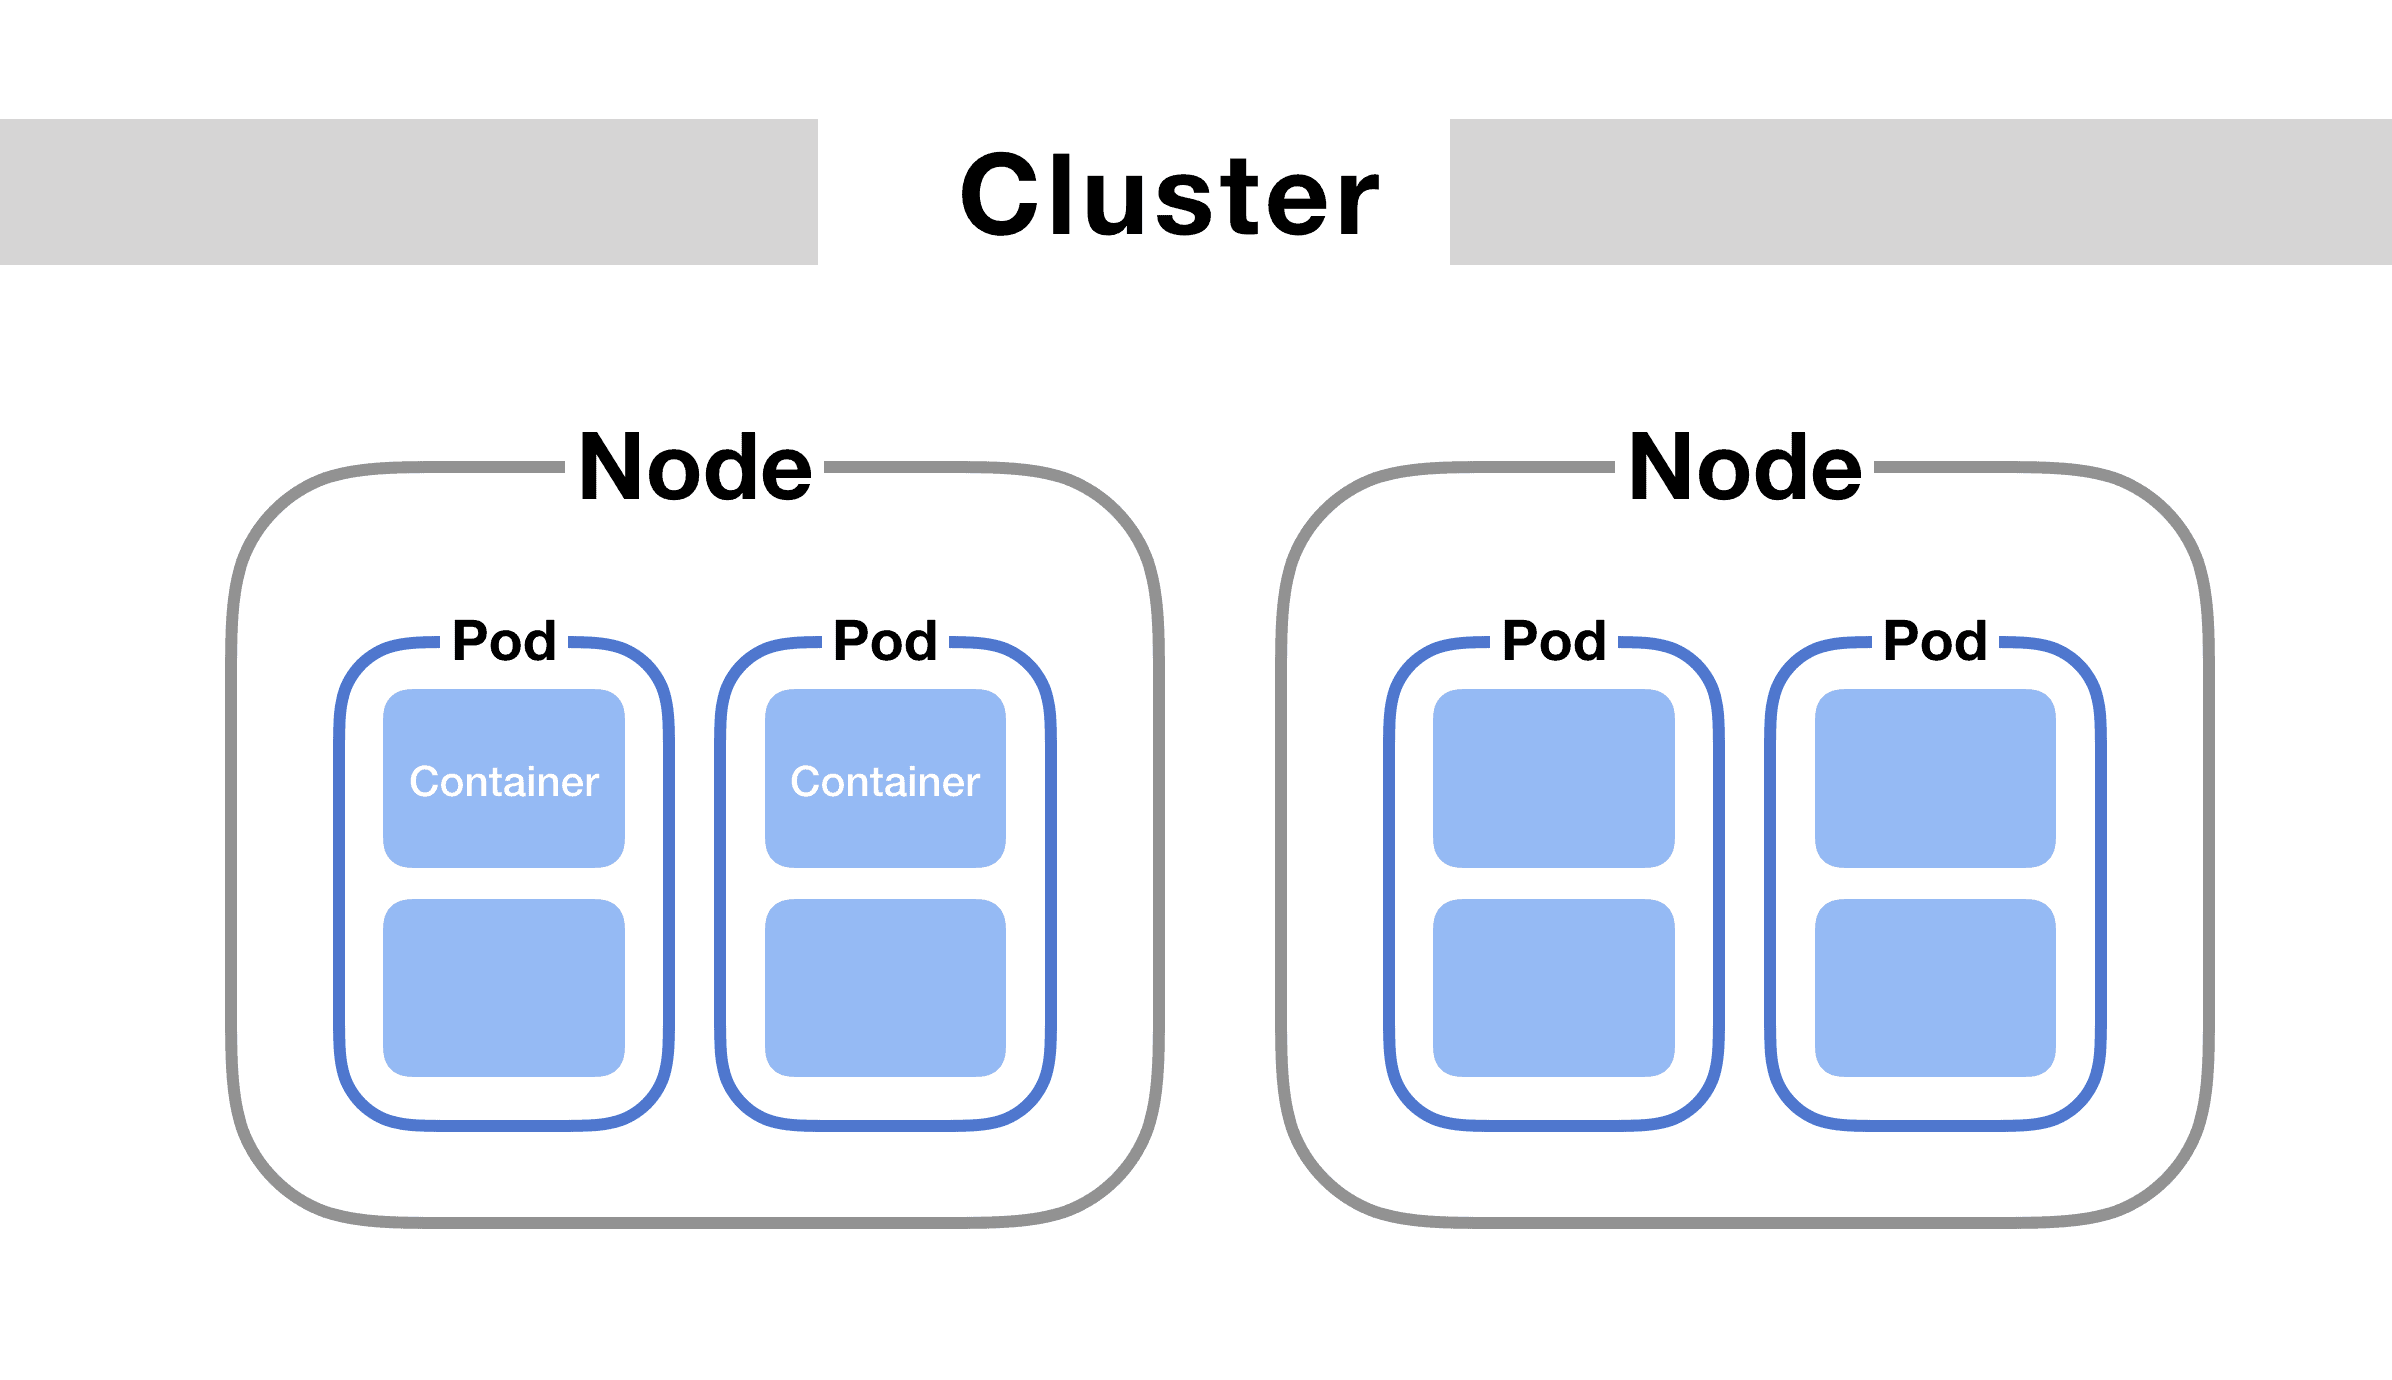
Pods are the most basic and smallest deployable objects in Kubernetes. A Pod is representative of a running process instance inside the cluster. Pods may have one or more containers. A pod can run multiple containers too. In that case, all those containers are managed as one entity, and they share the resources of the pod.
Deployments are used to represent several identical pods that have no distinctive identities. A GKE Cluster deployment runs multiple copies of the application and then replaces any instances that go down or stop responding. Thus, deployments make sure that at least one instance of your application is available for user requests. The Kubernetes Deployment controller manages these deployments.
Check Out: Our blog post on Google Professional Cloud Architect. Click here
Steps to Deploy Application on GKE Cluster
Now that we have a brief idea about Google Kubernetes Engine and deployment terms, let’s deploy an application on GKE Cluster.
Pre-Requisite
Before we begin, here are some prerequisites for the lab:
1.) It is assumed here that you have a working Google Cloud account, with access to Google Console. In case you don’t already have that, please follow the steps from our blog on Google Cloud Free Account to create your Google Cloud account.
2.) Once you have an account, you need to ensure that the Kubernetes Engine API is enabled on the Cloud Console, and Cloud Shell is activated. You can learn more about the console in our blog on Google Cloud Platform Console Walkthrough.
To enable Kubernetes Engine API and Cloud Shell, follow these steps:
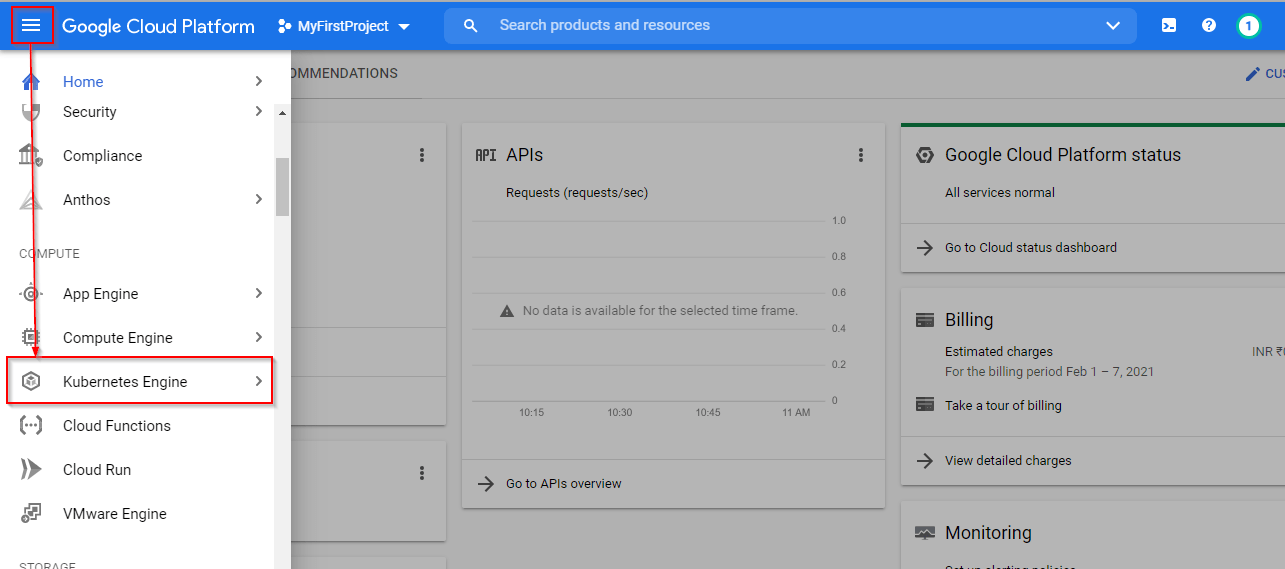
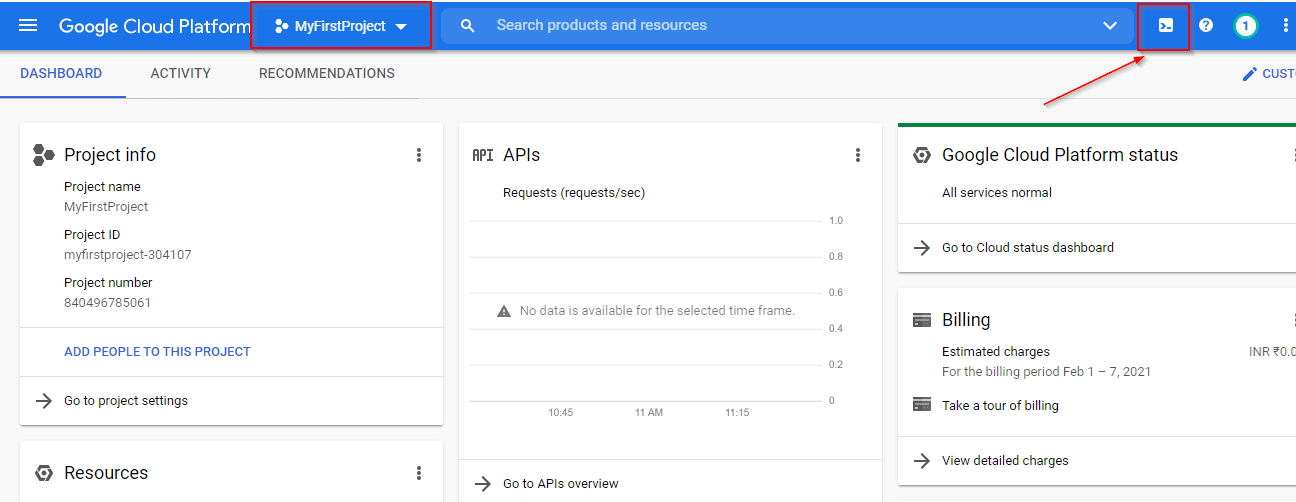
- Navigate to the Google Cloud Console homepage and sign in using your credentials.
- In the menu on the left, select Kubernetes Engine. Click on the enable button.

- To activate Cloud Shell, press on the icon right next to the search bar at the top. This is where all commands will be entered.
Check Out: Google Cloud Functions Pricing. Click here
Steps
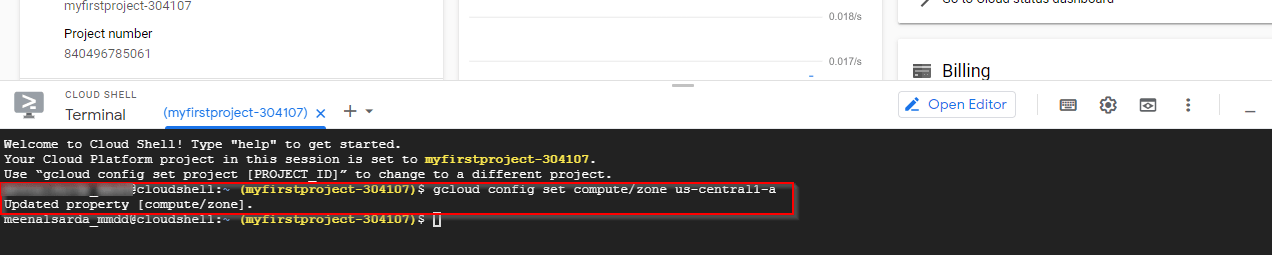
1.) Select a Default Compute Zone
The Compute Zone helps set a ballpark as to where the physical location of the clusters and resources will be.
To set your default compute zone, run the following command in the cloud shell:
gcloud config set compute/zone us-central1-a
Note: If you wish, you can change us-central1-a to a zone of your choice.
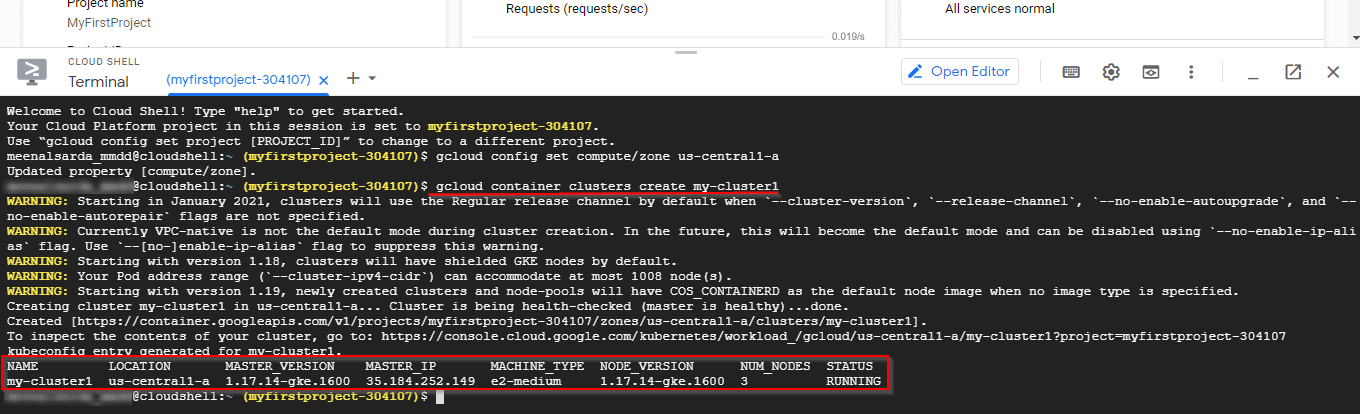
2.) Create a Cluster
Create a Cluster by executing the following command:
gcloud container clusters create [CLUSTER-NAME]
Note: Replace [CLUSTER-NAME] with a unique name of your choice.
3.) Authenticating the Cluster
To interact with your cluster, it is imperative that you get the authentication credentials for the same.
To authenticate the cluster, run the following command:
gcloud container clusters get-credentials [CLUSTER-NAME]
Note: Replace [CLUSTER-NAME] with the name of your cluster.

4.) Deploy an Application to the GKE Cluster
As somewhat of a test run, we’ll go ahead and deploy the hello-app application in the newly created cluster.
- The first step for that is to create a server. To do that, run the following command
kubectl create deployment hello-server –image=gcr.io/google-samples/hello-app:1.0

- Next, you need to specify which service to use, to make your application visible to others. To do that, create a Kubernetes service by running this command
kubectl expose deployment hello-server –type=LoadBalancer –port 8080

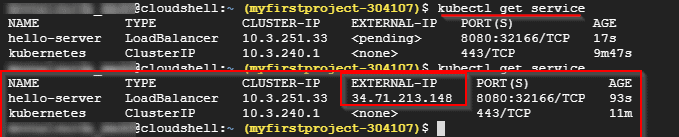
- Now you need to inspect our server to find out our external IP. For that, use the following command
kubectl get service

- Finally, to view the application from your browser, use the following command
https://[EXTERNAL-IP]:8080
Be sure to replace [EXTERNAL-IP] with the IP gotten in the previous step


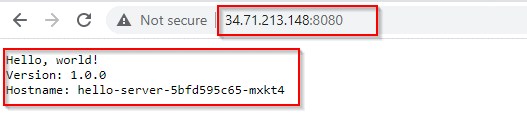
There you go! You have deployed your first containerized application to the GKE cluster.
Check Out: What is Google Cloud Run? Click here
Conclusion
This was a small guide describing the steps to deploy an application to a GKE Cluster It goes without saying, that one can also deploy more complex applications using the same method. In addition to that, clusters provide an efficient way to manage multiple applications deployed on the cloud and access them as per the user’s need.
Cluster Computing gets a number of Virtual Machines to work together and solve a task. They manage multiple nodes (which contain applications) and assign tasks to them, which facilitates the smooth functioning of the deployed application.
FAQs
What's the difference between a container and a cluster?
A container contains an application and runs in a pod. A group of such pods together constitute a cluster.
Is deploying applications on a cluster free of cost?
The Google Cloud Free-Tier account allows for one free zonal cluster per account. In case you need more, it shall be provided on a pay-per-use basis.
Who all can view the application deployed on the cluster?
The permissions for the specific applications can be set at the time of deployment and changed thereafter from settings.
Related References
- GCP Professional Cloud Architect: Everything You Need To Know
- Introduction To Google Cloud Platform
- Google Cloud Services & Tools
Next Task For You
If you are also interested and want to know more about the Google Professional Cloud Architect certification then register for our Free Class.


Leave a Reply