![]()
Kubernetes is a popular container orchestration tool that is known for how flexible it is and how many different things it can do. The idea of “namespaces” is one of its most important parts, but it is often overshadowed by the platform’s other, flashier parts. But if you want to master Kubernetes, you must know how namespaces work. In this detailed guide, we’ll go through all the details of Kubernetes namespaces.
In this blog, we will be discussing the Kubernetes namespace.
We will learn:
- What is a Kubernetes Namespace?
- Default namespace in Kubernetes
- Why use Kubernetes namespaces?
- When to use multiple Kubernetes namespaces?
- How pods communicate across different namespaces?
- Working with Kubernetes Namespaces
- Conclusion
What is a Kubernetes Namespace?
Namespaces are a way to separate groups of resources within a single Kubernetes cluster. The names of resources must be different within a namespace, but they can be the same between namespaces. But this namespace-specific scoping only works for objects in the same namespace, like Deployments and Services. It doesn’t work for entities that affect the whole cluster, like StorageClass, Nodes, and PersistentVolumes.
When many teams or projects share a Kubernetes cluster, namespaces provide a means to divide clusters into virtual sub-clusters. A cluster can support any number of namespaces, each of which can interact with the others despite being logically isolated from the others. A namespace cannot be nested inside of another namespace.
Any resource in Kubernetes may be found in either the default namespace or a namespace that the cluster operator defines. Only nodes and persistent storage volumes exist outside of the namespace; each namespace in the cluster has constant access to these low-level resources.
Default namespace in Kubernetes
Kubernetes begins with four namespaces:
- default: The namespace for objects that have no other namespace.
- kube-system: The namespace for Kubernetes-created objects.
- kube-public: This namespace is generated automatically and can be accessed by all users (including those not authenticated). This namespace is mostly reserved for cluster use, in case some resources need to be publicly visible and readable across the entire cluster. This namespace’s public aspect is merely a convention, not a requirement.
- kube-node-lease: This namespace contains Lease objects for each node. Node leases enable the kubelet to send heartbeats to the control plane, allowing it to detect node failure.
Why use Kubernetes namespaces?
Kubernetes namespaces have numerous applications, including:
- Allowing teams or projects to existing in their own virtual clusters without interfering with the work of others.
- Role-based access controls (RBAC) are being improved by restricting users and processes to specific namespaces.
- Using resource quotas, you can divide a cluster’s resources among multiple teams and users.
- Provides a simple method for separating containerized application development, testing, and deployment, allowing the entire lifecycle to take place on the same cluster.
When to use multiple Kubernetes namespaces?
Namespaces are designed to be used in environments with a large number of users spread across multiple teams or projects. Namespaces should not be created or considered for clusters with a few to tens of users. When you need the features that namespaces provide, start using them.
Namespaces define the scope of names. Resource names must be unique within a namespace but not across namespaces. Namespaces cannot be nested within each other, and each Kubernetes resource can only exist in one namespace.
Namespaces are a method of allocating cluster resources to multiple users (via resource quota).
It is not necessary to use multiple namespaces to distinguish slightly different resources, such as different versions of the same software: instead, use labels for different resources within the same namespace.
Nonetheless, having numerous namespaces has a number of advantageous advantages, such as:
- Isolation: Namespaces can be used by large or expanding teams to keep their projects and microservices apart from one another. Teams are free to reuse the same resource names across many workspaces. Moreover, actions taken on items in one workspace never have an impact on those in another.
- Organization: Namespaces can be used to sandbox development and test environments for organizations that use a single cluster for development, testing, and production. This makes sure that during the application lifecycle, changes made by developers or testers in their own namespaces won’t have an impact on production code.
- Permissions: Namespaces make Kubernetes RBAC possible, allowing teams to design roles that compile lists of permissions or skills under a single name. This can guarantee that only people who are permitted can access the resources in a specific namespace.
- Resource Control: Policy-driven resource quotas for CPU or memory usage can be used to create resource limits on namespaces. This can make sure that no namespace is using up all of the resources available and that each project or namespace has what it needs to function.
- Performance: Utilizing namespaces can help a cluster’s performance. When conducting actions, the Kubernetes API will have less objects to search if a cluster is divided into numerous namespaces for various projects. As a result, any application operating on the cluster will perform better overall and with less latency.
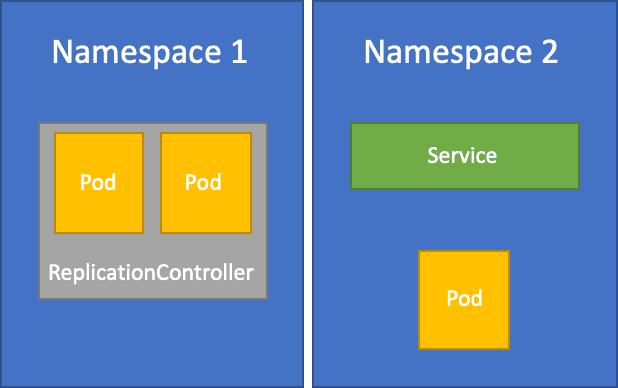
Image source: AWS
How pods communicate across different namespaces?
Although namespaces are distinct, they can easily communicate with one another. Using the expanded form of DNS addressing, the Kubernetes DNS service directory can easily locate any service by its name:
..svc.cluster.local
Access to services in any namespace on the cluster is provided by simply appending the namespace name to the service name. To access the payroll service in the development namespace, for example, use the address payroll.development.
To get to the payroll service in the production namespace, type payroll.production.
It should be noted that network policies can be used to control access between namespaces. A network policy, for example, can allow or deny all traffic from other namespaces. Network policies only apply to connections and are not intended to replace firewalls that perform packet inspection.
Let’s see Working with Kubernetes Namespaces –
How to Set Default Kubernetes Namespace:
To change the current namespace, use the following command, replacing <insert-namespace-name-here> with the name of the desired namespace:
kubectl config set-context --current --namespace=<insert-namespace-name-here>
To verify the change, view the current namespace with this command:
kubectl config view --minify | grep namespace
To reset the namespace to the default setting, use this command:
kubectl config set-context --current --namespace=default
How to Create a new Kubernetes namespace Using the kubectl Command?
Namespaces are easily created with the command:
$ kubectl create namespace <name>
A YAML file, like any other Kubernetes resource, can be created and used to create a namespace:
my-namespace.yaml:
apiVersion: v1
kind: Namespace
metadata:
  name: <insert-namespace-name-here>
Then run:
$ kubectl create -f my-namespace.yaml
The command to display all namespaces in the cluster is:
$ kubectl get namespace
How to Switch Namespaces in Kubernetes Using kubectl Command?
When addressing namespaces, actions must include the “-namepsace=” option in the command. Because this can be time-consuming, the default namespace can be modified by using the kubectl config command to set the namespace in the cluster context.
To switch from the default namespace to ‘K21,’ for example, type:
$ kubectl config set-context --current --namespace=K21.
This will make ‘K21’ the default namespace for all future kubectl commands.
How to rename a Kubernetes namespace?
Renaming a Kubernetes namespace is not recommended, so choose namespaces (other than the default) with caution.
How to delete a Kubernetes namespace?
Delete a namespace with the below command:
$ kubectl delete namespaces <name>
Because deletion is an asynchronous activity, the namespace will appear as ‘terminating’ until it is deleted.
Warning⚠️: The deletion of a namespace is the final act. Everything in the namespace will be deleted, including all services, running pods, and artifacts. Garbage collection will be performed on anything that previously existed in that namespace. Before performing this action, ensure that everything in the namespace has been deleted.
Conclusion
Namespaces in Kubernetes are crucial objects for dividing and managing Kubernetes clusters. Namespaces in Kubernetes enable us to logically separate and assign resources to individual users, teams, or applications. Kubernetes Namespaces are the fundamental building blocks for allocating resources, controlling access, and isolating applications, users, or groups of users. You can increase resource efficiencies by using Kubernetes Namespaces, as a single Kubernetes cluster can now be used for a diverse set of workloads.
Related/References
- Visit our YouTube channel “K21Academy”
- Certified Kubernetes Administrator (CKA) Certification Exam
- (CKA) Certification: Step By Step Activity Guides/Hands-On Lab Exercise & Learning Path
- Certified Kubernetes Application Developer (CKAD) Certification Exam
- (CKAD) Certification: Step By Step Activity Guides/Hands-On Lab Exercise & Learning Path
- Create AKS Cluster: A Complete Step-by-Step Guide
- Container (Docker) vs Virtual Machines (VM): What Is The Difference?
- How To Setup A Three Node Kubernetes Cluster For CKA: Step By Step
Join FREE Masterclass
Discover the Power of Kubernetes, Docker & DevOps – Join Our Free Masterclass. Unlock the secrets of Kubernetes, Docker, and DevOps in our exclusive, no-cost masterclass. Take the first step towards building highly sought-after skills and securing lucrative job opportunities. Click on the below image to Register Our FREE Masterclass Now!


There is a typo. Command “kubectl config set-context –current –namespace=K2” should be
“kubectl config set-context –current –namespace=K2”
Thank you so much for highlighting this. We have updated the blog.
Thanks & regards
Sahid
Team K21