![]()
Ansible is considered one of the best configuration management and automation tool. One of the most important components of Ansible is Ansible Roles. This blog will cover a brief explanation of Ansible Roles and how you can create them on your system with the following topics covered.
- Overview of Ansible
- What are Ansible Roles
- Install and Configure Ansible
- Create Ansible Roles
- Execute Ansible Roles
- Managing Ansible Roles
- Best Practices for Ansible Roles
- Conclusion
- FAQs
Overview of Ansible
Ansible is an open-source IT automation engine. It helps in application deployment automation, configuration management, service orchestration, and cloud provisioning. Ansible is designed for a multi-tier environment that models IT infrastructure. Ansible uses playbooks in the YAML language to describe automation jobs. YAML language is easier to understand by both humans and computers. Ansible works by pushing out small programs called Modules by connecting to your nodes.
What are Ansible Roles
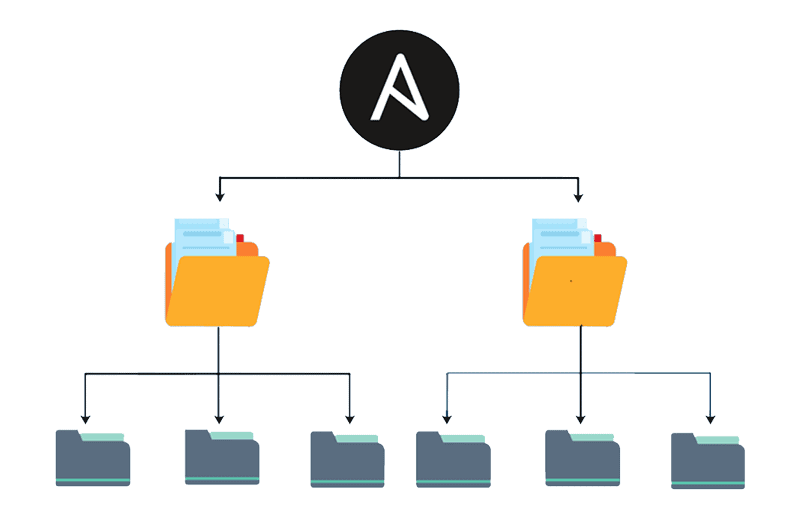
You might be familiar with the Ansible playbook. These are a complete collection of tasks containing configuration and deployment instructions. But Ansible Role is much simpler than that. All the tasks of the Ansible playbook are divided into different modules called Ansible Roles. Roles provide a framework for independent and interdependent collections of variables, tasks, modules, and templates.
Ansible Roles helps in modulation, and for a developer, it’s much easier to manage these roles. Ansible roles are reused multiple times within a playbook, and without a need to update the complete playbook, a developer can only update the specific Ansible Roles.
Check Out: What is Ansible?
Install and Configure Ansible
Since the Ansible Control node cannot be a Windows machine, we will use Linux (Ubuntu) for running Ansible. I have used the AWS EC2 instance to run Ubuntu, but you can also run it on your Ubuntu systems. I will assume that you have already created an Ubuntu EC2 instance on AWS. Now start your Ubuntu instance and follow the steps for Ansible install and configuration. If you are running Ubuntu on your own system, then open the Terminal for installing Ansible. You can skip the below steps if you already have Ansible on your system.
Step 1) First, we will prepare our Ubuntu System for Ansible installation. Run the below command one by one for updating your system and making it ready for installation.
$ sudo apt-get update
$ sudo apt-get install software-properties-common
$ sudo apt-add-repository ppa:ansible/ansible
Step 2) Now, you are ready to install Ansible on your system. Run the below commands one by one.
$ sudo apt-get update
$ sudo apt-get install ansible
It will take few minutes to complete the installation of Ansible. After completing the above steps, Ansible is installed on your Ubuntu system.
Also Read: Our blog post on Ansible Tutorial.
Create Ansible Roles
After installing Ansible on your Ubuntu system, you are ready to create Ansible Roles. Now, see the below steps to create it in your system.
Step 1) Create an Ansible role by running the below command. You can set the location of the role based on your need. I have created the Ansible role with the name ‘roledemo’ located under the ‘etc/ansible/roles/‘ directory.
$ ansible-galaxy init etc/ansible/roles/roledemo --offline

After running the command, you will see a simar result as shown in the above image.
Step 2) To check and list down the files present in a directory, you can install the tree tool in your system. Run the first command to install the tree tool, then run the second to check the tree for your roles.
$ sudo apt install tree # version 1.8.0-1
$ tree etc/ansible/roles/roledemo
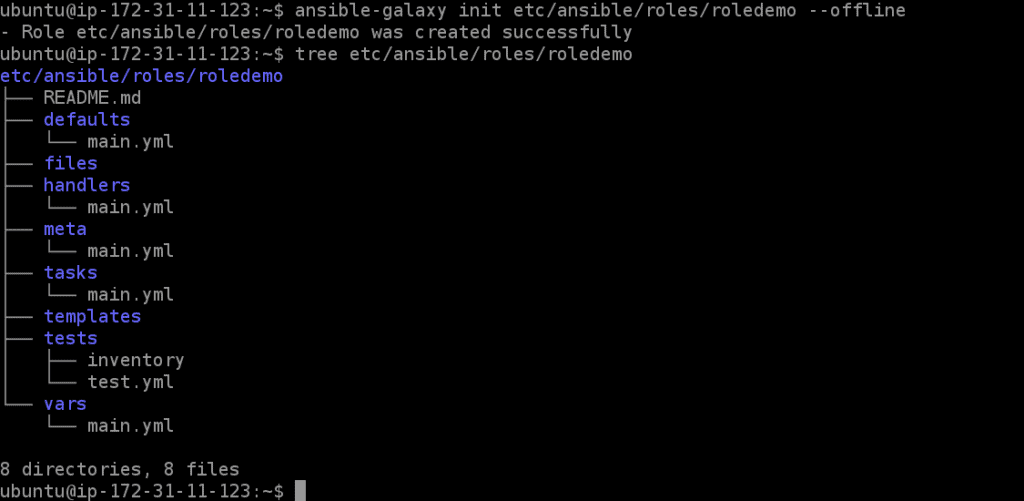
You can check the result in the above image after running the tree command. All the directories and files are listed under your newly created Ansible role.
Configure Ansible Roles
For the demo, I will be using a sample playbook divided into different roles: install, configure, and service YAML files. But you can use your own Ansible playbook too.
Step 1) Visit the tasks folder under your newly created roles by using the cd command as shown below. You can also list the files present here in this directory by running the ll command.
$ cd etc/ansible/roles/roledemo/tasks/
Step 2) After visiting the tasks folder of your ansible role, you need to edit the main.yml file. Run the vi or vim command to create or edit this file, as shown in the image below.
$ vim main.yml
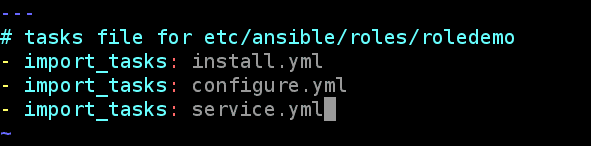
After running the above command, an editor will be shown in front of your screen with some space to fill your content. To fill content in this file, press key A and use arrow buttons to take your cursor wherever you want. After you are done with the update, press the Esc key, then type :wq and finally press Enter to save your file. I have imported three tasks in the main.yml file that I will create in the next step.
Step 3) Now, I will create some other YAML files inside the same tasks folder. To create new YAML files, run the below vi commands one by one and fill the tasks in each file.
$ vi install.yml
$ vi cofigure.yml
$ vi service.yml
---
#tasks for install.yml file
- name: Install httpd Package
  yum: name=httpd state=latest
---
#tasks for configure.yml file
- name: Copy httpd configuration file
copy: src=files/httpd.original dest=/etc/httpd/conf/httpd.conf
- name: Copy index.html file
copy: src=files/index.html dest==/var/www/html
notify:
- restart roledemo
---
#tasks for service.yml file
- name: Start and Enable httpd service
service: name=httpd state=restarted enabled=yes
I have filled some demo tasks in the above 3 YAML task files. After filling the content in each YAML file, save it using the same steps mentioned in the previous step.
Step 4) As mentioned in the notifying section of the configure.yml file, we also need to update the main.yml file of handlers to restart the service when there is a change.
$ cd..
$ vi handlers/main.yml
---
# handlers file for etc/ansible/roles/roledemo
- name: restart roledemo
  service: name=httpd state=restarted
Step 5) The above-created role’s task is to copy some files from the sources to the destination mentioned in the configure.yml file. Visit the directory with name files using the command given below.
$ cd
$ cd etc/ansible/roles/roledemo/files/
$ vi httpd.original
$ vi index.html
Fill content in the above files and save it. Inside the index.html file, you can fill in any message or layout.
Step 6) Now, we have successfully created a simple Ansible role. To check all the files and directories, we have created till now. Rerun the tree command.
$ cd
$ tree etc/ansible/roles/roledemo
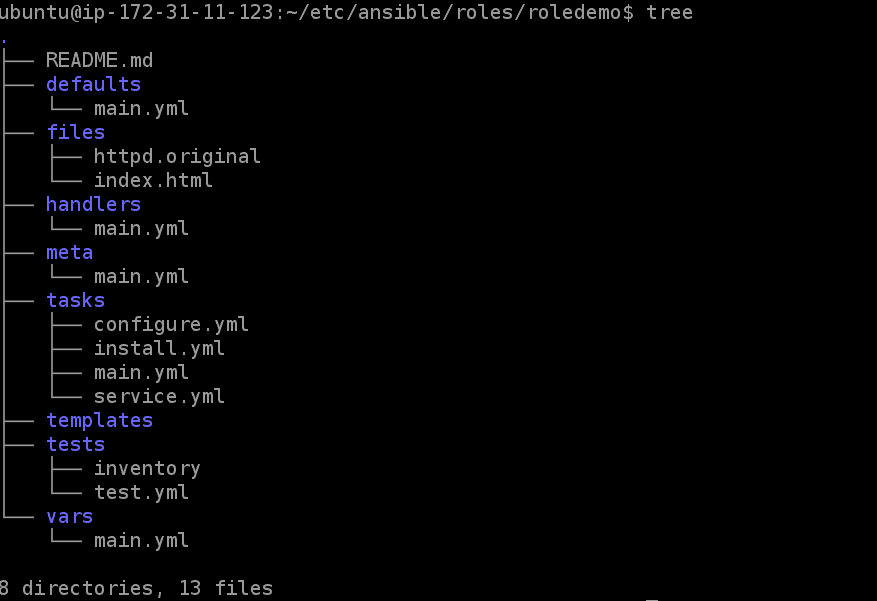
This is the final tree of the directories and files in our Ansible role.
Execute Ansible Roles
After creating the role, we need to create a playbook YAML file to run. Follow the steps below for testing our Ansible role.
Step 1) Visit the ansible directory and run the below commands to create a playbook YAML file with any name.
$ cd
$ cd etc/ansible/
$ vi setup.yml
---
# setup.yml as a ansible playbook
- hosts: localhost
  roles:
 - roledemo
Enter your hostname here and mention the role name to execute in the setup.yml file.
Step 2) To check if there is an error in your playbook file, you can run the below command. If there are no errors in your playbook and ansible roles, you can run your playbook.
$ ansible-playbook setup.yml --syntax-check
$ ansible-playbook setup.yml
After using the above commands, your ansible tasks are executed one by one, and all the execution updates are shown on your screen.
Step 3) To check the result of the index.html file, you can run the below command.
$ elinks http://localhost
Here, localhost is my default hostname. After completing all the steps, Ansible Role with some simple execution tasks is created successfully.
Conclusion
Ansible is one of the best tools for configuration management and deployment. Ansible roles act as multiple modules for a single Ansible playbook. This blog has given you a brief explanation of Ansible and Ansible Roles. Also, a step-by-step tutorial for installing Ansible on your system and creating Ansible Roles by yourself.
FAQs (Frequently Asked Questions)
What are Ansible roles?
Ansible roles are a way of organizing and encapsulating Ansible tasks, allowing users to modularize their automation workflows.
How do I create an Ansible role?
To create an Ansible role, set up the directory structure and define the tasks, handlers, variables, and templates required for the role.
What is Ansible Galaxy?
Ansible Galaxy is a repository for sharing Ansible roles, making it easy to find and install pre-written roles for various automation tasks.
How can I ensure the reliability of Ansible roles?
Implement testing frameworks such as Ansible Molecule to test roles across different environments and ensure their reliability.
Why are Ansible roles important in infrastructure management?
Ansible roles promote code reusability, maintainability, and scalability in infrastructure management, making automation workflows more efficient and manageable.
References
- Ansible for Beginners | Overview
- Ansible Provisioning: Provision the Environment to Deploy a Website
- [AZ-400] Roles And Responsibilities As An Azure DevOps Engineer
- [AZ-400] Microsoft Azure DevOps Certification Exam: Everything You Need To Know
Next Task For You
If you are considering in-depth learning about Ansible in the coming days, then do join our WAITLIST and don’t miss an opportunity to attend a free class and gain a plethora of insights on the basics of Ansible.


Leave a Reply