![]()
This post covers the Steps for Recovering the SSH Keys in Compute Instance Oracle Cloud Infrastructure (OCI).
To know more about Compute in Oracle Cloud Infrastructure, please check our previous post on [Video] Oracle Cloud Infrastructure (OCI) | Compute CPU & Memory
Note: An SSH key pair comprises of a private key and public key. You keep the private key on your computer and provide the public key every time you launch an instance.
Typical Scenarios When you need to recover your SSH Keys
- If you get a “Permission denied (publickey,gssapi-keyex,gssapi-with-mic)” error when trying to connect your instance via putty in windows or terminal in Linux.
- Imagine you are trying to connect into your Oracle Cloud Infrastructure instance but either you forgot which key you used or, for some unknown reason, your OPC user SSH key got corrupted or deleted.
Process to Follow
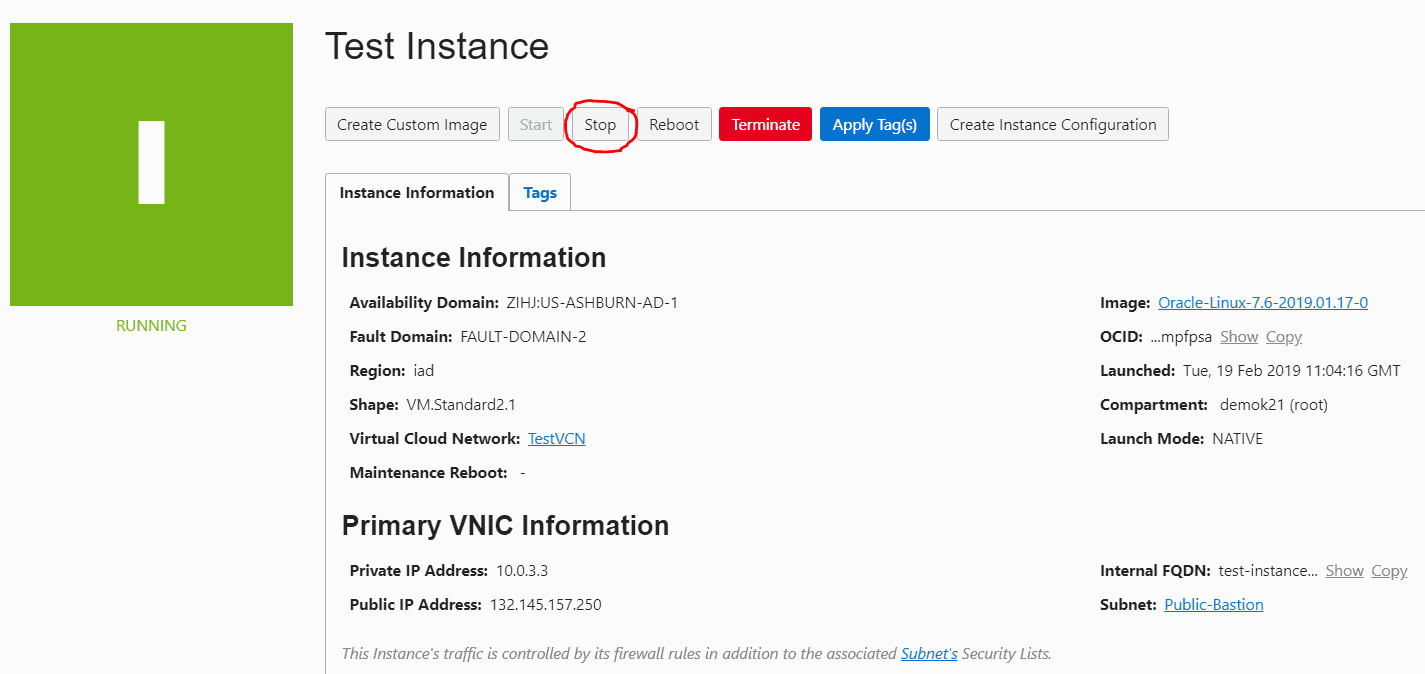
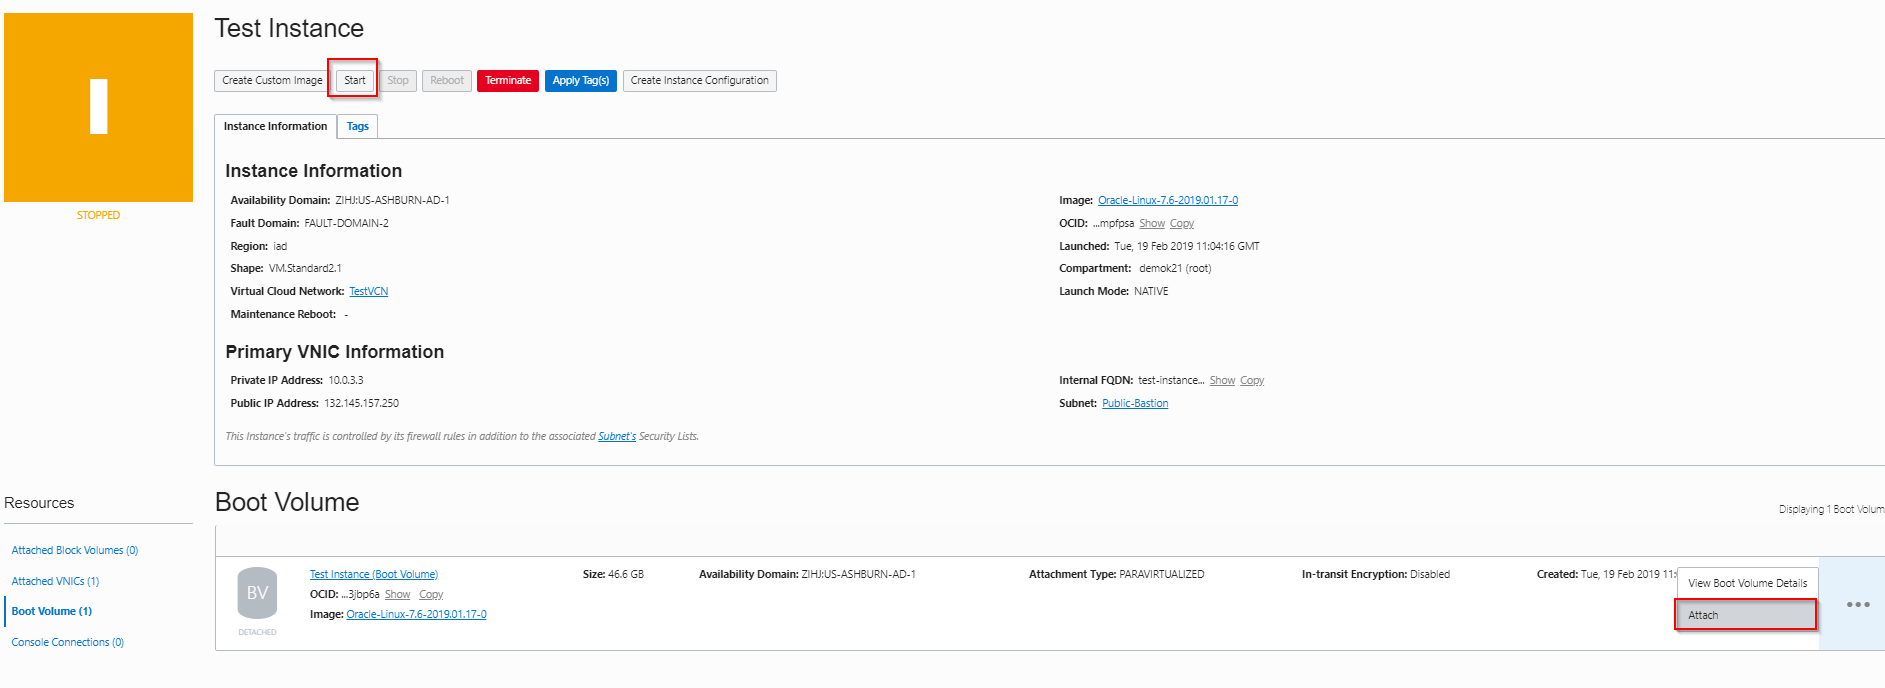
Step 1: Stop the compute instance for you are to recover your ssh keys. In the Oracle Cloud Infrastructure Console, go to the details page for the instance and click Stop.
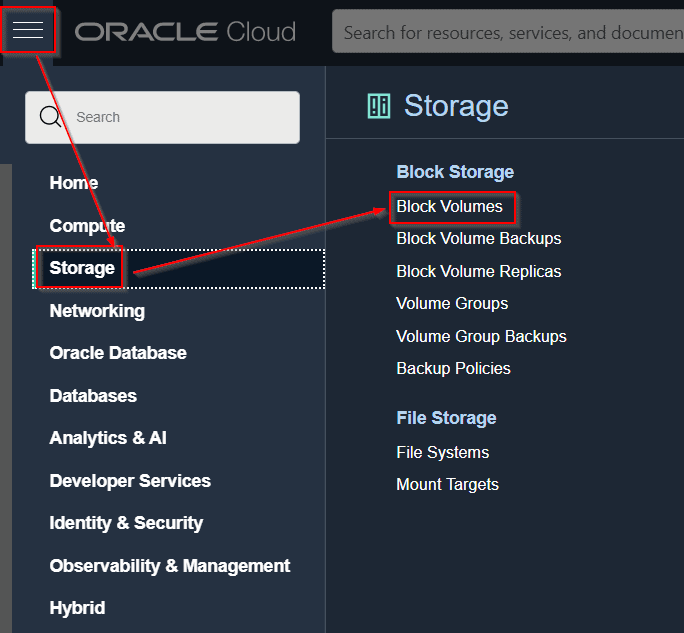
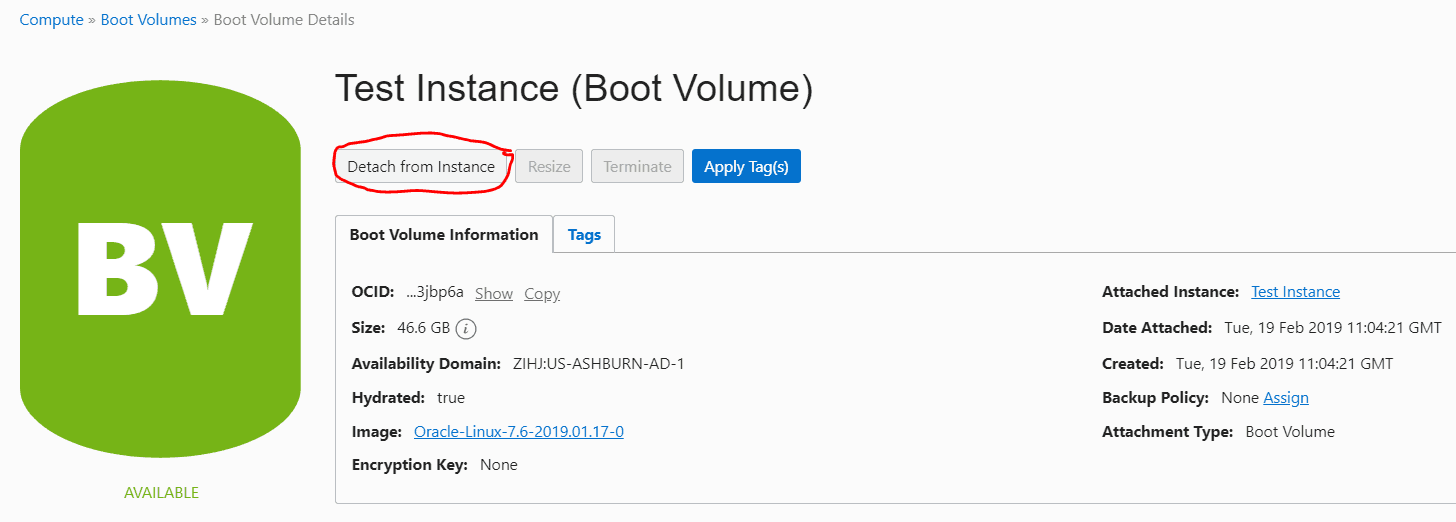
Step 2: Detach the boot volume. In the Boot Volume section, click the Actions icon and choose Detach.
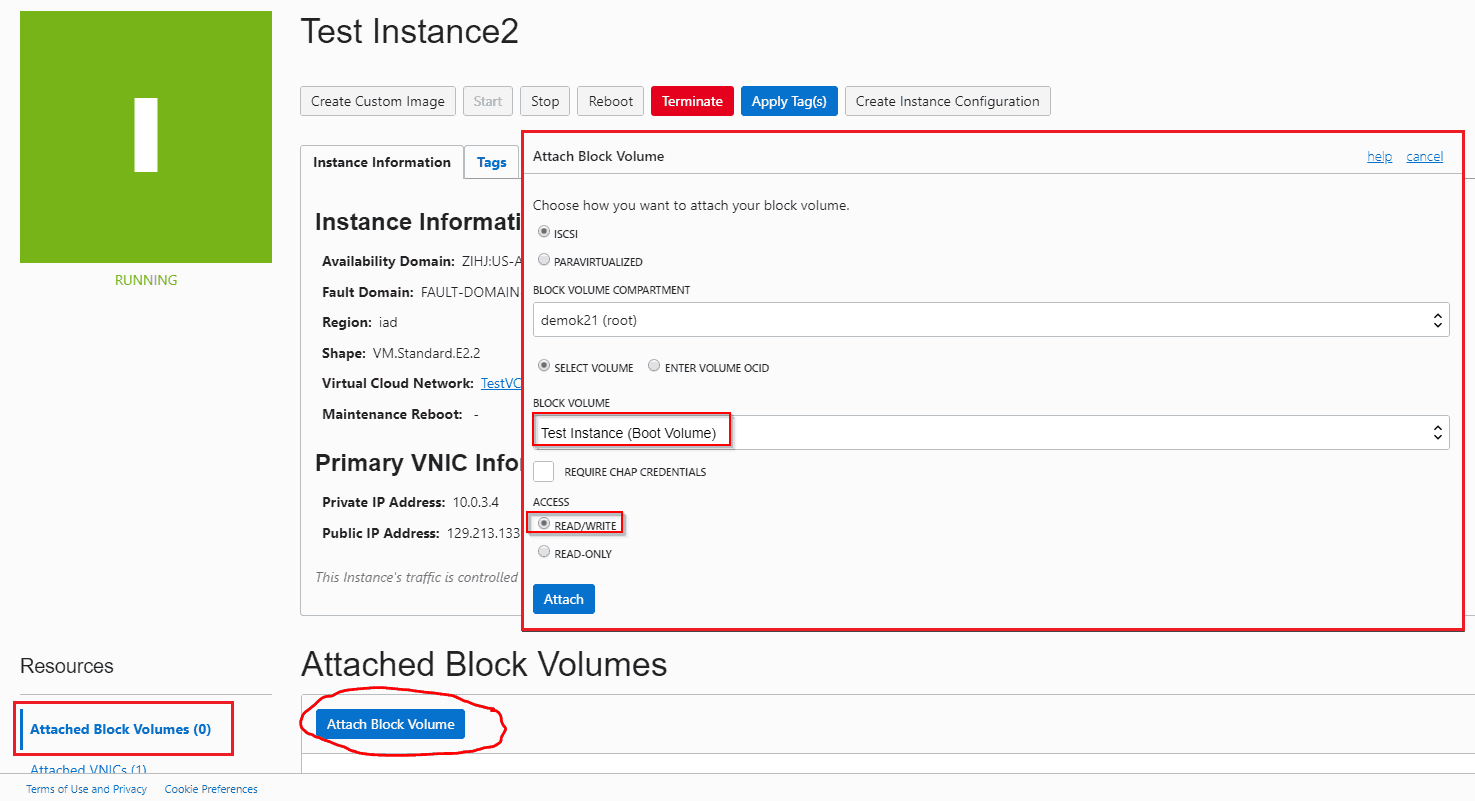
Step 3: Attach the boot volume to another Linux instance by going to the details page of a different VM, clicking Attach Block Volume, and then selecting the boot volume that you just detached in the previous step. Be sure to select Read/Write access.
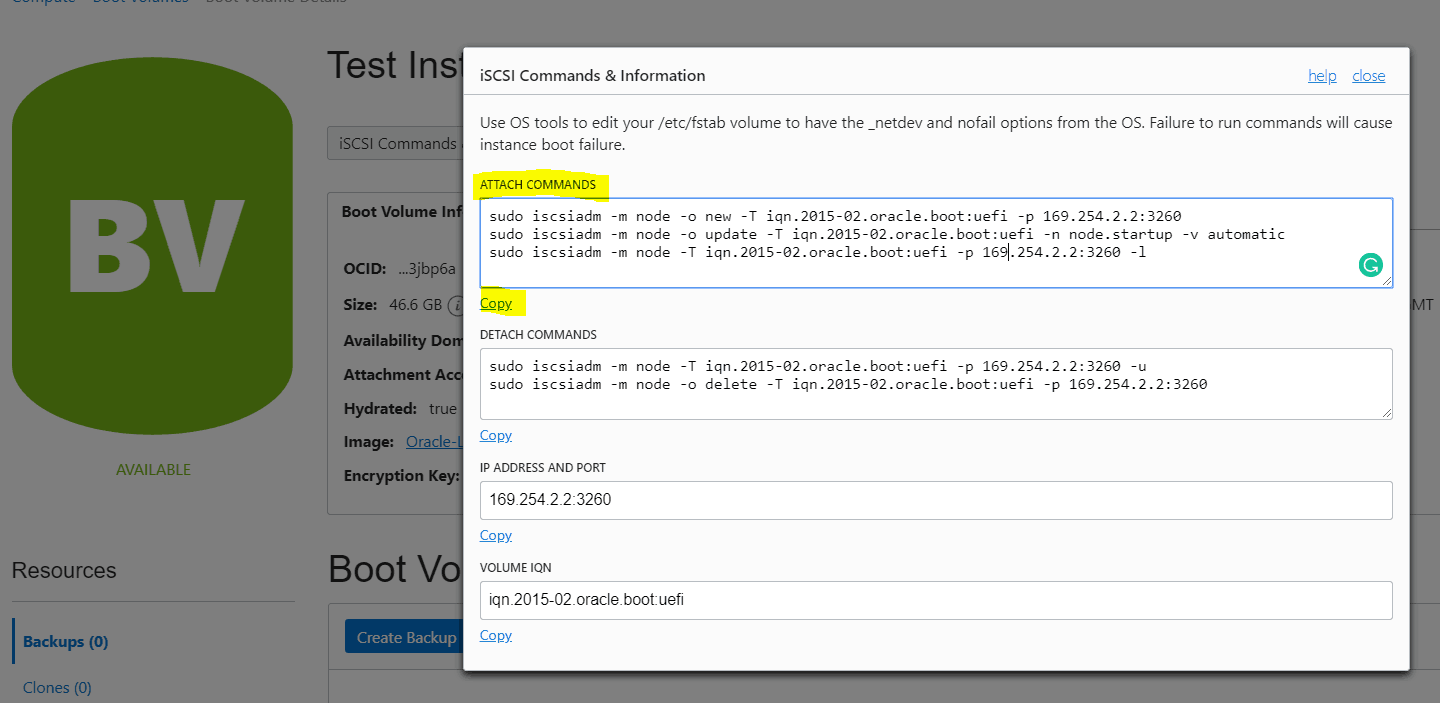
Step 4: After the boot volume attachment is completed (the BV icon is green), connect through SSH in the running VM and run the iSCSI commands to make that new disk available and visible by the OS.
Your boot-volume should appear as /dev/sdb.
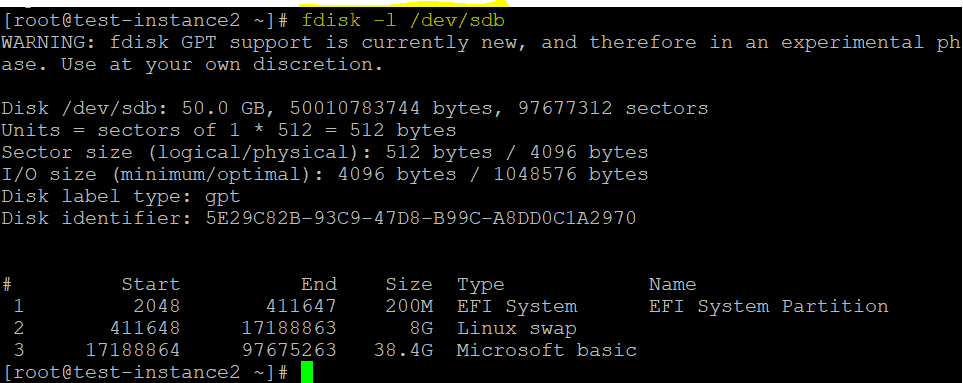
- Make /dev/sdb3, which is the root (/) partition where you can recover the OPC SSH key file, available to the local operating system using “mount” command. Be sure to use the -o nouuid option; otherwise, you will see the “mount: wrong fs type, bad option, bad superblock on /dev/sdb3” error message.
$ sudo mount -o nouuid /dev/sdb3 /mnt
- Fix the OPC SSH key by editing the /mnt/home/opc/.ssh/authorized_keys file and adding your SSH key public file.
$ sudo vi /mnt/home/opc/.ssh/authorized_keys
- After you add or change the SSH public key you need to use, save and exit it.
- Run umount /mnt.
$ sudo umount /mnt
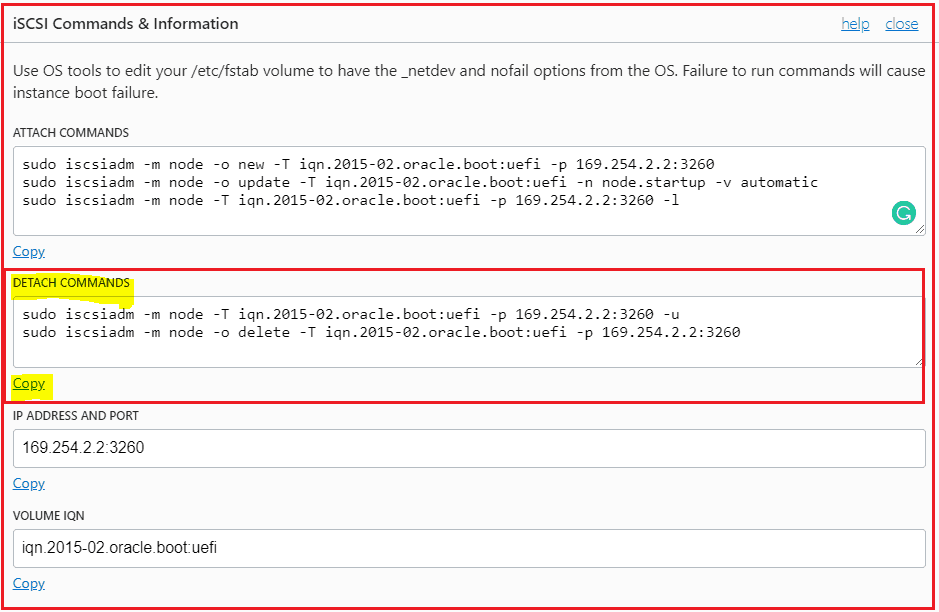
Step 5: Detach the iSCSI boot volume by running detach iSCSI commands.
Step 6: Ensure that the /dev/sdb disk is no longer available or visible through the SSH connection and then detach it.

Step 7: Reattach the boot volume to the instance where you wanted to recover the SSH key, wait for it to become operational (green icon) and start it.
That’s it. You recovered your OPC user SSH key and you can now able to connect to your compute instance for which you are recovering your ssh keys.
Now, it is your turn to try this Solution & If you face any issues then post your doubts in the comment section!
Related/Further Readings
- OCI for DBAs & Apps DBAs: Oracle Cloud Infrastructure (OCI) Why Should You Learn & In What Order
- Oracle Cloud Infrastructure (OCI) Architect Live Training
- Register for Oracle Cloud Trial Account
Begin Your Cloud Journey
Begin your journey towards becoming a Certified Oracle Cloud Infrastructure Architect and earning a lot more in 2022 by joining our FREE CLASS. You will also know more about the Roles and Responsibilities, Job opportunities for OCI Architects in the market, and what to study Including Hands-On labs you must perform to clear the Oracle Cloud Architect Associate Certification (OCI) certification exam by registering for our FREE Masterclass.
Click on the below image to Register Our FREE Class on Master Oracle Cloud (OCI) and Get a Higher Paying Job!


Very nicely written.
Hi Zaheer,
Glad you liked the post, stay tuned for more informative blogs
Regards,
Surbhi
Team k21
Thanks you so much!! You saved me!
Just a small contribution, the recover machine should be at the same AD from the that you want to get back the control.
But again, many thanks!
Hi Rafael,
We are Glad you liked the post, stay tuned for more informative blogs.
Regards,
Rahul Dangayach
Team K21 Academy
Hi Surbhi,
First of all, Very well explained document and it was easy to follow all steps.
However I am still facing access issue even after updating /mnt/home/opc/.ssh/authorized_keys with new public keys.
Any idea what I might be missing ?
Thanks, very smart and informative – I however didn’t manage to solve my lost keys…
Still get:
ubuntu@130……: Permission denied (publickey).
I’ve changed the keys both /mnt/home/ubuntu/.ssh/authorized_keys and /mnt/home/opc/.ssh/authorized_keys
Thanks you so much!! You saved me!
Hi Bruno,
We are Glad you liked the post, stay tuned for more informative blogs.
Regards,
Rahul Dangayach
Team K21 Academy
please help me how do I get the iScsi commands & information
Hi Linda,
To get iSCSI commands and information, you need to use the iscsiadm command-line tool to configure the iSCSI connection.
Once you attach a volume to an instance, you can access the iSCSI information by clicking the “iSCSI Commands and Information” button next to the volume in the Oracle Cloud Infrastructure console. The iSCSI information includes the volume’s IP address and port, which you need to know later in the procedure.
You can copy the commands and paste them into your instance session window for each of the following – Log in to the instance’s guest OS.
Additionally, there are several iSCSI commands available, such as Get-IscsiConnection and Get-IscsiSession, which can be used to retrieve information about connected iSCSI initiator connections and established iSCSI sessions
Regards,
Rahul Dangayach
Team K21 Academy